Exploded View
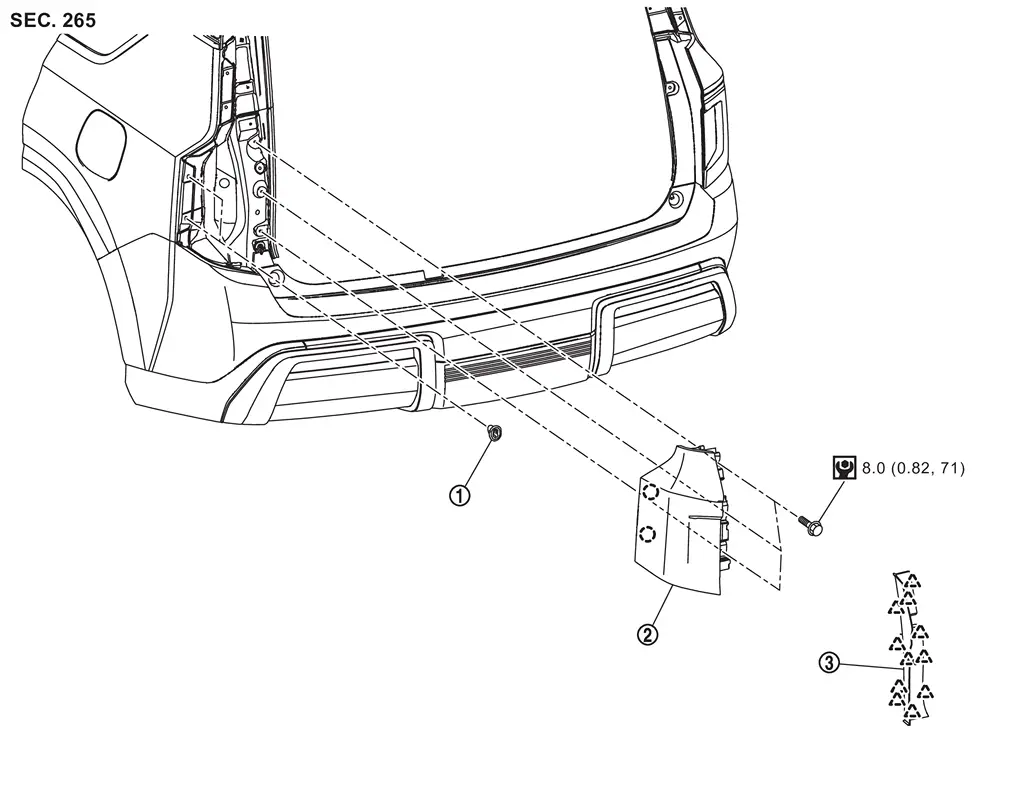
 |
Grommet |  |
Rear combination lamp |  |
Rear combination lamp cover |
 |
: Clip | ||||
 |
: Pawl | ||||
 |
: N·m (kg-m, in-lb) | ||||
Removal and Installation
CAUTION:
Disconnect the battery negative terminal or remove power circuit fuse when performing the operation for preventing electric leakage. Refer to Precautions for Removing Battery Terminal.
REMOVAL
Fully open back door.
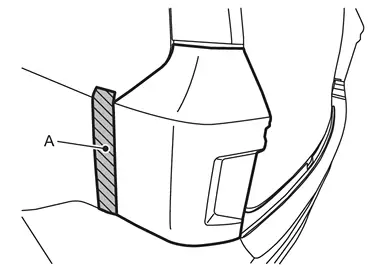
Apply protective tape (A) on the part to protect it from damage.
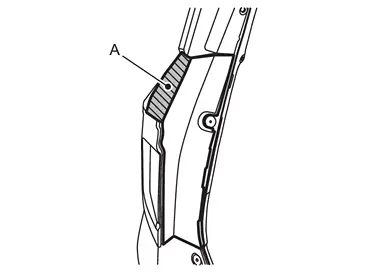
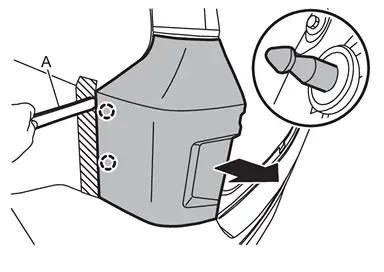
Disengage rear combination lamp cover fixing pawls using a remover tool (A), and then remove rear combination lamp cover.
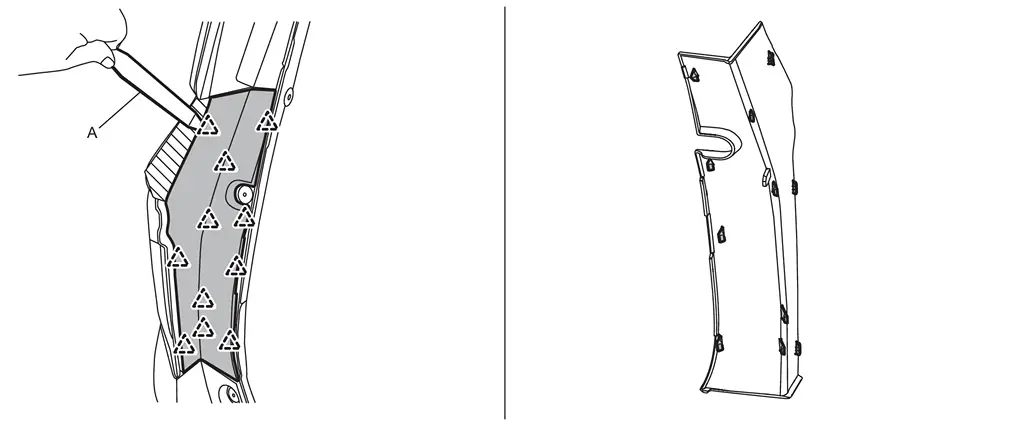
|
: Pawl |
Remove rear combination lamp mounting bolts  .
.
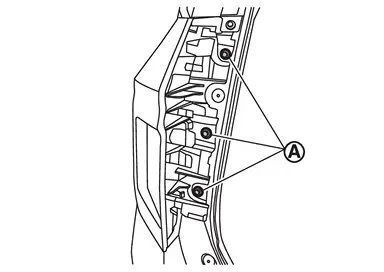
Apply protective tape (A) on the part to protect it from damage.
Disengage combination lamp fixing clips using a remover tool (A).
|
: Clip |
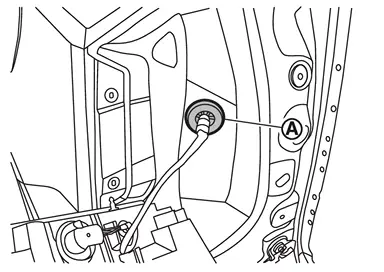
Remove grommet .
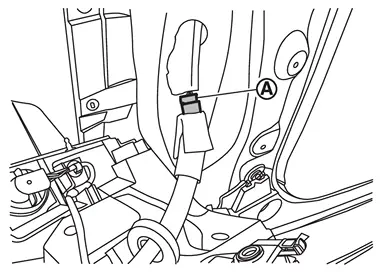
Disconnect rear combination lamp harness connector .
Remove rear combination lamp.
INSTALLATION
Note the following item, and then install in the reverse order of removal.
CAUTION:
Visually check clips for deformation and damage during installation. Replace with new ones if necessary.
Replacement
CAUTION:
Disconnect the battery negative terminal or remove power circuit fuse when performing the operation for preventing electric leakage. Refer to Precautions for Removing Battery Terminal.
TAIL LAMP/STOP LAMP
CAUTION:
Replacement of a single part is not possible due to the adoption of LED. For replacement, replace rear combination lamp as a set. Refer to Removal and Installation.
TAIL LAMP
CAUTION:
Replacement of a single part is not possible due to the adoption of LED. For replacement, replace rear combination lamp as a set. Refer to Removal and Installation.
STOP LAMP
CAUTION:
Replacement of a single part is not possible due to the adoption of LED. For replacement, replace rear combination lamp as a set. Refer to Removal and Installation.
REAR TURN SIGNAL LAMP
CAUTION:
Replacement of a single part is not possible due to the adoption of LED. For replacement, replace rear combination lamp as a set. Refer to Removal and Installation.
BACK-UP LAMP
CAUTION:
Replacement of a single part is not possible due to the adoption of LED. For replacement, replace rear combination lamp as a set. Refer to Removal and Installation.
REAR SIDE MARKER LAMP
CAUTION:
Replacement of a single part is not possible due to the adoption of LED. For replacement, replace rear combination lamp as a set. Refer to Removal and Installation.
Other materials
Wiper and washer switch
Basic information
WARNING
In the Nissan Armada, using the washer system in freezing temperatures may
cause the fluid to freeze on the windshield, significantly reducing visibility.
Always warm the glass using the defroster before activating the washer system to
ensure safe driving conditions ...
Driver Assistance/Navigation/Traffic Sign/Audio/TEL/SMS/Message for Driver Assistance
linking
In the Nissan Armada, the Head-Up Display (HUD) integrates multiple systems to
present critical driving information directly within the driver’s field of view,
enhancing safety and convenience.
The Driver Assistance interface in the Nissan Armada HUD provides real-time alerts
and warnings f ...
Engine Can Not Start
Description
Engine does not start when push-button ignition switch is pressed.SYMPTOM TABLE (BOTH INTELLIGENT KEYS HAVE THE SAME SYMPTOMS) Door lock operation (remote keyless entry) Door lock operation (request switch of front/rear door) or trunk/back door open operation (opener switch of trunk/bac ...