Exploded View
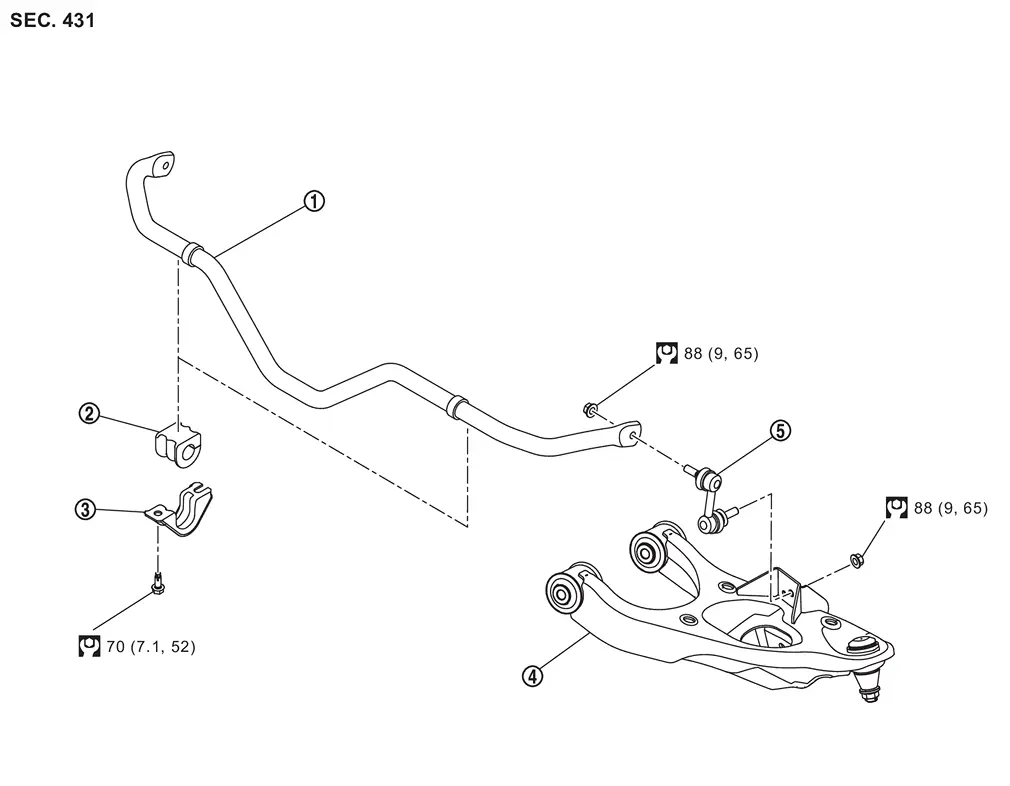
 |
Stabilizer bar |  |
Stabilizer bushing |  |
Stabilizer clamp |
 |
Front lower link |  |
Stabilizer connecting rod | ||
 |
: N·m (kg-m, ft-lb) |
Removal and Installation
WARNING:
-
Jacking up or lift up the vehicle may the vehicle height to go down which cause a personal injury and/or damage to the air suspension component parts. Refer to Precaution for when Jacking and Lifting Up the vehicle with Electronic Air Suspension System.
REMOVAL
Remove tires. Refer to ROAD WHEEL TIRE : Removal & Installation.
Remove stabilizer connecting rod mounting nuts.
Remove mounting bolts, and remove stabilizer bar assembly from vehicle.
Remove stabilizer connecting rods, stabilizer clamps, and stabilizer bushings from stabilizer bar.
Perform inspection after removal. Refer to Inspection.
INSTALLATION
Note the following, and install in the reverse order of removal.
-
Install stabilizer bushing that slit
 becomes vehicle front side ( ).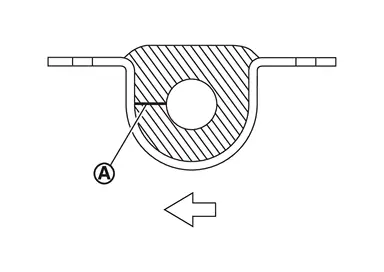
-
To installing the stabilizer connecting rod
, use a hexagonal wrench (A) to tighten the mounting nut  while preventing rotation.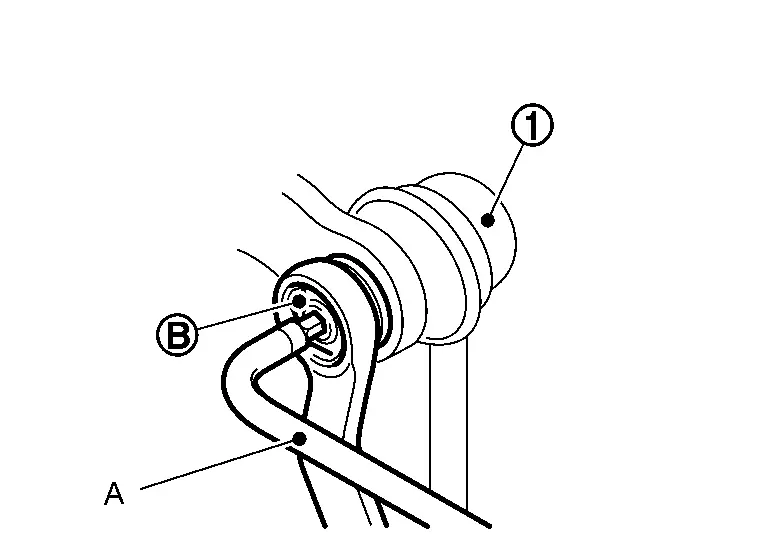
Inspection
INSPECTION AFTER REMOVAL
Check stabilizer bar, stabilizer connecting rod, stabilizer bushing and stabilizer clamp for deformation, cracks or damage. Replace it if necessary.
Other materials
Fuel Efficient Driving Tips
To get the best fuel economy from your Nissan Armada, follow these practical
and easy-to-apply driving tips. These recommendations not only improve efficiency
but also contribute to smoother and safer driving.
1. Use smooth accelerator and brake pedal application.
Avoid sudden acceleration ...
Transfer Range Position Sensor
Exploded View
Transfer assembly
Transfer range position sensor
: N·m (kg-m, in-lb)
Removal and Installation
WARNING:
Jacking up or lift up the vehicle may the vehicle height to go down which cause a personal injury and/or damage to the air sus ...
Additional Service When Replacing Third Seat Control Unit Rh
Description
When after replacing third seat control unit RH, third seat RH position initialization must be performed. For details, refer to Work Procedure.
Work Procedure
REPLACE THIRD SEAT CONTROL UNIT RH
Replace third seat control unit RH. Refer to Removal and Installation.
>>
GO TO 2.
THI ...