
Nissan Armada 2025-2026 Service and Repair Manual: Removal & Installation
REMOVAL
CAUTION:
Before replacing TCU, perform “ADDITIONAL SERVICE WHEN REPLACING TCU". For details, refer to Work Procedure.
Remove the glove box assembly. Refer to Removal and Installation.
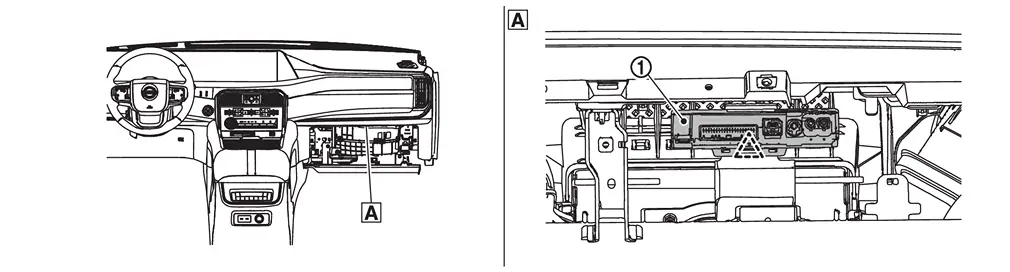
 | Behind of glove box (View from below) |
 | TCU |
 | : Pawl |
Disconnect the TCU harness connectors.
Press the pawl  to release the lock.
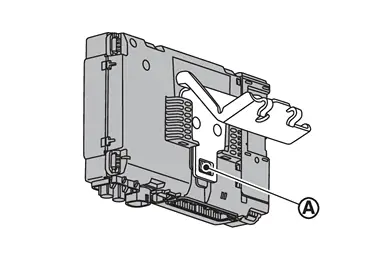
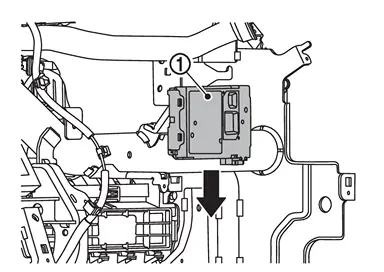
Press the pawl and slide the TCU in the arrow direction shown to remove the TCU from the bracket.
 NOTE:
NOTE:
To remove the bracket, remove the instrument panel assembly.
INSTALLATION
Installation is in the reverse order of removal.
CAUTION:
After replacing TCU, perform “ADDITIONAL SERVICE WHEN REPLACING TCU". For details, refer to Work Procedure.
 Exploded View
Steering member Bracket TCU : Pawl ...
 Microphone
...
Other materials:
Work Procedure
Description
When replacing or removing the Head Up Display unit, distortion calibration of the display and adjustment of the display position are required.
Work Procedure
REPLACE HEAD UP DISPLAY UNIT
Replace Head Up Display unit. Refer to Removal and Installation.
>>
GO TO 2.
PERFORM CALIBRA ...
Removal and Installation
CAUTION:
Perform work with 2 workers, because it is heavy weight.
Support back door with a proper material and use protective tape or shop cloth to protect back door and body from falling and damage when removing and installing spindle unit.
REMOVAL
Disconnect battery cable from 12V battery negativ ...
Exploded View
With ProPILOT Assist 2.1 models
Combination switch Steering angle sensor Spiral cable : Pawl
Without ProPILOT Assist 2.1 models
Combination switch Steering angle sensor Spiral cable : Pawl : Always replace after every disassembly. ...

0.0051