Exploded View
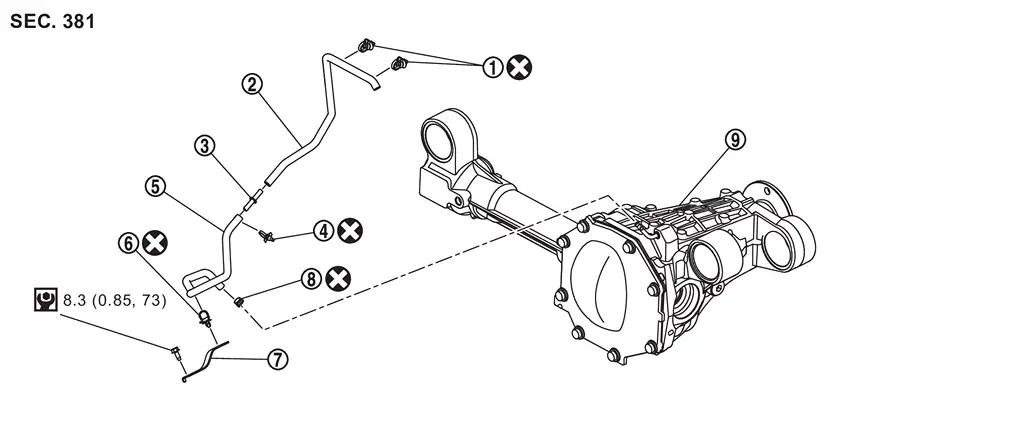
 |
Clip A |  |
Air breather hose A |  |
Hose connector |
 |
Clip B |  |
Air breather hose B |  |
Clip C |
 |
Bracket |  |
Hose clamp |  |
Front final drive assembly |
 : Always replace after every disassembly. : Always replace after every disassembly. |
|||||
 : N・m (kg-m, in-lb) : N・m (kg-m, in-lb) |
|||||
Removal and Installation
WARNING:
-
Jacking up or lift up the vehicle may the vehicle height to go down which cause a personal injury and/or damage to the air suspension component parts. Refer to Precaution for when Jacking and Lifting Up the vehicle with Electronic Air Suspension System.
REMOVAL
Remove engine under cover. Refer to Exploded View.
Release hose clamp , and remove air breather hose B from final drive assembly.
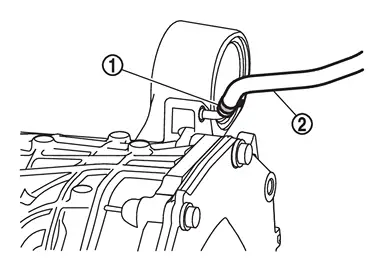
Remove clip C from bracket .
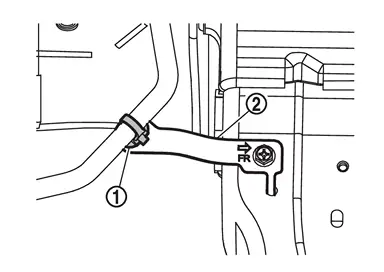
Remove bracket mounting bolt (  ) and remove bracket .
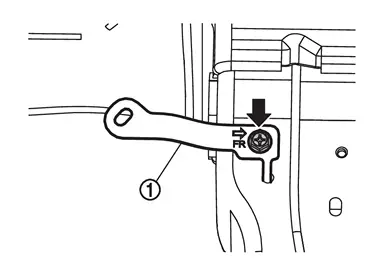
Remove clip B .
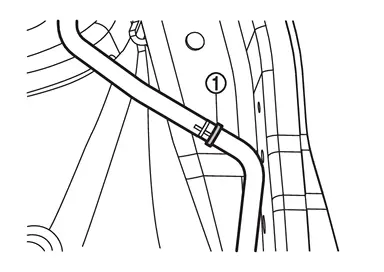
Remove clip A .
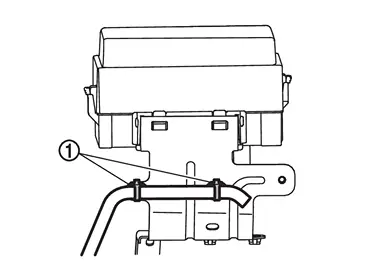
Remove air breather hose assembly.
Separate each component part.
INSTALLATION
Note the following, and install in the reverse order of removal.
-
For non-reusable parts, refer to Exploded View.
-
When inserting air breather hose to hose connector
, be sure to insert it fully until its end reaches the stop.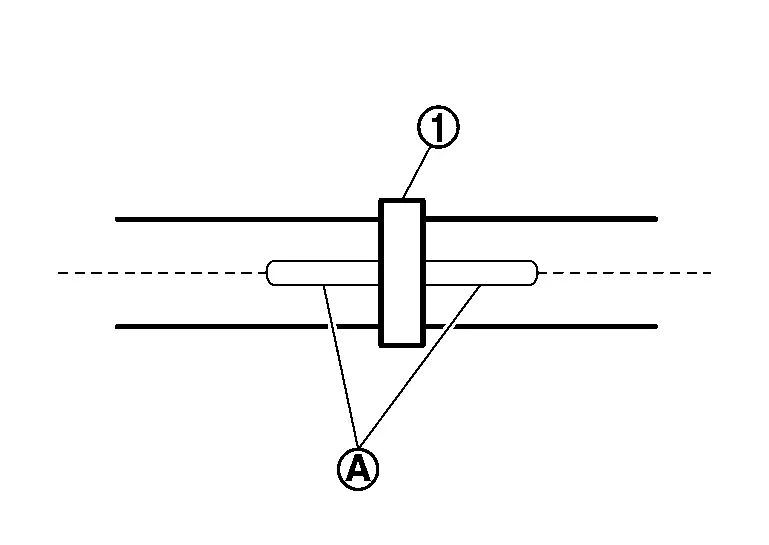
CAUTION:
Align paint marks
 on each air breather hose.
 -
When inserting air breather hose B to final drive assembly, be sure to insert it fully until its end reaches the stop.
CAUTION:
-
Install air breather hose B
so that the paint mark on it and tab of hose clamp faced leftward of the vehicle.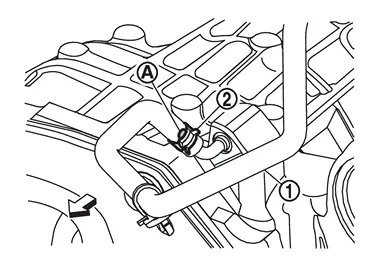
: vehicle front -
Set hose clamp
at the end of air breather hose with dimension (A) from the hose edge.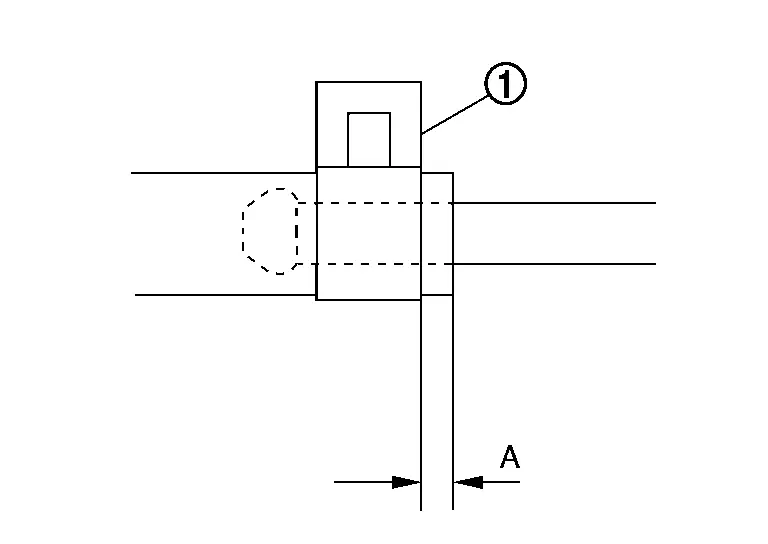
Dimension (A) : 5 – 7 mm (0.20 – 0.28 in)
-
-
When installing air breather hose, make sure there are no pinched or restricted areas on air breather hose caused by bending or winding.
Other materials
Warning & Indicator Lights
Warning/indicator lights (red)
Warning/indicator lights (yellow)
Warning/indicator lights (other)
( white )
(
green )
Checking lights
In the Nissan Armada, the warning and indicator light system is designed to immediately
inform the driver about the vehicle’s condition, ...
Unexpected Brake Pedal Reaction
Diagnosis Procedure
A malfunction of brake pedal feel (height or others) is detected when the brake pedal is depressed.CHECK AXLE
Check that there is no significant looseness of axle.
Front axle
2WD models: Refer to Inspection.
4WD models: Refer to Inspection.
Rear axle: Refer to Inspectio ...
Rear Window Defogger and Door Mirror Defoggers Do Not Operate
Diagnosis Procedure
CHECK REAR WINDOW DEFOGGER RELAY
Check rear window defogger relay. Refer to Component Function Check.
Is the inspection result normal?
YES>>
GO TO 2.
NO>>
Repair or replace the malfunctioning parts.
CHECK REAR WINDOW DEFOGGER SWITCH
Check rear window defogger switch ...