Exploded View
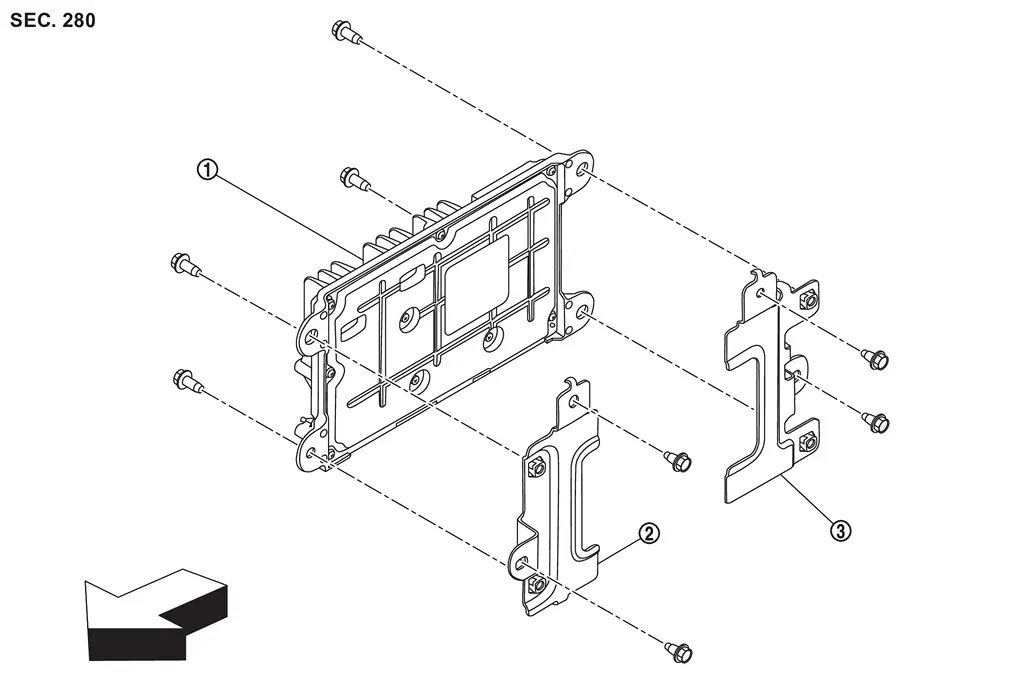
 |
Audio amp. |  |
Bracket RH |  |
Bracket LH |
| : vehicle front | |||||
Removal & Installation
CAUTION:
Before replacing audio amp, perform "ADDITIONAL SERVICE WHEN REPLACING audio AMP". Refer to Work Procedure.
REMOVAL
Remove luggage side lower finisher RH. Refer to Removal and Installation.
Remove the audio amp. mounting nut  , and then remove the audio amp. .
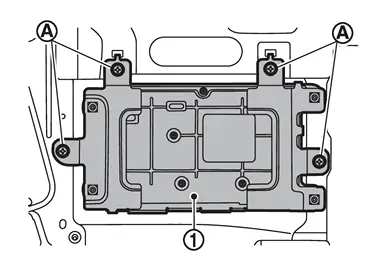
Disconnect the audio amp. harness connectors.
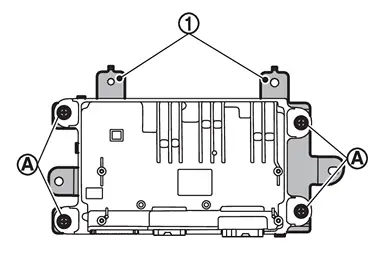
Remove bracket mounting bolts , and then remove brackets .
INSTALLATION
CAUTION:
Before replacing audio amp, perform "ADDITIONAL SERVICE WHEN REPLACING audio AMP". Refer to Work Procedure.
Install in the reverse order of removal.
Other materials
Remote engine start
Basic information
Example
The Nissan Armada remote engine start feature is activated using the dedicated
button on the Intelligent Key (if equipped), allowing the engine to be started conveniently
from outside the vehicle.
This advanced Nissan Armada functionality enhances comfort by en ...
Charge Air Cooler
Exploded View
Air inlet tube 1
Bracket 1
Mounting rubber (upper)
Bracket 2
Charge air cooler cover
Clip
Mounting rubber (lower)
Bracket 3
Bracket 4
Air inlet tube 2
Air inlet hose
Clamp
Recirculation valve
Turbocharger boost sensor
Charge air cooler
...
Combination Switch System Symptoms
Symptom Table
Perform “Data Monitor” of CONSULT to check for any malfunctioning item.
Check that the data monitor display switches in conjunction with the combination switch operation.
If there is a switch whose display does not change, specify the applicable combination switch circuit (IN ...