Exploded View
WITHOUT DYNAMIC DIGITAL SUSPENSION AND ELECTRONIC AIR SUSPENSION
Without ProPILOT ASSIST 2.1
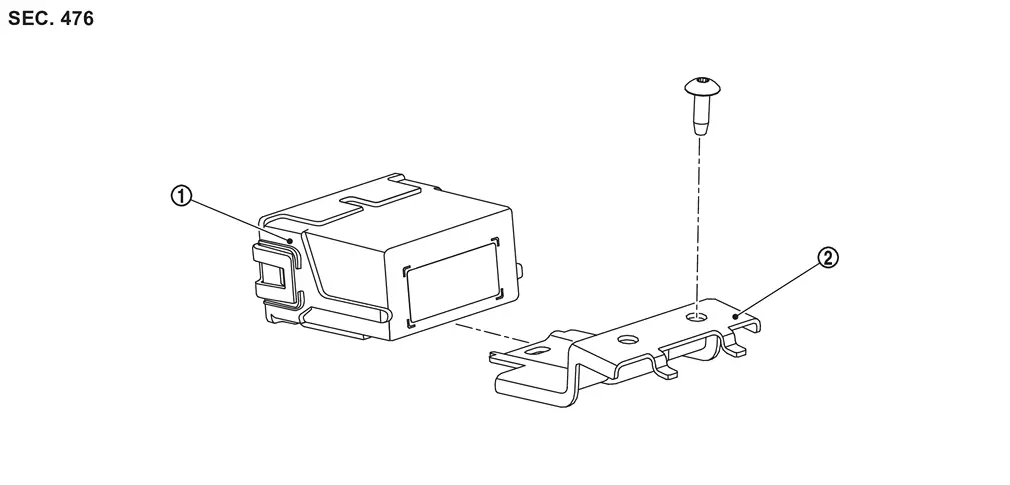
 |
Chassis control module |  |
Bracket |
With ProPILOT ASSIST 2.1
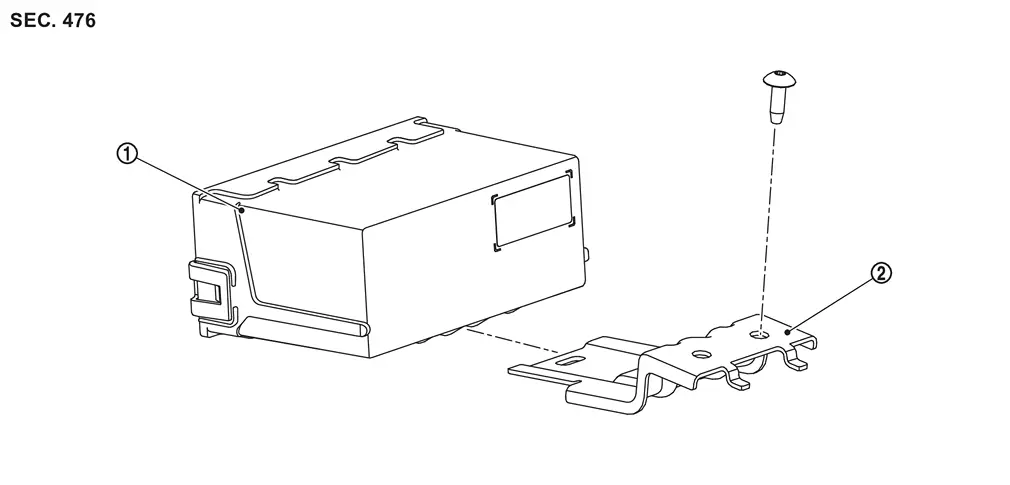
|
Chassis control module | |
Bracket |
WITH DYNAMIC DIGITAL SUSPENSION AND ELECTRONIC AIR SUSPENSION
|
Chassis control module | |
Bracket |
Removal and Installation
REMOVAL
CAUTION:
When replacing chassis control module, configuration of chassis control module is required. Refer to Description.
Without Dynamic Digital Suspension And Electronic Air Suspension
Remove the glove box. Refer to Removal and Installation.
Disconnect the chassis control module harness connector  , and remove mounting screws
  and chassis control module .
-
WITHOUT ProPILOT Assist 2.1
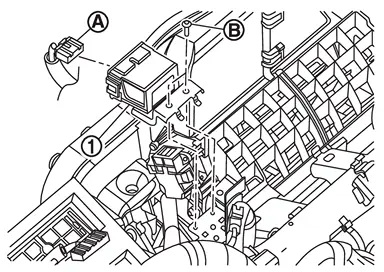
-
WITH ProPILOT Assist 2.1
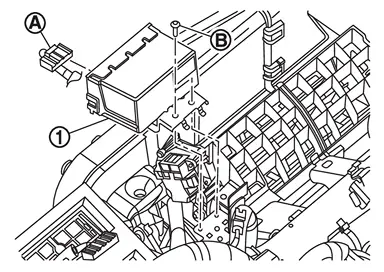
Remove the chassis control module from bracket .
-
WITHOUT ProPILOT Assist 2.1
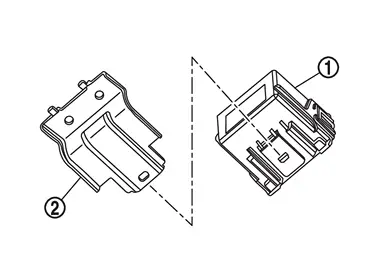
-
WITH ProPILOT Assist 2.1
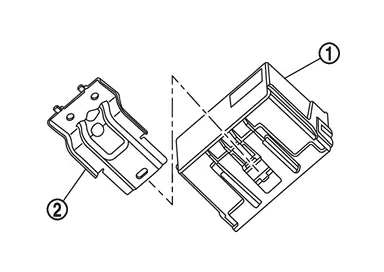
With Dynamic Digital Suspension And Electronic Air Suspension
Remove the glove box. Refer to Removal and Installation.
Disconnect the chassis control module harness connectors , and remove mounting screws and chassis control module .
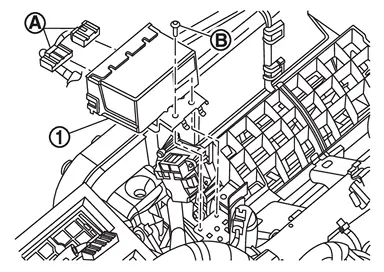
Remove the chassis control module from bracket .
INSTALLATION
Note the following, install in the reverse order of removal.
When replacing the chassis control module, be sure to perform the configuration of chassis control module. Refer to Description.
Other materials
The Braking Distance Is Long
Description
Brake stopping distance is long when ABS function is operated.
Diagnosis Procedure
CAUTION:
Brake stopping distance on slippery road like rough road, gravel road or snowy road may become longer when ABS is operated than when ABS is not operated.CHECK BRAKING FORCE
Check the brake force u ...
Additional Service When Replacing Third Seat Control Unit Rh
Description
When after replacing third seat control unit RH, third seat RH position initialization must be performed. For details, refer to Work Procedure.
Work Procedure
REPLACE THIRD SEAT CONTROL UNIT RH
Replace third seat control unit RH. Refer to Removal and Installation.
>>
GO TO 2.
THI ...
Automatic Back Door Close Switch Assembly
Removal and Installation
REMOVALRemove automatic back door switch finisher. Refer to Removal and Installation.
Disengage automatic back door close switch assembly fixing pawls using a remover tool (A), and then remove automatic back door close switch assembly from automatic back door switch finishe ...