Removal and Installation
REMOVAL
CAUTION:
Never damage the front door panel and any parts.
Remove front door sash inner cover. Refer to Removal & Installation.
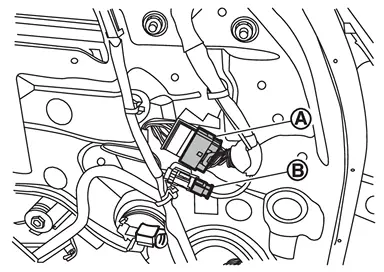
Disconnect door mirror assembly harness connectors  and
and  .
.
 NOTE:
NOTE:
Harness connector : Side camera harness connector (with side camera)
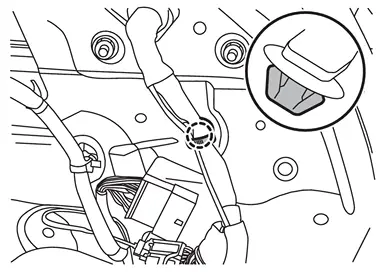
Remove harness clip.
 |
: Clip |
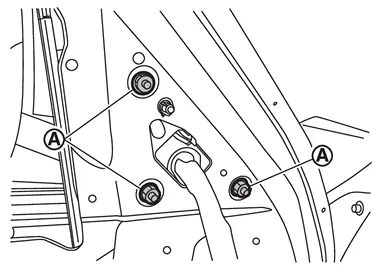
Remove door mirror assembly mounting nuts .
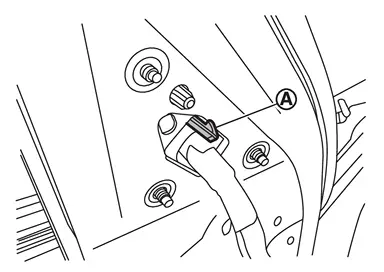
Disengage door mirror assembly fixing pawl , and then remove door mirror assembly.
INSTALLATION
Note the following items, and then install in the reverse order of removal.
CAUTION:
-
In accordance with the replacement operation of the door mirror assembly and side camera, the parameter writing of the camera and the camera image calibration must be performed.
-
Refer to the matrix below and perform the action as appropriate.
-
The numbers in the matrix indicate the operating procedure.
| Situations | |||||
|---|---|---|---|---|---|
| Operations | Replace door mirror assembly & side camera | Replace door mirror assembly (side camera reused) | Replace side camera (door mirror assembly reused) | Remove door mirror assembly with camera | |
| Parameter writing for camera | 1 | - | 1 | - | Refer to Work Procedure |
| Camera image calibration | 2 | 1 | 2 | 1 | Refer to Work Procedure |
Disassembly and Assembly
DISASSEMBLY
Remove door mirror assembly. Refer to Removal and Installation.
Remove door mirror cover. Refer to Removal and Installation.
Disconnect all terminals from harness connector .
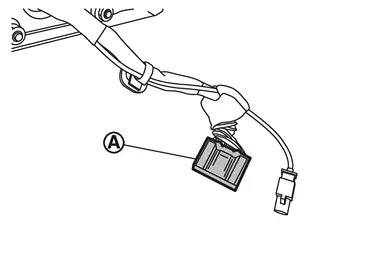
NOTE:
Make a mark (short note, photo, etc.) of terminals layout, before disassembly.
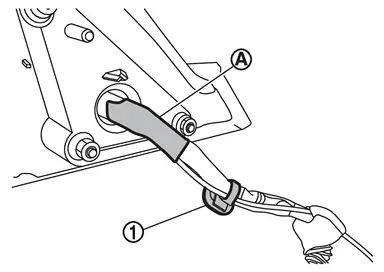
Remove harness clip  and vinyl tape .
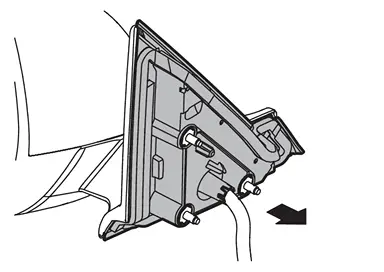
Remove door mirror base gasket.
Disengage door mirror base cover fixing pawls, and then remove door mirror base cover.
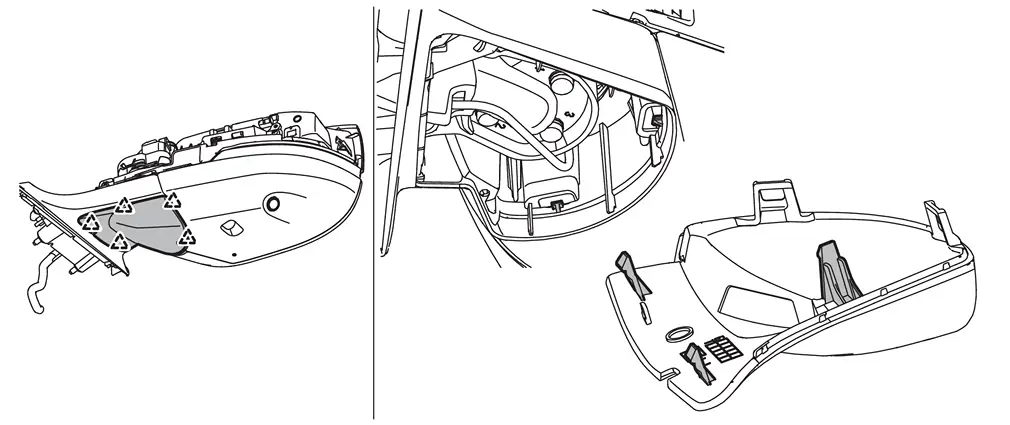
 |
: Pawl |
Remove door mirror base assembly fixing screws , and then remove door mirror base assembly.
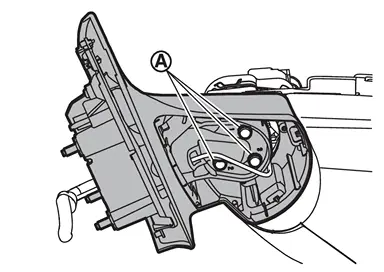
Remove door mirror finisher fixing screws .
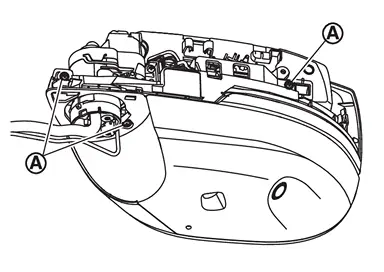
Disengage door mirror finisher fixing pawls, and then remove door mirror finisher from door mirror housing assembly.
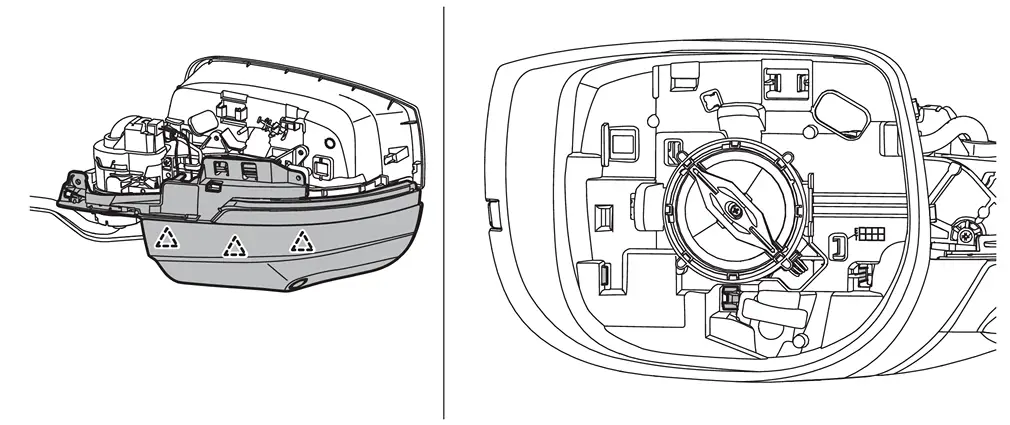
|
: Pawl |
Remove side camera (with side camera) or side camera cover (without side camera). Refer to the follows.
-
Side camera: Removal and Installation.
-
Side camera cover: Remove side camera cover fixing pawls, and then remove side camera cover.
Remove side turn signal lamp. Refer to Removal & Installation.
Remove puddle lamp (with puddle lamp) or puddle lamp cover (without puddle lamp). Refer to the follows.
-
Puddle lamp: Removal and Installation.
-
Puddle lamp cover: Remove puddle lamp cover fixing pawls, and then remove puddle lamp cover.
Disconnect harness connector .
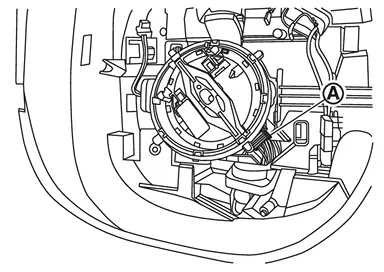
Remove power folding motor fixing screws , and then remove power folding motor.
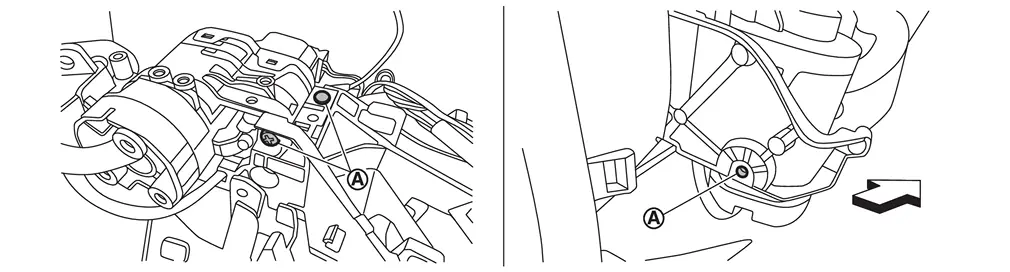
| : vehicle front |
Remove harness from power folding motor.
NOTE:
Make a mark (short note, photo, etc.) of harness layout, before removal.
Disconnect side camera harness A and side camera harness B (with side camera).
ASSEMBLY
Note the following items, and then assemble in the reverse order of disassembly.
CAUTION:
-
Never reuse door mirror base assembly fixing screws, vinyl tape, and harness clip. Always replace it with a new one when it is removed.
-
After installation, visually check that fixing pawls are securely engage.
Other materials
Warning/indicator lights (red)
Brake warning light
or
In the Nissan Armada, the brake warning light is a critical safety indicator
that helps monitor the condition of the braking system. When the ignition switch
is turned to the ON position, this light should illuminate briefly for a few seconds
and then turn off, ...
Rear Door Finisher
Exploded View
Rear door panel
Inside seal
Rear door sash inner cover
Pull handle cap
Inside handle cap
Rear door finisher
Pull handle bracket
Grommet
: Clip
: Pawl
: N·m (kg-m, in-lb)
...
Hood Lock Control Handle
Removal and Installation
REMOVALDisengage hood lock control handle fixing pawl, and then remove hood lock control handle.
: Pawl
INSTALLATIONNote the following items, and then install in the reverse order of removal.CAUTION:
After installation, perform hood lock control inspection. Refer to In ...