Removal and Installation
CAUTION:
Never damage front door panel.
REMOVAL
CAUTION:
When removing, always use a remover tool that is made of plastic to prevent damage to the parts.
Fully open front door.
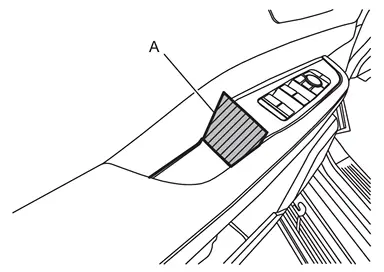
Remove pull handle cap.Apply protective tape (A) on front door finisher to protect it from damage.
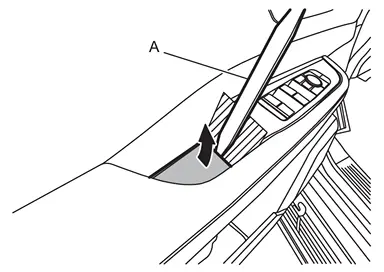
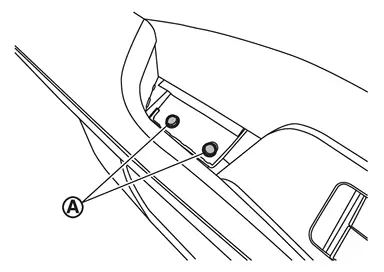
Remove front door finisher fixing screws  .
.
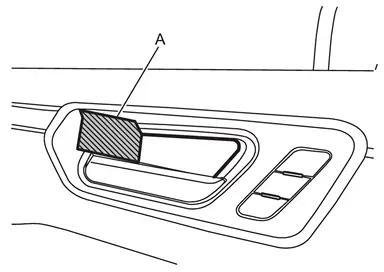
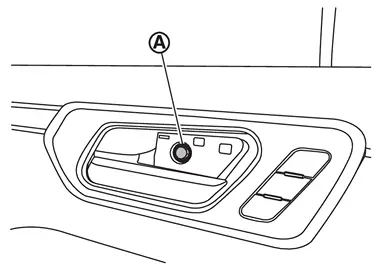
Remove inside handle cap.Apply protective tape (A) on inside handle to protect it from damage.
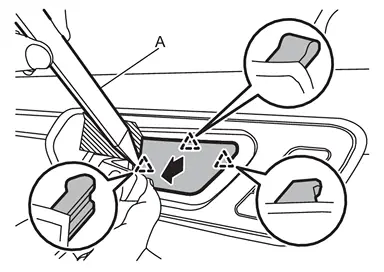
 |
: Pawl |
Remove front door finisher mounting bolt .
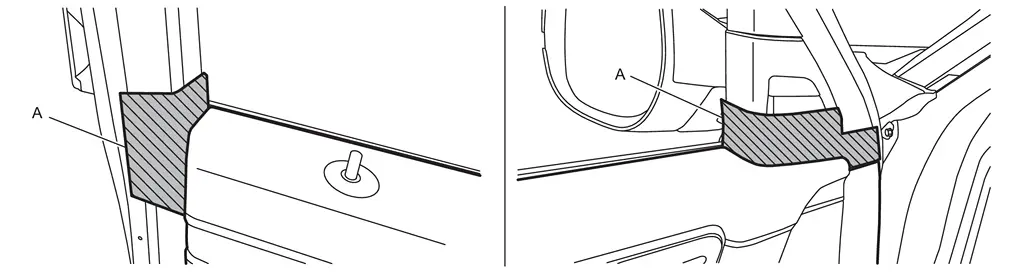
Apply protective tapes (A) on front door sash inner cover to protect it from damage.
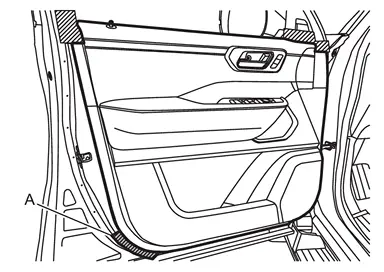
Apply protective tape (A) on front door panel to protect it from damage.
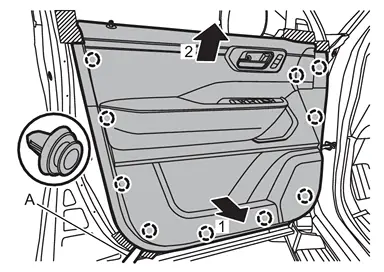
Disengage front door finisher fixing clips using a remover tool (A) according to numerical order 1→2 indicated by arrows as shown in the figure.
CAUTION:
Insert a remover tool between front door panel and clip to prevent damage to the parts, and then disengage clips.
 |
: Clip |
Disconnect each front door harness connector, and then remove harness fixing clips from front door finisher.
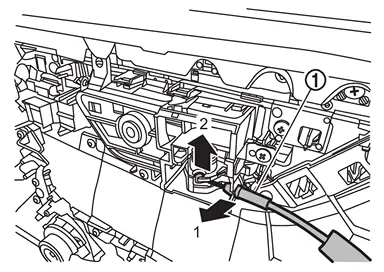
Disconnect inside handle cable  from inside handle according to numerical order 1→2 indicated by arrows as shown in the figure.
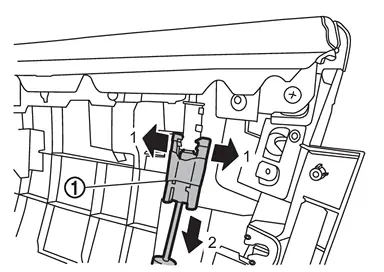
Disconnect lock knob cable from front door finisher according to numerical order 1→2 indicated by arrows as shown in the figure, and then remove front door finisher.
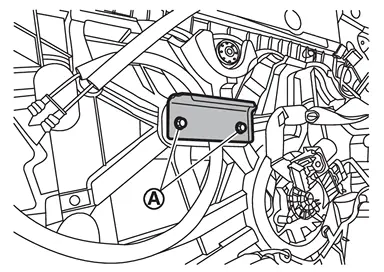
Remove pull handle bracket mounting bolts , and then remove pull handle bracket.
INSTALLATION
Note the following items, and then install in the reverse order of removal.
CAUTION:
-
Visually check clips for deformation and damage during installation. Replace with new ones if necessary.
-
Check in advance that clips are accurately aligned with the portions on front door panel, and then install by pressing in.
-
Tighten front door finisher mounting bolt
to the specified torque. Refer to Exploded View (front door inside handle part).
Other materials
Brake Pad
Exploded View
Cylinder body
Inner shim cover
Inner shim
Inner pad
Pad wear sensor
Pad retainer
Torque member
Outer pad
Outer shim
: vehicle front
: N·m (kg-m, ft-lb)
: Always replace after every disassembly.
Removal and Install ...
In-Vehicle Sensor
Exploded View
Front
Instrument lower panel LH
Front in-vehicle sensor
Aspirator duct
: vehicle front
RearRefer to Exploded View. ...
Driver Side Power Window Does Not Operate
Diagnosis Procedure
CHECK POWER WINDOW MAIN SWITCH POWER SUPPLY AND GROUND CIRCUIT
Check power window main switch power supply and ground circuit. Refer to Diagnosis Procedure.
Is the inspection result normal?
YES>>
GO TO 2.
NO>>
Repair or replace the malfunctioning parts.
CHECK FRONT ...