Removal and Installation
REMOVAL
Remove fender cover. Refer to Removal and Installation.
Remove front fender drip cover. Refer to Removal and Installation.
Remove front combination lamp and head lamp. Refer to Removal and Installation.
Remove front fender protector. Refer to Removal and Installation.
Remove front door assembly. Refer to Removal and Installation.
Disengage front fender baffle upper part  fixing pawls, and then remove front fender baffle upper part from front fender assembly.
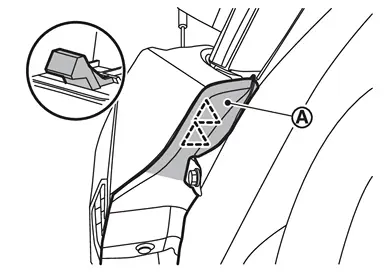
 |
: Pawl |
Remove front fender baffle fixing clips, and then remove front fender baffle.
Remove front fender assembly mounting bolts, and then front fender assembly.
Remove front fender bracket mounting bolts, and then remove front fender bracket.
INSTALLATION
Note the following items, and then install in the reverse order of removal.
CAUTION:
-
When installation, adjust the following part.
-
Hood assembly: Refer to Adjustment.
-
Front door panel: Refer to Adjustment.
-
-
After installation, apply the touch-up paint (the body color) onto the head of front fender mounting bolts.
Other materials
Fuel System
Hydraulic Layout
EVAP canister purge volume control solenoid valve
EVAP resonator
EVAP line
Fuel line
Fuel tank
Fuel filler neck
EVAP canister
Quick Connector
CAUTION:
After connecting fuel tube quick connectors, check quick connectors are secur ...
Rear Suspension Tools and Preparation
Special Service Tools
The actual shapes of TechMate tools may differ from those of special service tools illustrated here.
Tool number
(TechMate No.)
Tool name Description
ST3127S000
(NI-25765-A)
Preload gauge
Measuring rotating torque of ball joint
KV401110S0
( - )
Rear shock absorber s ...
For Rear Collision
When SRS is not activated in a collision
CAUTION:
Due to varying models and option levels, not all parts listed in the chart below apply to all Nissan Armada vehicles.WORK PROCEDUREBefore performing any of the following steps, ensure that all vehicle body and structural repairs have been completed.
...