Removal and Installation
CAUTION:
-
Perform work with 2 workers, because it is heavy weight.
-
Support hood with a proper material and use protective tape or shop cloth to protect hood and body from falling and damage when removing and installing hood stay.
REMOVAL
Support hood assembly with a suitable material to prevent it from falling.
WARNING:
Injury may occur if hood assembly is not supported with a proper material when removing hood stay.
Remove metal clip  located on connection between hood stay
  and stud ball part
  of hood assembly using a remover tool (A) according to the numerical order 1→2 indicated by arrows as shown in the figure.
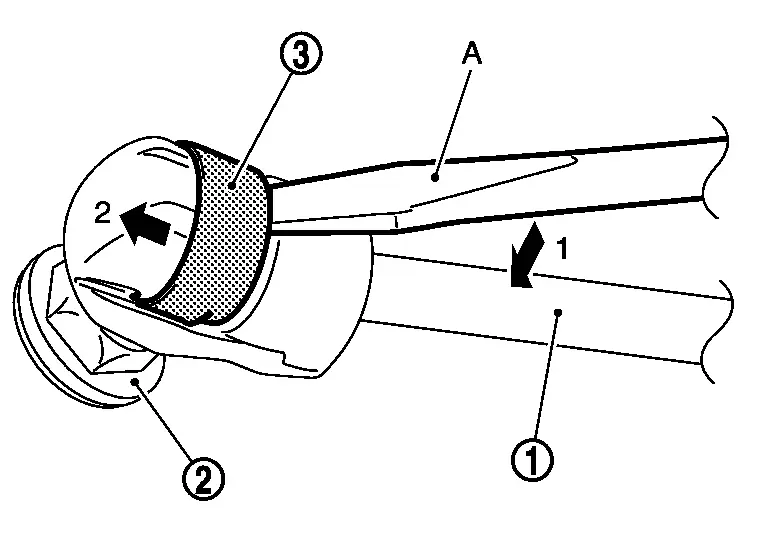
Remove hood stay from hood assembly.
Repeat the same operation to disengage hood stay from stud ball, and then remove hood stay.
Loosen stud ball, and then remove stud ball from hood assembly.
INSTALLATION
Install in the reverse order of removal.
Disposal
CAUTION:
When performing disposal operation, wear the protective glasses and protective gloves.
Fix hood stay using a vise (C).
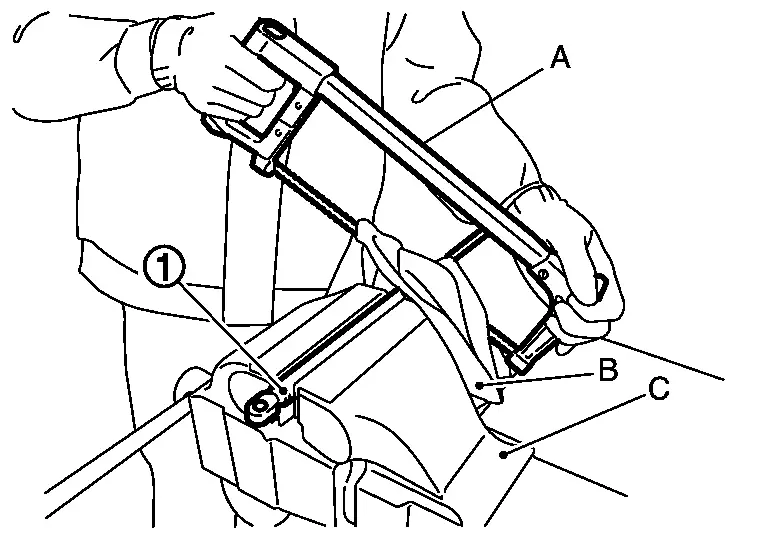
CAUTION:
When cutting a hole on hood stay, always cover a hacksaw (A) using a shop cloth (B) to avoid scattering metal fragments or oil.
Using hacksaw slowly make 2 holes in the hood stay, in numerical order as shown in the figure.
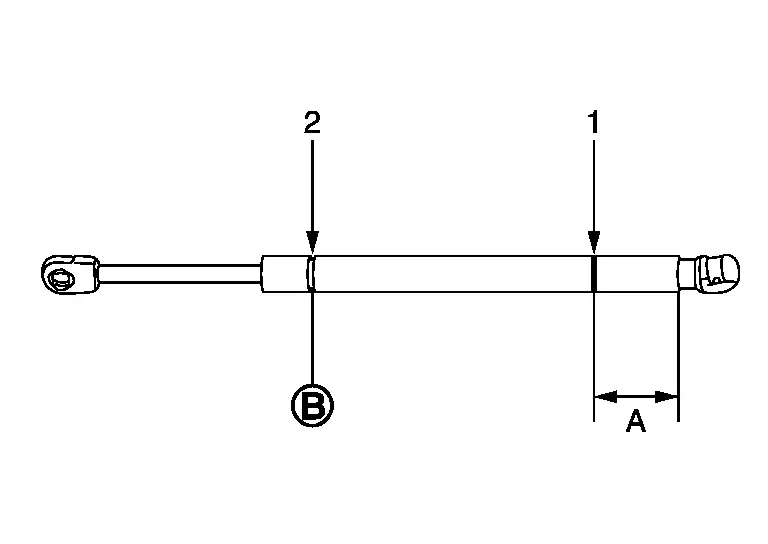
| A: | 20.0 mm (0.787 in) |
 : : |
Cut at the groove. |
Other materials
Transfer Assembly
Exploded View
Transfer assembly
: N·m (kg-m, ft-lb)
Removal and Installation
WARNING:
Jacking up or lift up the vehicle may the vehicle height to go down which cause a personal injury and/or damage to the air suspension component parts. Refer to Precaution for when Jacking and Li ...
Rear Suspension Tools and Preparation
Special Service Tools
The actual shapes of TechMate tools may differ from those of special service tools illustrated here.
Tool number
(TechMate No.)
Tool name Description
ST3127S000
(NI-25765-A)
Preload gauge
Measuring rotating torque of ball joint
KV401110S0
( - )
Rear shock absorber s ...
Squeak and Rattle Trouble Diagnoses
Work Flow
CUSTOMER INTERVIEWInterview the customer if possible, to determine the conditions that exist when the noise occurs. Use the Diagnostic Worksheet during the interview to document the facts and conditions when the noise occurs and any customer comments. Refer to Diagnostic Worksheet. This in ...