PRECAUTIONS FOR REMOVING BATTERY TERMINAL : Precautions
-
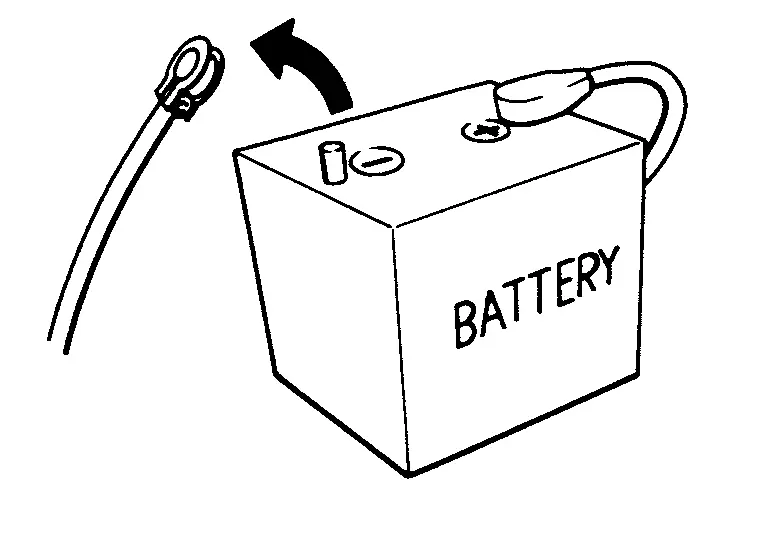
When disconnecting the 12V battery terminal, turn off the ACC power before disconnecting the 12V battery terminal, observing “How to disconnect 12V battery terminal” described below.
 NOTE:
NOTE:
Some ECUs operate for a certain fixed time even after ignition switch is turned OFF and ignition power supply is stopped. If the battery terminal is disconnected before ECU stops, accidental DTC detection or ECU data damage may occur.
-
For Nissan Armada vehicles with the 2-batteries, be sure to connect the main battery and the sub battery before turning ON the ignition switch.
NOTE:
If the ignition switch is turned ON with any one of the terminals of main battery and sub battery disconnected, then DTC may be detected.
-
After installing the 12V battery, always check "Self Diagnosis Result" of all ECUs and erase DTC.
NOTE:
The removal of 12V battery may cause a DTC detection error.
HOW TO DISCONNECT 12V BATTERY TERMINAL
Disconnect 12V battery terminal according to instruction described below.
-
Open the hood.
-
Turn ignition switch to the ON position.
-
Turn ignition switch to the OFF position with the driver side door opened.
-
Get out of the vehicle and close the driver side door.
-
Wait at least 3 minutes. For vehicle with the engine listed below, remove the battery terminal after a lapse of the specified time.
BR08DE : 4 minutes R9N engine : 12 minutes BR10DE : 12 minutes V9X engine : 4 minutes D4D engine : 20 minutes YD25DDTi : 2 minutes HR09DET : 12 minutes YS23DDT : 4 minutes HR10DDT : 12 minutes YS23DDTT : 4 minutes HR10DET : 12 minutes ZD30DDTi : 60 seconds HR13DDT : 12 minutes ZD30DDTT : 60 seconds HRA2DDT : 12 minutes K9K engine : 4 minutes M9R engine : 4 minutes R9M engine : 4 minutes CAUTION:
While waiting, never operate the vehicle such as locking, opening, and closing doors. Violation of this caution results in the activation of ACC power supply according to the Auto ACC function.
-
Remove 12V battery terminal.
CAUTION:
After installing 12V battery, always check self-diagnosis results of all ECUs and erase DTC.
Service Notice or Precautions for Steering System
-
Check the following item when performing the trouble diagnosis.
-
Check any possible causes by interviewing the symptom and it′s condition from the customer if any malfunction, such as power steering warning lamp is turned ON, occurs.
-
Check if air pressure and size of tires are proper, the specified part is used for the steering wheel, and control unit is genuine part.
-
Check if the connection of steering column assembly and steering gear assembly is proper (there is not looseness of mounting bolts, damage of rods, boots or sealants, and leakage of grease, etc).
-
Check if the wheel alignment is adjusted properly.
-
Check if there is any damage or modification to suspension or body resulting in increased weight or altered ground clearance.
-
Check if installation conditions of each link and suspension are proper.
-
Check if the 12V battery voltage is proper.
-
Check connection conditions of each connector are proper.
-
Before connecting or disconnecting the power steering control module harness connector, ignition switch “OFF” and disconnect 12V battery ground cable. Because 12V battery voltage is applied to power steering control module even if ignition switch is “OFF”.
-
When connecting or disconnecting pin connectors into or from power steering control module, take care not to damage terminals (bend or break).
-
-
During quick steering, rasping noise may be heard from under the vehicle. This is not a malfunction. The noise is an operating noise of the EPS system under normal conditions. If the rasping noise occurs during slow steering, this may not be an operating noise of the system. In this case, it is necessary to find out the location of the noise and repair, if necessary.
Other materials
Rear Axle Service Data and Specifications
Wheel Bearing
Item Standard
Axial end play
0.05 mm (0.002 in) or less
Drive Shaft
With differential lock Item Standard
Grease quantity
Wheel side
155 - 175 g (5.47 – 6.17 oz)
Final drive side
310 - 330 g (10.94 – 11.63 oz)
Boots installed length
Wheel side
143.6 mm (5 ...
Seat Lifting
Diagnosis Procedure
CHECK LIFTING MECHANISM
Check for the following.
Mechanism deformation or pinched foreign materials.
Interference with other parts because of poor installation.
Is the inspection result normal?
YES>>
GO TO 2.
NO>>
Repair or replace the malfunctioning parts.
CH ...
Rear Wiper
Exploded View
Rear wiper motor
Rear wiper blade
Rear wiper arm
Pivot seal
: N·m (kg-m, in-lb)
...