
Nissan Armada 2025-2026 Service and Repair Manual: Removal and Installation
WARNING:
REMOVAL
 NOTE:
NOTE:
CAUTION:
Perform this step when the engine is cold.
Remove front bumper. Refer to Exploded View.
Remove front under cover. Refer to Removal and Installation.
Drain A/T fluid. Refer to Draining.
Remove A/T fluid cooler hose A and B from A/T fluid cooler. Refer to Removal and Installation.
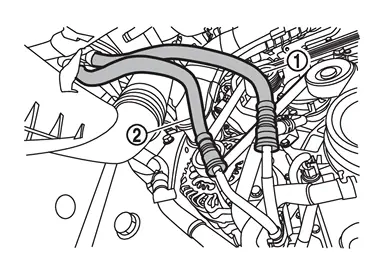
Remove A/T fluid cooler hose A  and A/T fluid cooler hose B
  from A/T fluid cooler tube assembly using the following procedure:
Remove A/T fluid cooler tube cap
from A/T fluid cooler tube assembly .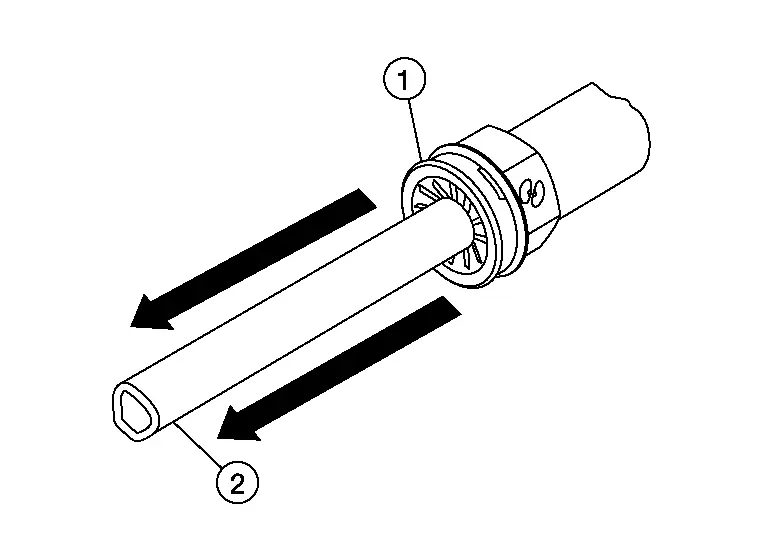
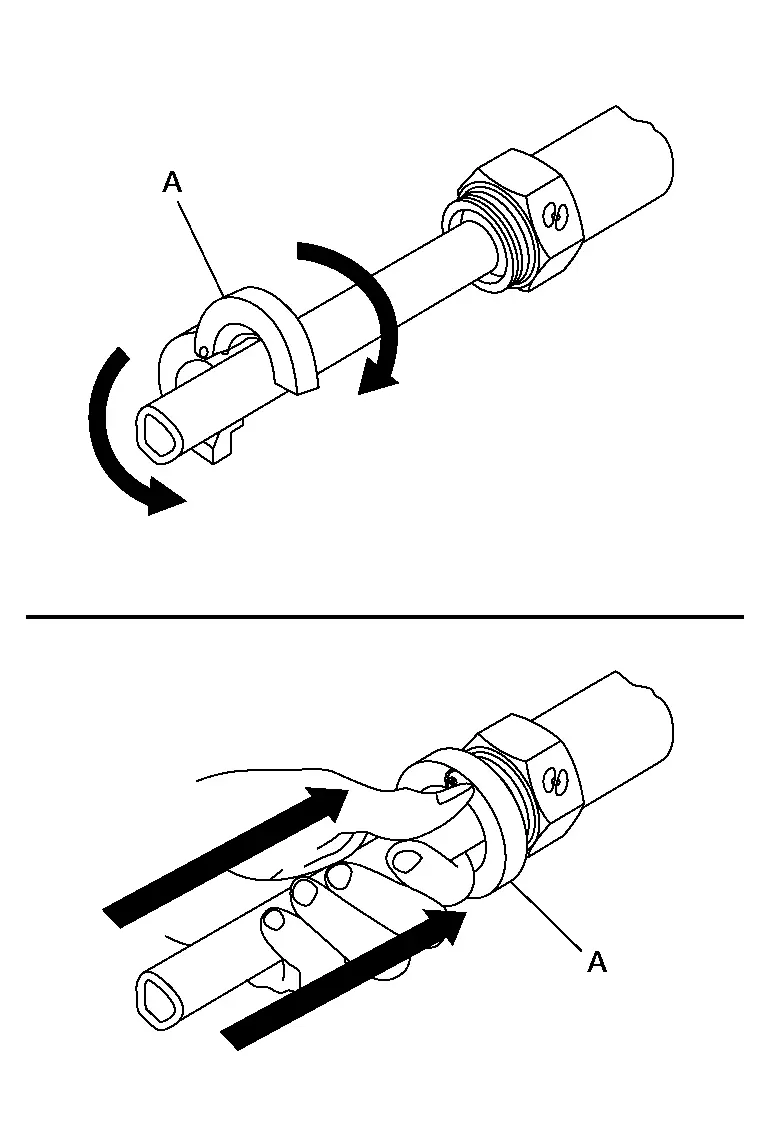
Install suitable disconnect tool (A) (commercial service tool) on to the A/T fluid cooler tube assembly at the A/T fluid cooler hose side.
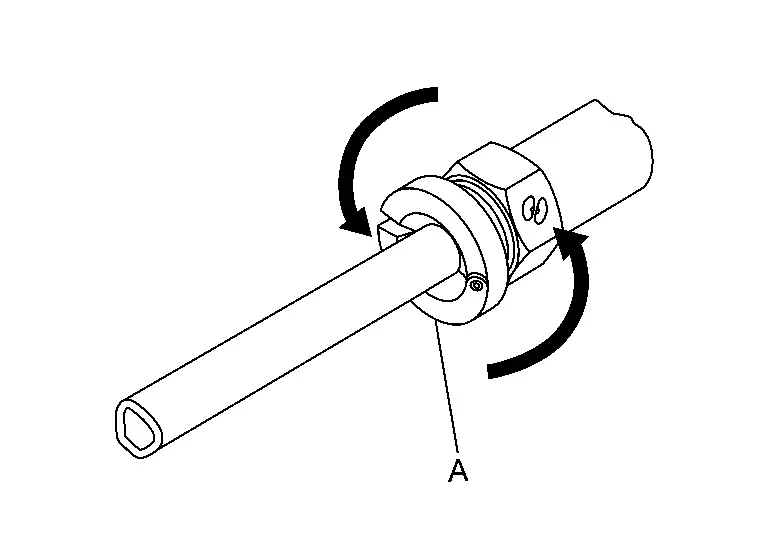
Remove A/T fluid cooler tube
from A/T fluid cooler hose.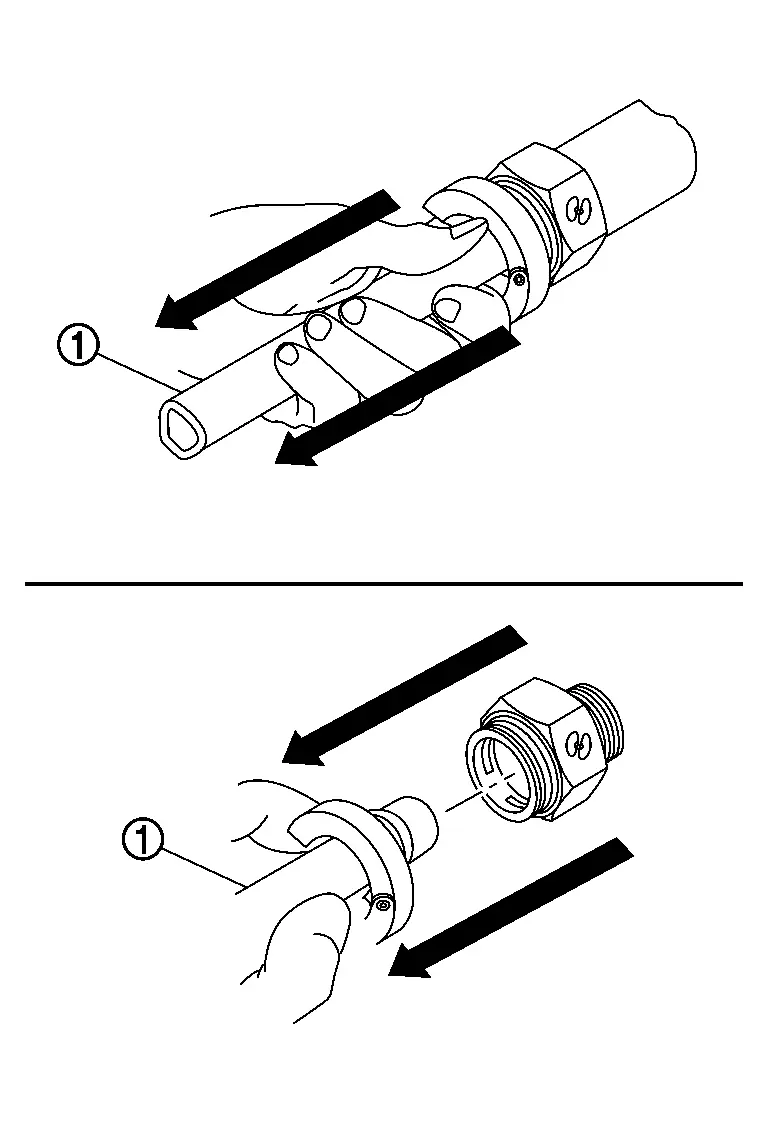
Remove the water hose clip A and B from the A/T fluid cooler tube assembly bracket. Refer to Removal and Installation.
Remove A/T fluid cooler tube assembly mounting nut ( ) and remove A/T fluid cooler tube assembly from bracket.
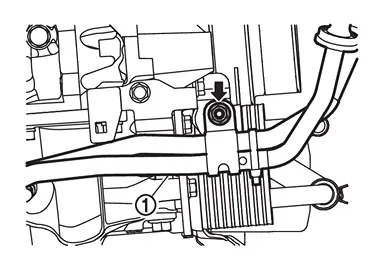
Remove A/T fluid cooler tube assembly mounting bolt () and remove A/T fluid cooler tube assembly from bracket.
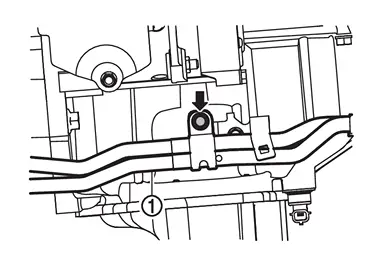
Remove A/T fluid cooler tube assembly  from A/T assembly using the following procedure:
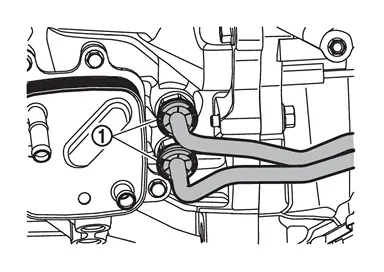
Remove A/T fluid cooler tube cap
from A/T fluid cooler tube assembly  .
.Install suitable disconnect tool (A) (commercial service tool) on to the A/T fluid cooler tube assembly at the A/T assembly side.
Remove A/T fluid cooler tube
from A/T assembly.
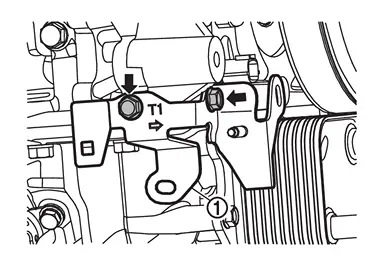
Remove bracket mounting bolts () and remove bracket .
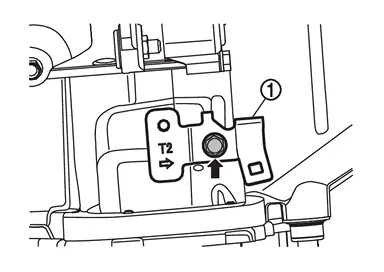
Remove bracket mounting bolt () and remove bracket .
INSTALLATION
Installation is in the reverse order of removal.
Fill A/T fluid after installation. Refer to Refilling.
 Exploded View
A/T assembly A/T fluid cooler tube assembly Bracket Bracket A/T fluid cooler hose A A/T fluid cooler hose B To A/T fluid cooler. Refer to Exploded View. : Clip : N·m (kg-m, in-lb) ...
 Inspection and Adjustment
INSPECTION AFTER INSTALLATION
Check for A/T fluid leakage. Refer to Inspecton.
ADJUSTMENT AFTER INSTALLATION
Adjust A/T fluid level. Refer to Adjustment. ...
Other materials:
Diagnosis Procedure
CHECK AUTO ANTI-DAZZLING MIRROR CIRCUIT
Check auto anti-dazzling mirror circuit. Refer to Diagnosis Procedure.
Is the inspection result normal?
YES>>
GO TO 2.
NO>>
Repair or replace the malfunctioning parts.
REPLACE GLASS MIRROR
Replace glass mirror. Refer to Removal and Installation.
...
Removal and Installation
REMOVAL
Remove back door finisher. Refer to Removal and Installation.
Disconnect license plate lamp harness connectors.
Remove back door opener switch assembly fixing pawls using a remover tool (A), and then remove back door opener switch .
: Pawl
INSTALLATION
Install in the reverse order of re ...
Exploded View
Steering member Passenger knee air bag module : Always replace after every disassembly. : N·m (kg-m, in-lb) ...

0.0065