
Nissan Armada 2025-2026 Service and Repair Manual: Removal and Installation
WARNING:
REMOVAL
Remove tires. Refer to ROAD WHEEL TIRE : Removal & Installation.
CAUTION:
Never depress brake pedal while brake caliper is removed.
Remove wheel sensor and harness connector. Refer to Removal and Installation.
CAUTION:
Never pull on wheel sensor harness.
Set suitable jack under lower link.
CAUTION:
Never damage lower link.
Remove steering knuckle.
2WD models: Refer to Removal and Installation.
4WD models: Refer to Removal and Installation.
Remove shock absorber mounting bolt (lower side), and separate shock absorber from lower link. Refer to Removal and Installation.
Remove stabilizer bar assembly. Refer to Removal and Installation.
Remove mounting bolts, eccentric discs, and adjusting bolts, and remove stopper rubber and lower link.
Perform inspection after removal. Refer to Inspection.
INSTALLATION
Note the following, and install in the reverse order of removal.
Perform final tighting of lower link (frame side) by the following procedures.
Measure between wheel center and fender arch (A).
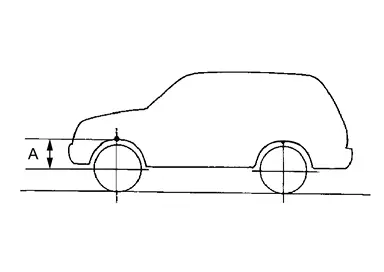
 NOTE:
NOTE:Note the measurements.
Set the wheel chocks on the rear tires.
Jack up front of the vehicle and set the rigid rack.
Remove the front tires.
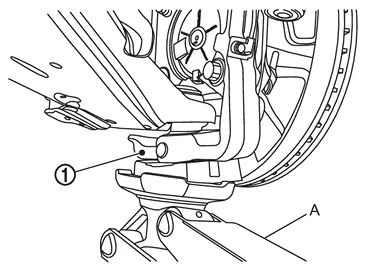
CAUTION:
Never damage threaded part of ball joint.
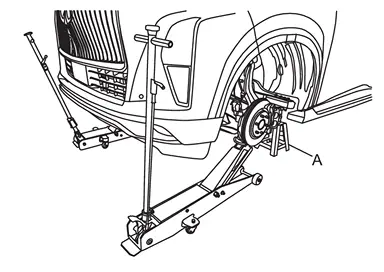
CAUTION:
Never damage steering knuckles.
Check the stable condition when using a suitable jack.
Never float the vehicle.
NOTE:Jack up left and right at the same time.
Measure between wheel center and fender arch (A).
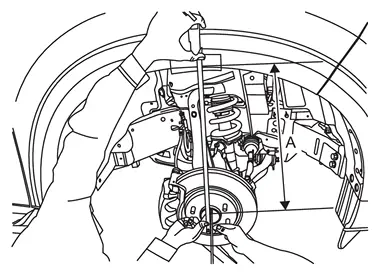
CAUTION:
Check the measurements are within +20 mm (0.79 in) from step 1.
If the measurements are +20 mm (0.79 in) or more, perform step 6 again.
Tight the mounting nuts of lower link (frame side) to the specified torque. Refer to Exploded View.
Perform inspection after installation. Refer to Inspection.
Perform adjustment after installation. Refer to Adjustment.
 Exploded View
Frame Eccentric disc Adjusting bolt Stopper rubber Lower link Steering knuckle : Always replace after every disassembly. : N·m (kg-m, ft-lb) ...
 Inspection
INSPECTION AFTER REMOVAL
Appearance
Check the following items, and replace the part if necessary.
Lower link for deformation, cracks or damage.
Bushings for complete seperation. (If completely seperat ...
Other materials:
Exploded View
Rear door panel Grommet Rear door striker TORX bolt Rear door protector Rear door check link Rear door hinge (lower) Rear door hinge (upper) Rear door weather-strip Rear door parting seal lower 2 Rear door parting seal lower 1 Rear door parting seal front clip Rear door parting seal fr ...
When SRS is not activated in a collision
CAUTION:
WORK PROCEDURE
Check the SRS components using the table below.
Ensure entire SRS operates properly.
SRS INSPECTION (FOR REAR COLLISION)
Part Inspection Driver air bag module If the driver air bag has not been activated:
Remove driver air bag module. Check harness cover and connectors fo ...
Avoiding collision and rollover
WARNING
Improper or unsafe operation of the Nissan Armada may lead to loss of control,
serious accidents, or vehicle rollover. Always drive responsibly and remain fully
aware of road conditions and surroundings.
Stay alert at all times and practice defensive driving techniques when operating
...

0.0051