
Nissan Armada 2025-2026 Service and Repair Manual: Removal and Installation
REMOVAL
Remove front center console body assembly. Refer to Removal and Installation.
Disengage fixing pawls, and then remove rear floor duct LH 1  and RH 1
  .
.
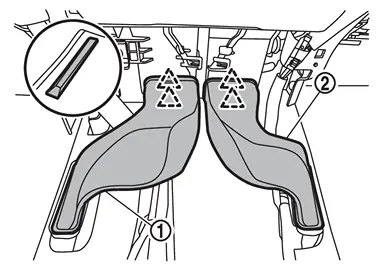
 | : Pawl |
Peel off front floor carpet to secure work space. Refer to Removal and Installation.
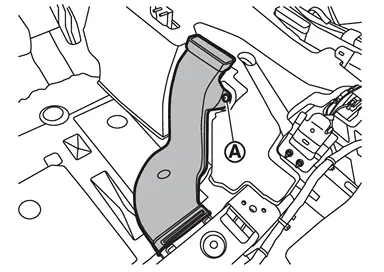
Remove fixing clip  , and then remove rear floor duct 2.
Remove mounting screw and disengage harness fixing clip, and then remove rear floor duct 3.
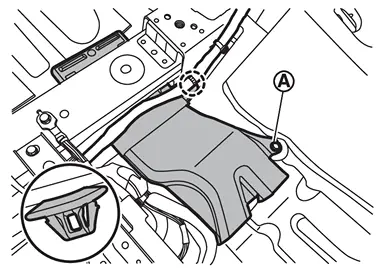
 | : Clip |
INSTALLATION
Install in the reverse order of removal.
 Rear Floor Duct
...
 Rear
Rear
...
Other materials:
SONAR CONTROL UNIT : Removal & Installation
REMOVAL
CAUTION:
Before replacing sonar control unit, perform “ADDITIONAL SERVICE WHEN REPLACING SONAR CONTROL UNIT". For details, Refer to Work Procedure
Remove the luggage side lower finisher LH. Refer to Removal and Installation
Disconnect the harness connectors from sonar control unit .
Rem ...
Diagnosis Procedure
CHECK DOOR SWITCH
Check door switch.
Refer to Component Function Check.
Is the inspection result normal?
YES>>
GO TO 2.
NO>>
Repair or replace the malfunctioning parts.
CHECK UNLOCK SENSOR
Check unlock sensor.
Refer to Diagnosis Procedure.
Is the inspection result normal?
YES>>
...
ROAD WHEEL : Service Data
ALUMINUM WHEEL
Item Limit Runout Axial runout 0.3 mm (0.012 in) or less Radial runout Allowable unbalance Dynamic (At flange) 5 g (0.17 oz) or less (one side) Static (At flange) 10 g (0.35 oz) or less
ALUMINUM WHEEL (EMERGENCY)
Item Limit Runout Axial runout (Average) 0.3 mm (0.012 ...

0.0054