
Nissan Armada 2025-2026 Service and Repair Manual: Removal and Installation
CAUTION:
Never damage the body panel.
REMOVAL
CAUTION:
Remove center pillar lower garnish. Refer to Removal and Installation.
Pull out tongue of seat belt pre-tensioner retractor from buckle of lap pre-tensioner. Refer to Removal and Installation.
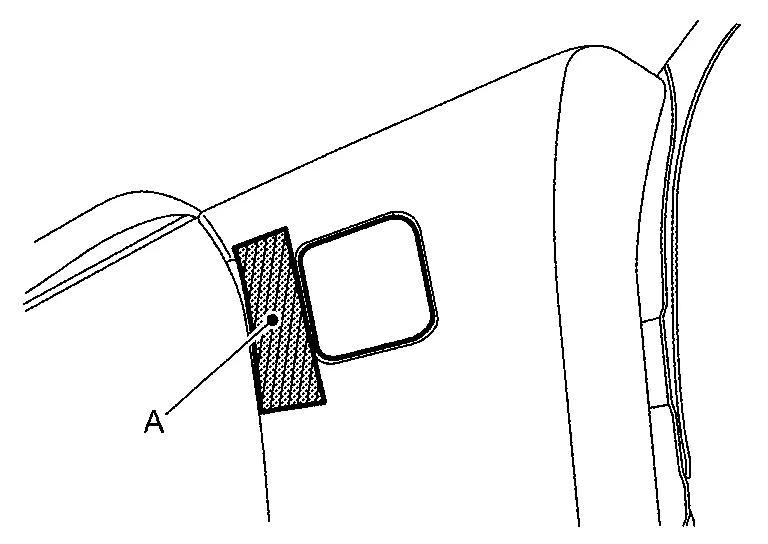
Apply protective tape (A) on center pillar upper garnish to protect it from damage.
Disengage pillar cap fixing pawls of center pillar upper garnish using a remover tool (A), and then remove pillar cap of center pillar upper garnish.
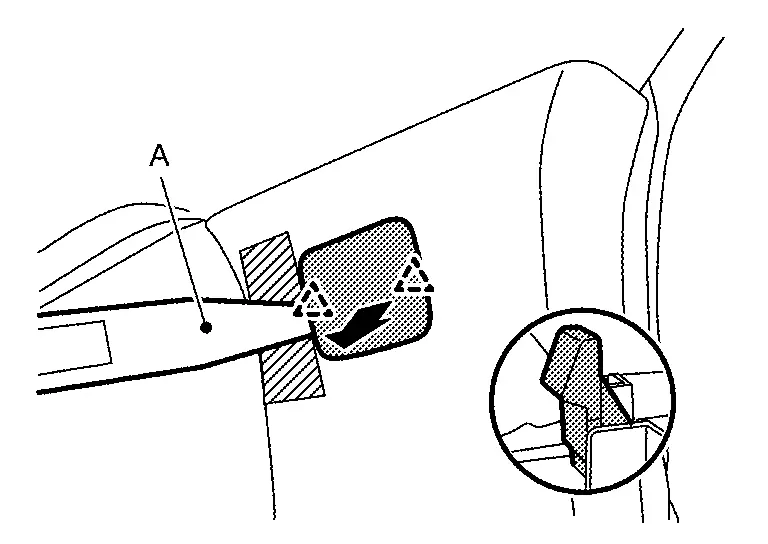
 | : Pawl |
Remove center pillar upper garnish mounting bolt.
Disengage center pillar upper garnish lower side fixing clip.
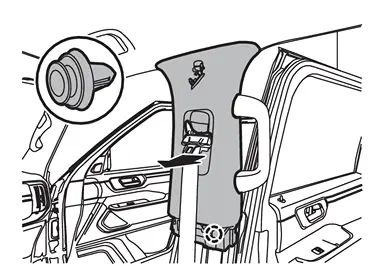
 | : Clip |
Pull out seat belt, and then remove center pillar upper garnish.
INSTALLATION
Note the following items, and then install in the reverse order of removal.
CAUTION:
Visually check clip for deformation and damage during installation. Replace with new ones if necessary.
Check in advance that clip is accurately aligned with the hole on body panel, and then install by pressing in.

 Floor Trim
...
Other materials:
Work Procedure
Always adjust the camera aiming after removing and installing or replacing the front camera unit.
Always adjust the camera aiming after removing and installing or replacing the windshield glass.
CAUTION:
Place the vehicle on level ground when the camera aiming adjustment is operated.
Be sure to pla ...
Diagnosis Procedure
PERFORM ECM SELF-DIAGNOSIS
With CONSULT
Perform self-diagnosis for “ECM�.
Is any DTC detected?
YES >>
Check DTC detected item. Refer to DTC Index.
NO>>
GO TO 2.
PERFORM SELF-DIAGNOSIS
With CONSULT
Perform self-diagnosis for "AWD/4WD".
Is any DTC detected?
YES>>
Check the DTC ...
Hydraulic Layout
EVAP canister purge volume control solenoid valve EVAP resonator EVAP line Fuel line Fuel tank Fuel filler neck EVAP canister ...

0.0048