
Nissan Armada 2025-2026 Service and Repair Manual: Removal and Installation
CAUTION:
Never damage the body panel.
REMOVAL
CAUTION:
Remove luggage rear plate. Refer to Removal and Installation.
Release luggage side lower finisher portion of back door weather-strip. Refer to Removal and Installation.
Set second seat to walk-in position.
Remove third seat. Refer to Removal and Installation.
Remove second seat belt anchor plate. Refer to Removal and Installation.
Remove third seat belt anchor plate. Refer to Removal and Installation.
Remove luggage hook.Slide pin part  of luggage hook
  using a remover tool (B) to release fixing pawls of luggage hook.
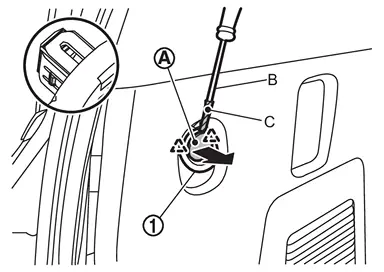
CAUTION:
Use a remover tool wrapped in protective tape (C) to prevent damage to the parts.
 | : Pawl |
Remove rope hooks.Disengage rope hook fixing pawls using a remover tool (A), and then open rope hook cover.
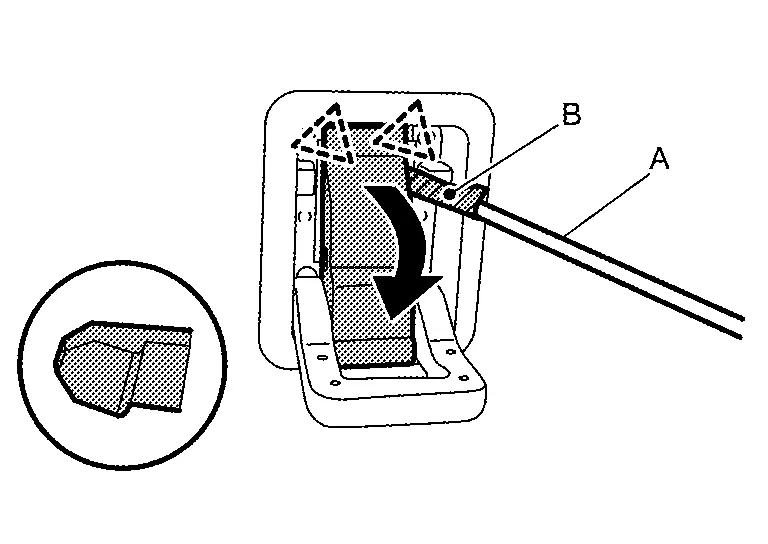
CAUTION:
Use a remover tool wrapped in protective tape (B) to prevent damage the parts.
| : Pawl |
, and then remove rope hook.
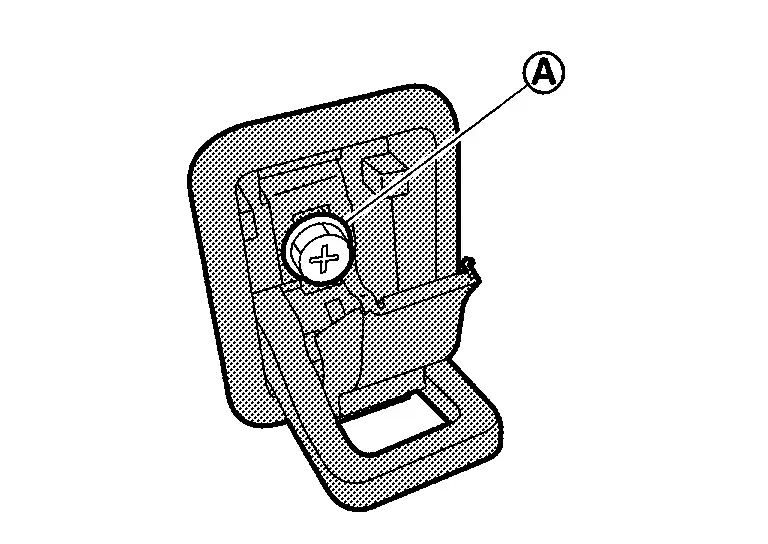
Remove seat switch escutcheon.Apply protective tape (A) on luggage side lower finisher to protect it from damage.
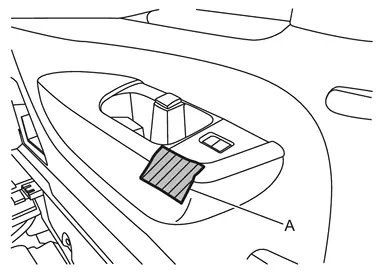
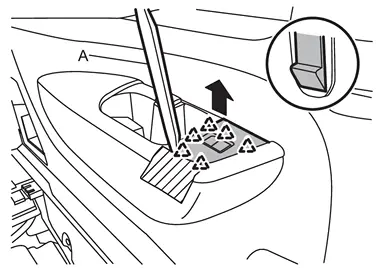
| : Pawl |
Apply protective tapes (A) on luggage side lower finisher to protect it from damage.
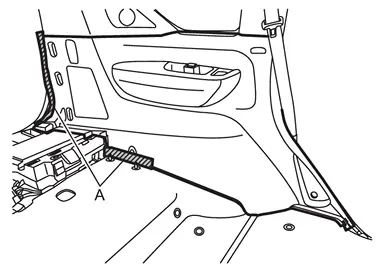
Disengage luggage side lower finisher fixing clips and pawls using a remover tool (A) according to numerical order 1→4 indicated by arrows as shown in the figure.
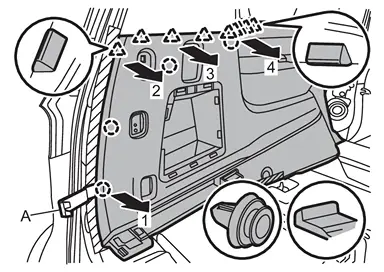
 | : Clip |
| : Pawl |
Disengage luggage side lower finisher fixing clips and pawls according to numerical order 1→4 indicated by arrows as shown in the figure.
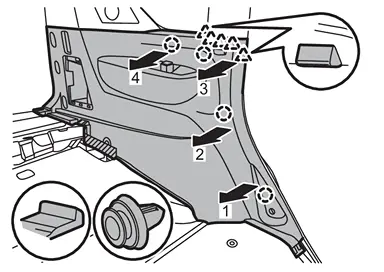
| : Clip |
| : Pawl |
Disengage each harness connector, and then remove luggage side lower finisher.
INSTALLATION
Note the following items, and then install in the reverse order of removal.
CAUTION:
Check in advance that clips and pawls are accurately aligned with the portions on body panel, and then install by pressing in.
After installation, check that the lip of body side welt covers. Refer to Inspection


Other materials:
High Intensity Cabin Structure
In recent years, the body construction of vehicles is changing for the purpose of protecting passengers at the time of the collision.
A greater use of high strength sheet steel reinforcements and the adoption of sheet steels of different thicknesses are good examples of securing survival space for p ...
Removal and Installation
REMOVAL
CAUTION:
Never damage the back door panel.
Remove back door trim. Refer to Removal and Installation.
Disconnect harness connectors.
Remove mounting nuts .
Apply protective tapes (A) on the parts to protect it from damage.
Disengage fixing clips using remover tool (A).
: Clip
Disconn ...
Work Procedure
CHECK ANTI-PINCH FUNCTION
Fully open the door glass.
Place a piece of wood near fully closed position.
Close door glass completely with AUTO UP.
Check the following conditions.
Check that door glass lowers for 145 mm (5.71 in) without pinching piece of wood and stops.
Check that door glass does not ...

0.0052