
Nissan Armada 2025-2026 Service and Repair Manual: Removal and Installation
REMOVAL
CAUTION:
Before removing, take a short memo/photo to remember door harness and cable layout.
Rear Door Inner Frame Front
Remove pull handle bracket. Refer to Removal and Installation.
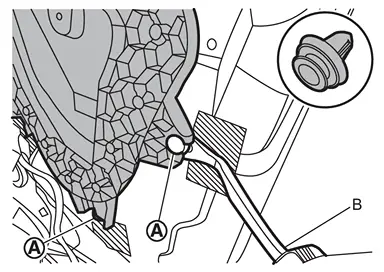
Apply protective tapes (A) on the part to protect it from damage.
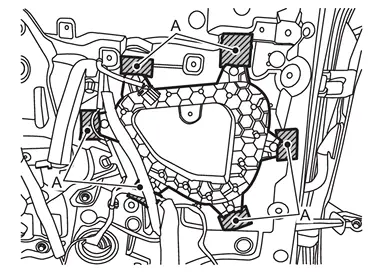
Disengage fixing clips  by using removal tool (B), and then remove rear door inner frame front.
Rear Door Inner Frame Rear
Remove rear door finisher. Refer to Removal and Installation.
Disconnect rear door switch harness connector and disengage harness fixing clips.
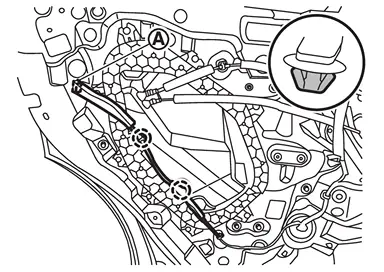
 | : Clip |
Apply protective tapes (A) on the part to protect it from damage.
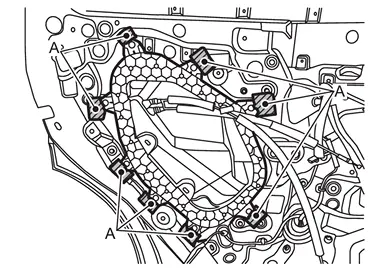
Disengage rear door inner frame rear fixing clips by using removal tool (B).
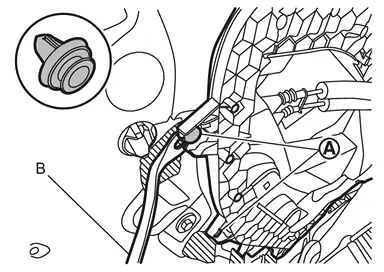
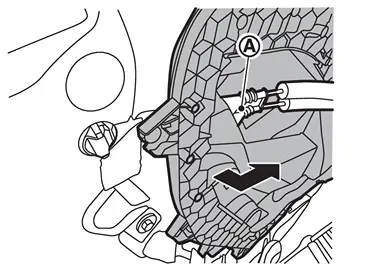
Remove grommet of rear door inside handle cable and rear door lock knob cable , and then remove rear door inner frame rear.
INSTALLATION
Install in the reverse order of removal.


Other materials:
Removal and Installation
REMOVAL
Remove back door assembly. Refer to Removal and Installation.
Remove back door hinge mounting nuts, and then remove back door hinge.
INSTALLATION
Note the following items, and then install in the reverse order of removal.
CAUTION:
Before installation, apply anticorrosive agent onto mounting ...
Work Procedure
CHOOSE METHOD
There are two ways of learning method.
Which method do you choose?
With CONSULT>>
GO TO 2.
Without CONSULT>>
GO TO 3.
WITH CONSULT
With CONSULT
Ignition switch ON.
Perform "Steering column position learning� in "Work support" mode of "STEERING COLUMN� using CONSULT.
...
Hydraulic Layout
EVAP canister purge volume control solenoid valve EVAP resonator EVAP line Fuel line Fuel tank Fuel filler neck EVAP canister ...

0.0048