
Nissan Armada 2025-2026 Service and Repair Manual: Removal and Installation
REMOVAL
Remove front door outside molding. Refer to Removal and Installation.
Remove front door glass run of upper side. Refer to Removal and Installation.
Remove front door weather-strip of upper side. Refer to Removal and Installation.
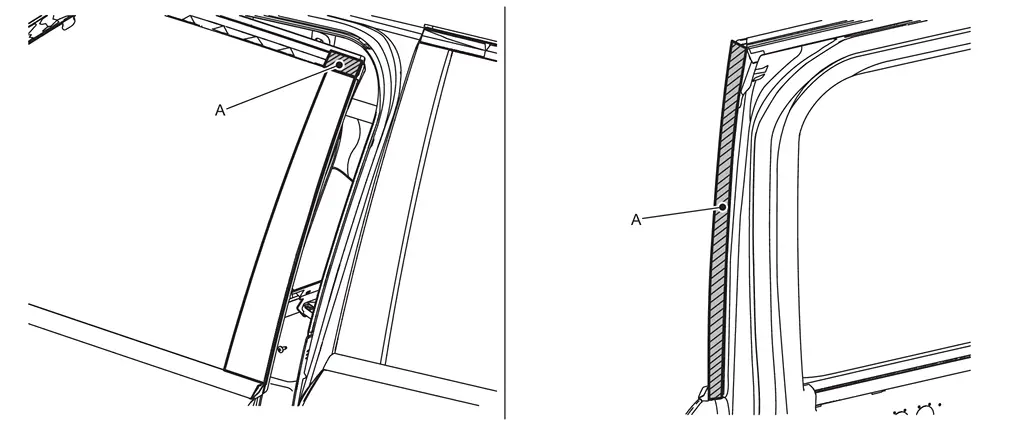
Apply protective tapes (A) on the part to protect it from damage.
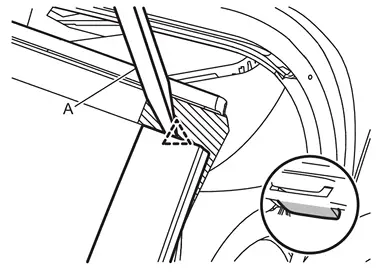
Disengage fixing pawl using remover tool (A).
CAUTION:
Never damage the front door panel.
Never lift the front door sash cover with excessive force.
 | : Pawl |
Insert a remover tool (A) between front door panel and front door sash cover, and then cut double-sided tape using a cutter (B) while lifting front door sash cover.
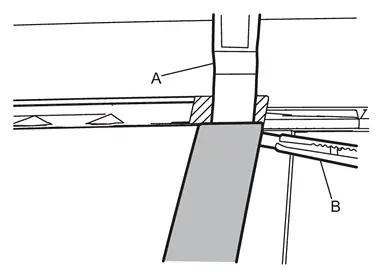
Remove front door sash cover.
CAUTION:
Remove double-sided tape remaining on front door panel and back of front door sash cover with a double-sided tape remover, after removing front door sash cover.
INSTALLATION
Note the following items, and then install in the reverse order of removal.
CAUTION:
Always replace double-sided tape and EPT seal with new ones, if front door sash cover is reused.
Degrease front door sash cover mounting surface of front door panel.
Paint grain or dust on mounting surface of front door sash cover may spoil exterior appearance if it remains. Clean the mounting surface and check that no paint grain or dust remains, before starting the operation.
Never wash the vehicle within 24 hours after installing so as to keep adhesive.
 NOTE:
NOTE:
Fitting adjustment cannot be performed.
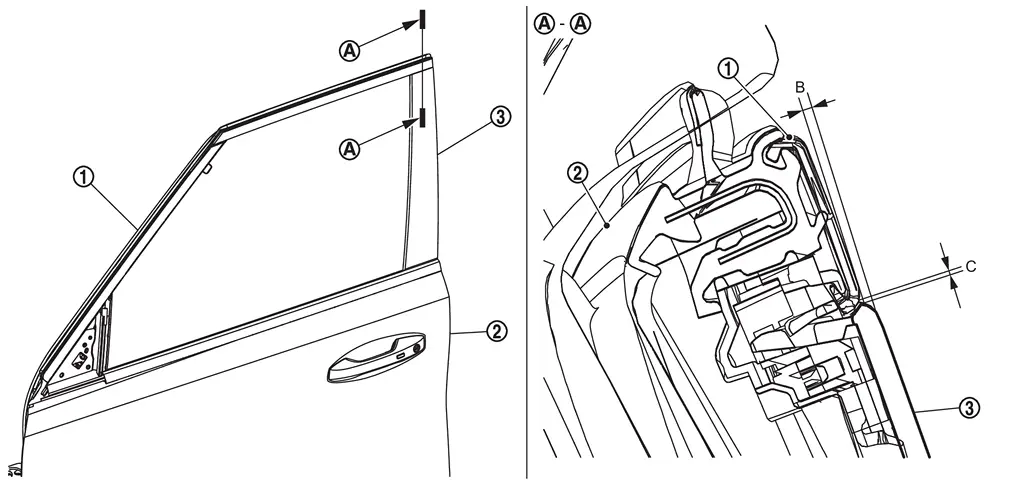

Front door sash molding 
Front door panel 
Front door sash cover B : 0.2 - 2.0 mm (0.008 - 0.079 in) C : 0.1 mm (0.004 in)


Other materials:
Removal and Installation
CAUTION:
Never bend the pawl of power window switch finisher.
REMOVAL
Remove front door finisher (passenger side). Refer to Removal & Installation.
Disengage door lock and unlock switch (passenger side) fixing pawls using a remover tool (A), and then remove door lock and unlock switch (passenger ...
Removal and Installation
WARNING:
Always observe the following items for preventing accidental activation.
Before servicing, ignition switch OFF, disconnect battery negative terminal and wait for 3 minutes or more (discharges electricity held in the additional power supply circuit of the air bag diagnosis sensor unit). Refe ...
Work Procedure
WRITING THE REQUIRED INFORMATION FOR CONTROL UNIT REPLACEMENT
With CONSULT
Ignition switch ON.
Select "AWD/4WD".
Select "Replace ECU".
Perform the work according to the procedure displayed in CONSULT.
CAUTION:
The following conditions must be maintained during ECU modernization procedure.
Ignition s ...

0.005