
Nissan Armada 2025-2026 Service and Repair Manual: Removal and Installation
REMOVAL
CAUTION:
Never damage the rear door panel.
Fully open rear door glass.
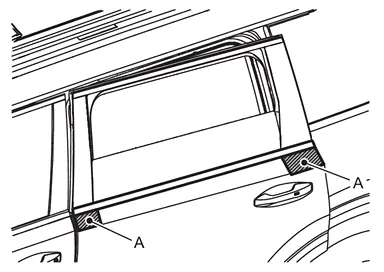
Apply protective tapes (A) on the part to protect it from damage.
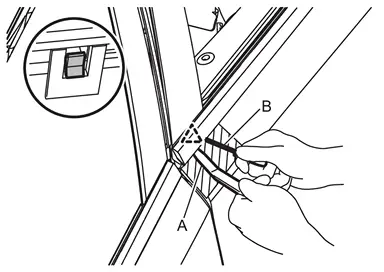
Disengage rear door outside molding fixing pawls of front and rear side using remover tool (A) and (B).
CAUTION:
Never lift rear door outside molding with excessive force to prevent damage to the part.
 | : Pawl |
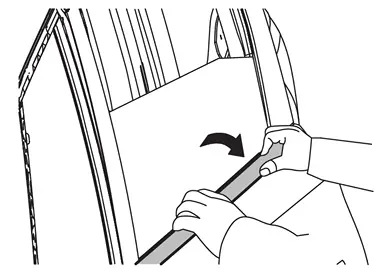
Twist rear door outside molding toward the direction of arrow in the figure, and then lift up and remove it.
INSTALLATION
Note the following items, and then install in the reverse order of removal.
CAUTION:
When installing rear door outside molding, it must take account of the mating surface with the rear door sash cover.

 Parting Seal
...
Other materials:
Symptom Table
NOTE:
Symptom Possible cause Inspection item All the following lamps does not turn ON.
Map lamp
Personal lamp
Rear room lamp
Luggage room lamp
Front foot lamp
Center console tray lamp
Door pocket lamp
Vanity mirror lamp
Glove box lamp
Console box lamp
Advanced ambient light
Fuse
Interior room la ...
Diagnosis Procedure
CHECK AUTO ANTI-DAZZLING INSIDE MIRROR POWER SUPPLY AND GROUND CIRCUIT
Check auto anti-dazzling inside mirror power supply and ground circuit. Refer to Diagnosis Procedure.
Is the inspection result normal?
YES>>
GO TO 2.
NO>>
Repair or replace the malfunctioning parts.
CHECK AUTO ANTI- ...
Inspection Procedure
INSTRUMENT PANEL
Most incidents are caused by contact and movement between:
Cluster lid A and instrument panel
Acrylic lens and combination meter housing
Instrument panel to front pillar garnish
Instrument panel to windshield
Instrument panel mounting pins
Wiring harnesses behind the combination met ...

0.0053