Exploded View
Bank 1 side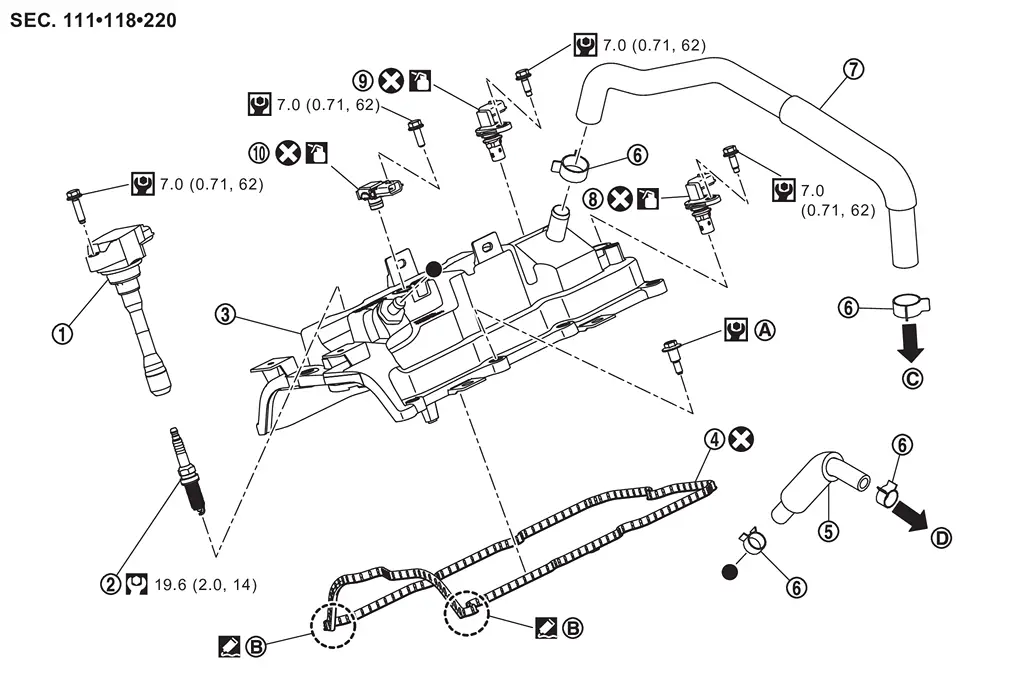
 |
Ignition coil |  |
Spark plug |  |
Rocker cover |
 |
Rocker cover gasket |  |
Blow-by hose 1 (bank 1) |  |
Clamp |
 |
Blow-by hose 2 (bank 1) |  |
Intake camshaft position sensor |  |
Exhaust camshaft position sensor |
 |
Crankcase pressure sensor | ||||
 |
Comply with the installation procedure when tightening. Refer to Removal and Installation. |  |
Camshaft bracket side |  |
To rocker cover (bank 2). |
 |
To intake manifold. Refer to Exploded View. | ||||
 |
: N·m (kg-m, ft-lb) | ||||
 |
: N·m (kg-m, in-lb) | ||||
 |
: Always replace after every disassembly. | ||||
 |
: Should be lubricated with oil. | ||||
 |
: Sealing point | ||||
 |
: Indicates that the parts is connected at points with same symbols in actual vehicle. | ||||
Bank 2 side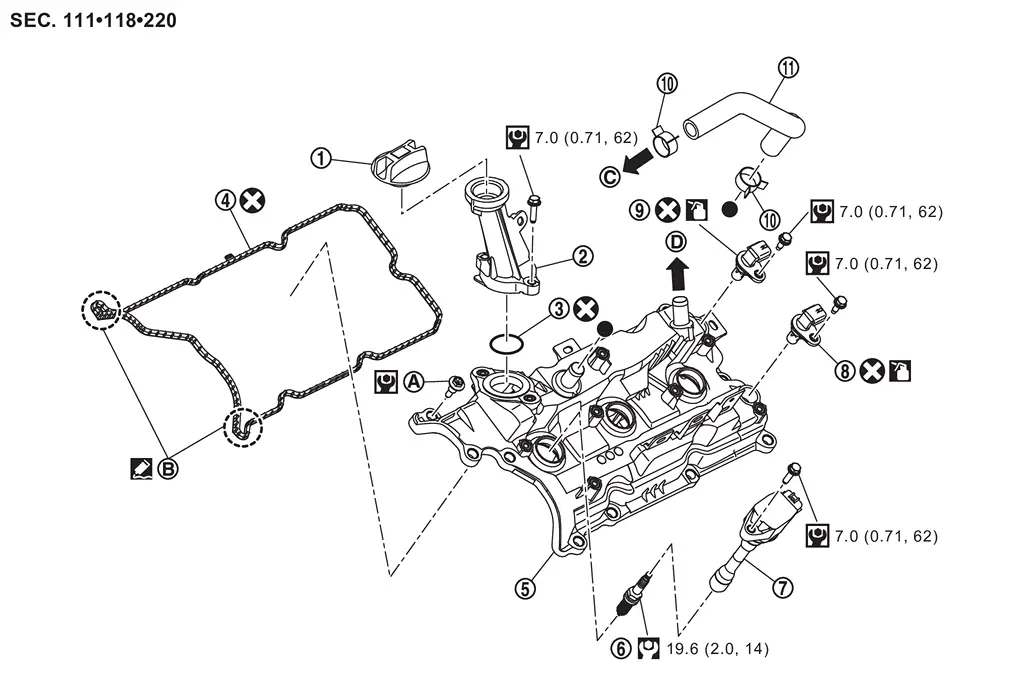
|
Oil filler cap | |
Oil filler tube | |
O-ring |
|
Rocker cover gasket | |
Rocker cover | |
Spark plug |
|
Ignition coil | |
Exhaust camshaft position sensor | |
Intake camshaft position sensor |
|
Clamp |  |
Blow-by hose (bank 2) | ||
|
Comply with the installation procedure when tightening. Refer to Removal and Installation. | |
Camshaft bracket side | |
To air duct. Refer to Exploded View. |
|
To rocker cover (bank 1). | ||||
|
: N·m (kg-m, ft-lb) | ||||
|
: N·m (kg-m, in-lb) | ||||
|
: Always replace after every disassembly. | ||||
|
: Should be lubricated with oil. | ||||
|
: Sealing point | ||||
|
: Indicates that the parts is connected at points with same symbols in actual vehicle. | ||||
Removal & Installation
WARNING:
-
Jacking up or lift up the vehicle may the vehicle height to go down which cause a personal injury and/or damage to the air suspension component parts. Refer to Precaution for when Jacking and Lifting Up the vehicle with Electronic Air Suspension System.
REMOVAL
Remove engine cover. Refer to Removal and Installation.
Remove ignition coil. Refer to Removal and Installation.
Remove spark plug with a spark plug wrench (commercial service tool).
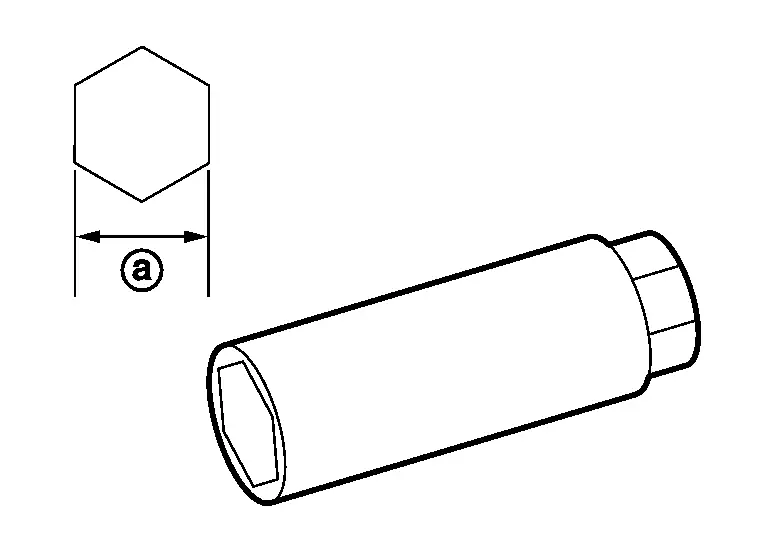
 |
: 14 mm (0.55 in) |
INSTALLATION
Install in the reverse order of removal.
Inspection
WARNING:
-
Jacking up or lift up the vehicle may the vehicle height to go down which cause a personal injury and/or damage to the air suspension component parts. Refer to Precaution for when Jacking and Lifting Up the vehicle with Electronic Air Suspension System.
INSPECTION AFTER REMOVAL
Use the standard type spark plug for normal condition.
| Spark plug (Standard type) | : Refer to Spark Plug. |
CAUTION:
-
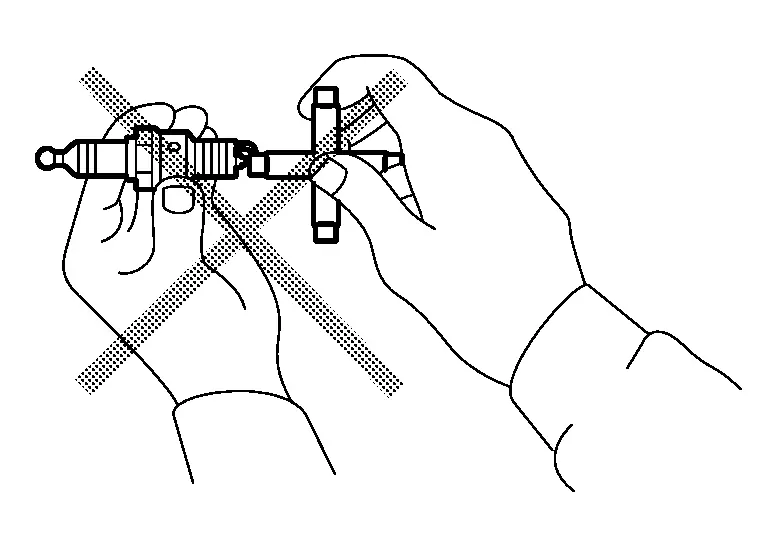
Never drop or shock spark plug.
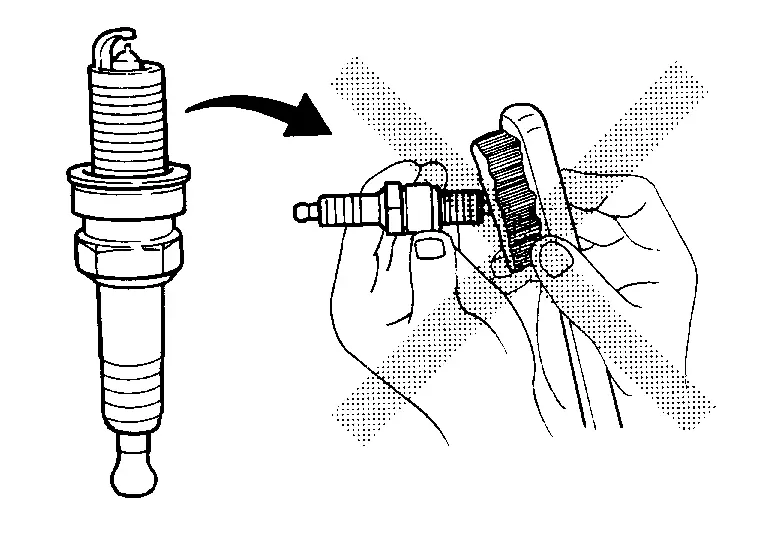
-
Never use a wire brush for cleaning.
-
If plug tip is covered with carbon, use spark plug cleaner to clean.
Cleaner air pressure : Less than 588 kPa (6 kg/cm2, 85 psi) Cleaning time : Less than 20 seconds -
Check and adjustment of plug gap is not required between change intervals.
Other materials
Speed Limit Assist (a feature of ProPILOT Assist 1.1 and 2.1)
Speed Limit Assist in the Nissan Armada is an advanced functionality integrated
within the ProPILOT Assist 1.1 and 2.1 systems. This feature works in conjunction
with the built-in map locator and Traffic Sign Recognition (TSR) system to help
drivers maintain compliance with posted speed limits ...
Noise
Symptom Table
Symptom Noise source Probable cause Corrective action
Unusual noise from A/C compressor when A/C is ON.
Inside of A/C compressor
Wear, breakage, or clogging of foreign material in inner parts.
Check A/C compressor oil. Refer to Inspection.
Magnet clutch
Contact of clut ...
Additional Service When Replacing Driving Video Recorder Control Module
Work Procedure
DRIVING VIDEO RECORDER CONTROL MODULE REPLACEMENT
Replace driving video recorder control module. Refer to Removal and Installation.
>>
GO TO 2.
WRITING OF VIN DATA TO DRIVING VIDEO RECORDER CONTROL MODULE
With CONSULT
Ignition switch ON and wait at least 5 seconds.
Select ...