Exploded View
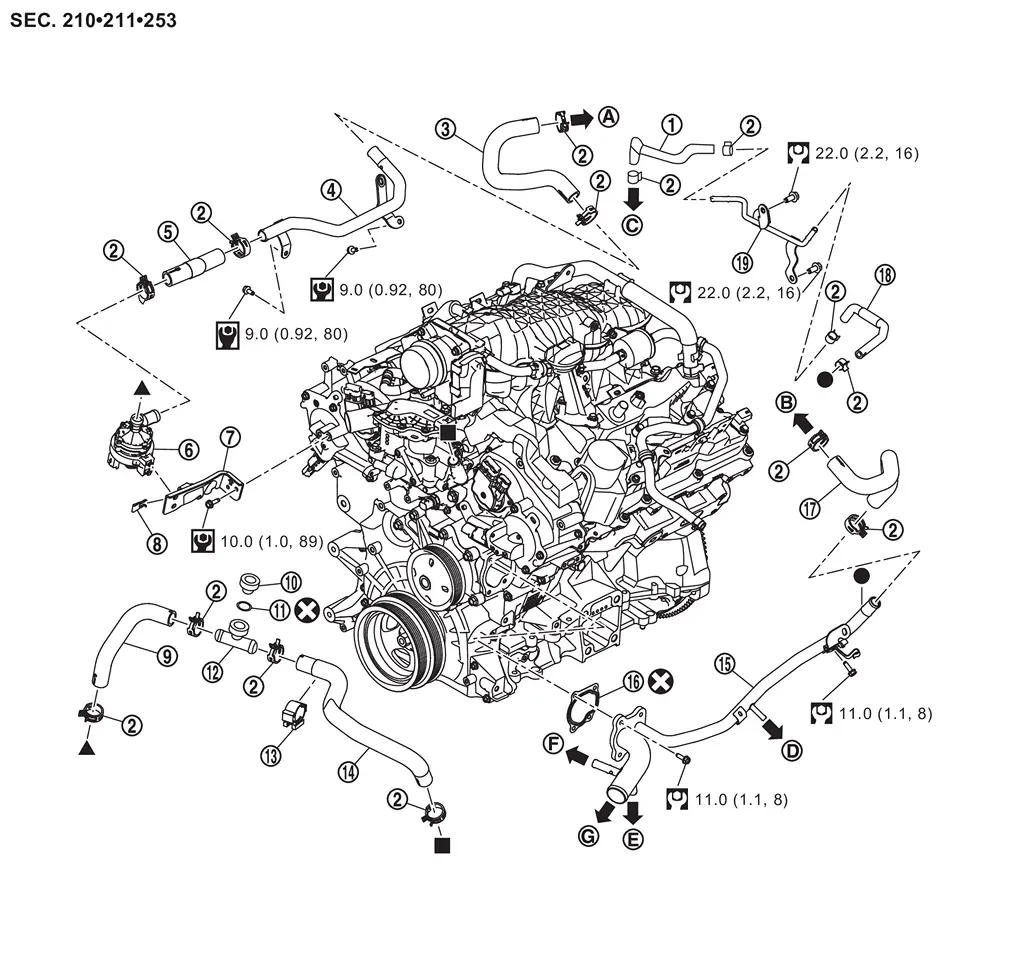
 |
Water hose 1 |  |
Clamp |  |
Water hose 2 |
 |
Water pipe 1 |  |
Water hose 3 |  |
Electric water pump |
 |
Bracket |  |
Clip |  |
Water hose 4 |
 |
Drain plug |  |
O-ring |  |
Connector |
 |
Clip |  |
Water hose 5 |  |
Water pipe 2 |
 |
Gasket |  |
Water hose 6 |  |
Water hose 7 |
 |
Water pipe assembly | ||||
 |
To front heater pipe assembly. Refer to Exploded View. |  |
To front heater outlet pipe assembly. Refer to Exploded View. |  |
To water outlet tube. Refer to Exploded View. |
 |
To water outlet tube. Refer to Exploded View. |  |
To oil cooler. Refer to Exploded View. |  |
To reservoir tank. Refer to RADIATOR : Exploded View. |
 |
To radiator. Refer to RADIATOR : Exploded View. | ||||
 |
: N·m (kg-m, in-lb) | ||||
 |
: N·m (kg-m, ft-lb) | ||||
 |
: Always replace after every disassembly. | ||||
 , , , ,  Indicates that the part is connected at points with same symbol in actual vehicle. Indicates that the part is connected at points with same symbol in actual vehicle. |
|||||
Removal and Installation
WARNING:
-
Jacking up or lift up the vehicle may the vehicle height to go down which cause a personal injury and/or damage to the air suspension component parts. Refer to Precaution for when Jacking and Lifting Up the vehicle with Electronic Air Suspension System.
REMOVAL
Water pipe 1
Remove engine cover. Refer to Removal and Installation.
Drain engine coolant. Refer to ENGINE COOLANT : Draining.
CAUTION:
Perform this step when the engine is cold.
Remove air inlet tube 1. Refer to Removal & Installation.
Remove water hose 2 and water hose 3  from water pipe 1
  .
.
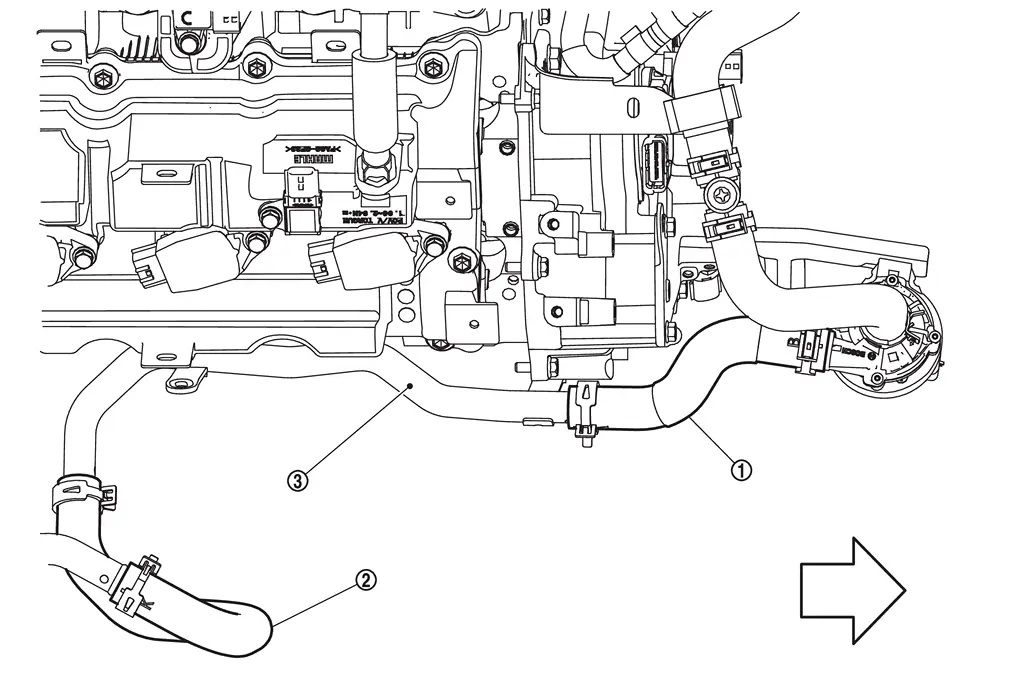
| : vehicle front |
Remove water pipe 1.
Water pipe 2
Remove engine cover. Refer to Removal and Installation.
Drain engine coolant. Refer to ENGINE COOLANT : Draining.
CAUTION:
Perform this step when the engine is cold.
Remove air cleaner assembly. Refer to Removal and Installation.
Remove air inlet tube 2. Refer to Removal & Installation.
Remove inlet air duct 2, bracket 2 and air duct 2 (bank 2). Refer to Exploded View.
Remove radiator hose (lower) .
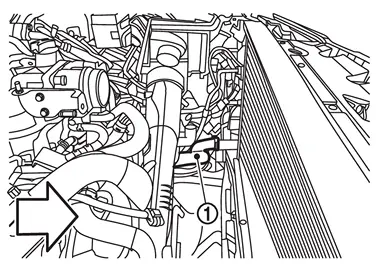
| : vehicle front |
Remove oil cooler hose 3. Refer to Exploded View.
Remove water hose 2. Refer to Exploded View.
Remove water outlet hose. Refer to Exploded View.
Remove water hose 6 .
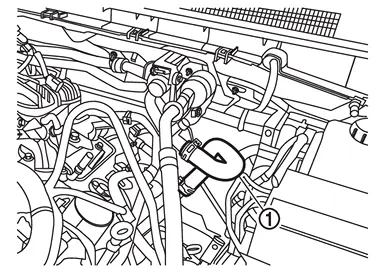
Remove water pipe 2.
INSTALLATION
Note the following and install in the reverse oreder removal.
CAUTION:
Do not reuse gasket.
-
Securely insert each hose, and install clamp at a position where it does not interfere with the pipe bulge.
Inspection
INSPECTION AFTER INSTALLATION
-
Check that the reservoir tank cap is tightened.
-
Check for leakage of engine coolant using the radiator cap tester adapter and the radiator cap tester (commercial service tool). Refer to ENGINE COOLANT : Inspection.
-
Start and warm up the engine. Visually check that there is no leakage of engine coolant.
Other materials
Precautions on supplemental restraint system
This section describes the Supplemental Restraint System (SRS) in the Nissan
Armada and provides essential safety information regarding its operation. The Nissan
Armada is equipped with multiple advanced protection systems designed to work together
with seat belts to reduce the risk of injury ...
Intelligent Key Warning Buzzer
Removal and Installation
REMOVALDisconnect Intelligent Key warning buzzer harness connector.
Disengage clip of frame, and then remove Intelligent Key warning buzzer .
: Clip
INSTALLATIONInstall in the reverse order of removal. ...
Glass Lid
Exploded View
Refer to Exploded View.
Removal and Installation
CAUTION:
Always work with a helper.REMOVALTilt glass lid up.
Disengage side trim from glass lid.
Remove glass lid fixing screws .
Remove glass lid from vehicle.INSTALLATIONNote the following items, and then install in the reverse ord ...