Exploded View
Refer to Exploded View.
Removal and Installation
CAUTION:
Always work with a helper.
REMOVAL
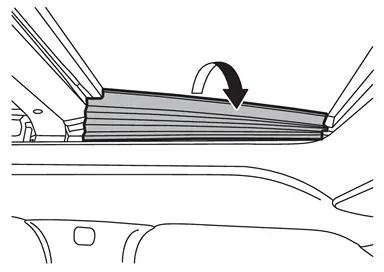
Tilt glass lid up.
Disengage side trim from glass lid.
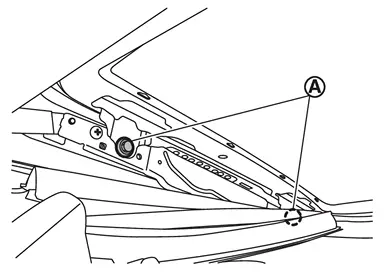
Remove glass lid fixing screws  .
.
Remove glass lid from vehicle.
INSTALLATION
Note the following items, and then install in the reverse order of removal.
CAUTION:
-
After installing the glass lid, perform the leak test and check that there is no malfunction.
-
After installation, perform fitting adjustment. Refer to Adjustment.
 NOTE:
NOTE:
Before installation, tilt glass lid up so that secure work space.
Adjustment
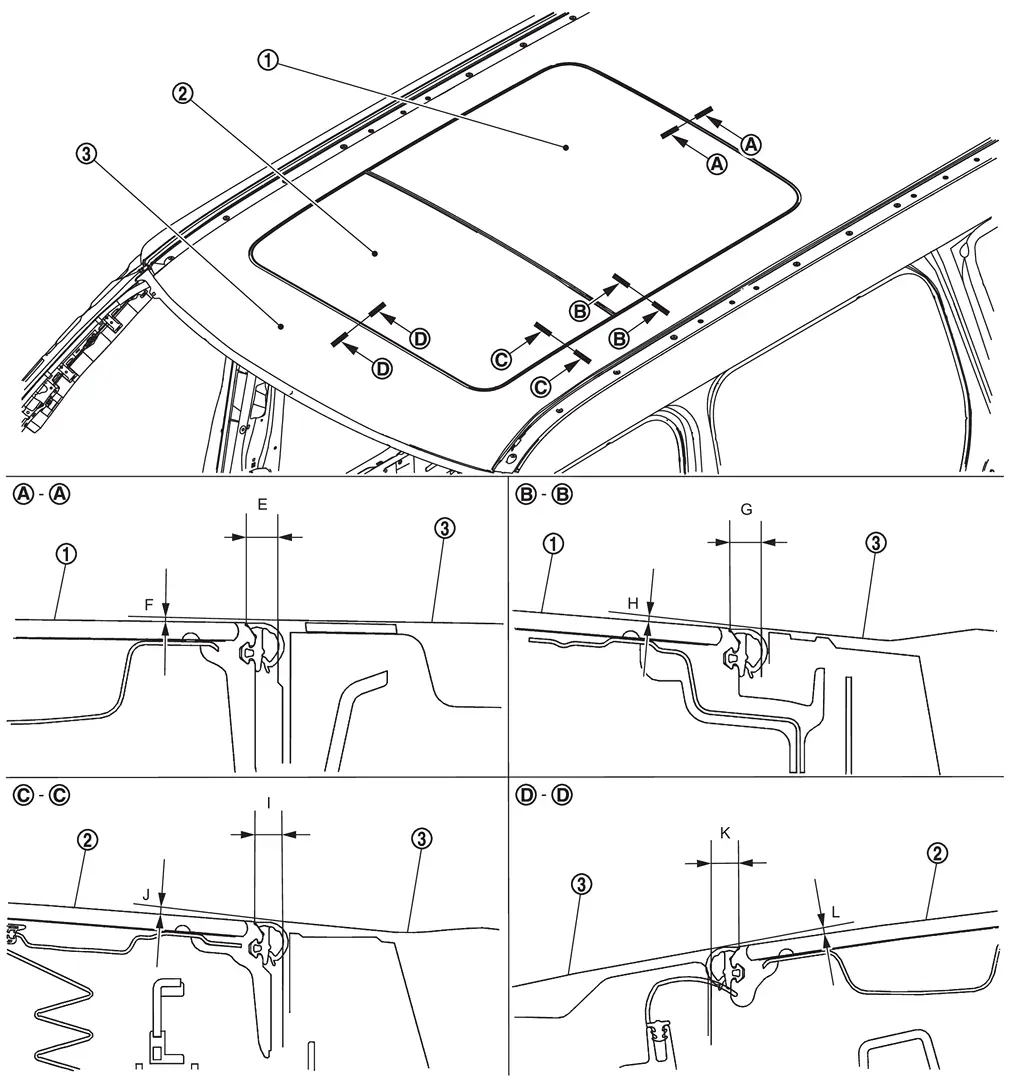
 |
Rear moonroof glass |  |
Glass lid |  |
Roof panel |
If the clearance and the surface height are out of specification, adjust them according to the procedures shown below.
NOTE:
Standard of surface height is given assuming that the glass upper side status is (+), and the glass lower side status is (−) relative to the roof panel.
Unit: mm [in]
| Portion | Standard | |||
|---|---|---|---|---|
| Roof panel – Rear moonroof glass | – |
E | Clearance |
6.4 – 8.0 [0.252 – 0.315] |
| F | Surface height |
(−2.4) – (+1.0) [(−0.094) – (+0.039)] |
||
 – – |
G | Clearance |
6.1 – 8.3 [0.240 – 0.327] |
|
| H | Surface height |
(−2.4) – (+1.0) [(−0.094) – (+0.039)] |
||
| Roof panel – Glass lid |  – – |
I | Clearance |
6.4 – 8.0 [0.252 – 0.315] |
| J | Surface height |
(−2.4) – (+1.0) [(−0.094) – (+0.039)] |
||
 – – |
K | Clearance |
6.4 – 8.0 [0.252 – 0.315] |
|
| L | Surface height |
(−2.4) – (+1.0) [(−0.094) – (+0.039)] |
||
Loosen glass lid fixing screws.
Adjust the clearance of glass lid and roof panel according to the fitting standard dimension.
To prevent glass lid from moving after adjustment, first tighten the fixing screw of front left, and then tighten the screw of rear right.
Tighten remaining fixing screws, being careful to prevent glass lid from moving.
Tilt glass lid up and down several times to check that it moves smoothly.
CAUTION:
After adjusting the moonroof unit assembly, perform additional service. Refer to Work Procedure.
Other materials
Parking Brake Does Not Release
Description
When the electric parking brake cannot be released by the parking brake switch or automatically releasing, following procedure can be released.CAUTION:
Never reuse the parking brake actuator.
When replacing parking brake actuator, replace rear brake caliper assembly.
Diagnosis Proc ...
Both Side Front Fog Lamps Are Not Turned on
Description
Both side front fog lamps are not turned ON in any condition.
Diagnosis Procedure
COMBINATION SWITCH INSPECTION
Check combination switch. Refer to Symptom Table.
Is the inspection result normal?
YES>>
GO TO 2.
NO>>
Repair or replace the malfunctioning part.
CHECK FRONT FOG ...
Additional Service When Replacing Ipdm E/r
Description
After replaced IPDM E/R, it is necessary to perform control unit configuration. For details, refer to Work Procedure.
Work Procedure
REPLACE IPDM E/R
Replace IPDM E/R. Refer to Removal and Installation.
>>
GO TO 2.
WRITING vehicle SPECIFICATION
Perform configuration (IPDM E/R). R ...