
Nissan Armada 2025-2026 Service and Repair Manual: Work Procedure
If system detects that driver is not facing forward even though driver is facing forward, perform face recognition check.
PREPARATION BEFORE FACE RECOGNITION CHECK
Make sure that all of the following conditions are satisfied
Vehicle speed is 0 km/h (stopped).
Shift position is "P" range.
Put driver's head on the headrest.
Adjust seat so that eye position is the same as the inner rear end of assist grip.
Adjust steering position to the lowest position and the farthest position from driver.
CAUTION:
It is necessary for another person to check the position of driver's eyes from the passenger side.
If the eye position is different from the specified position, face recognition cannot be performed correctly.
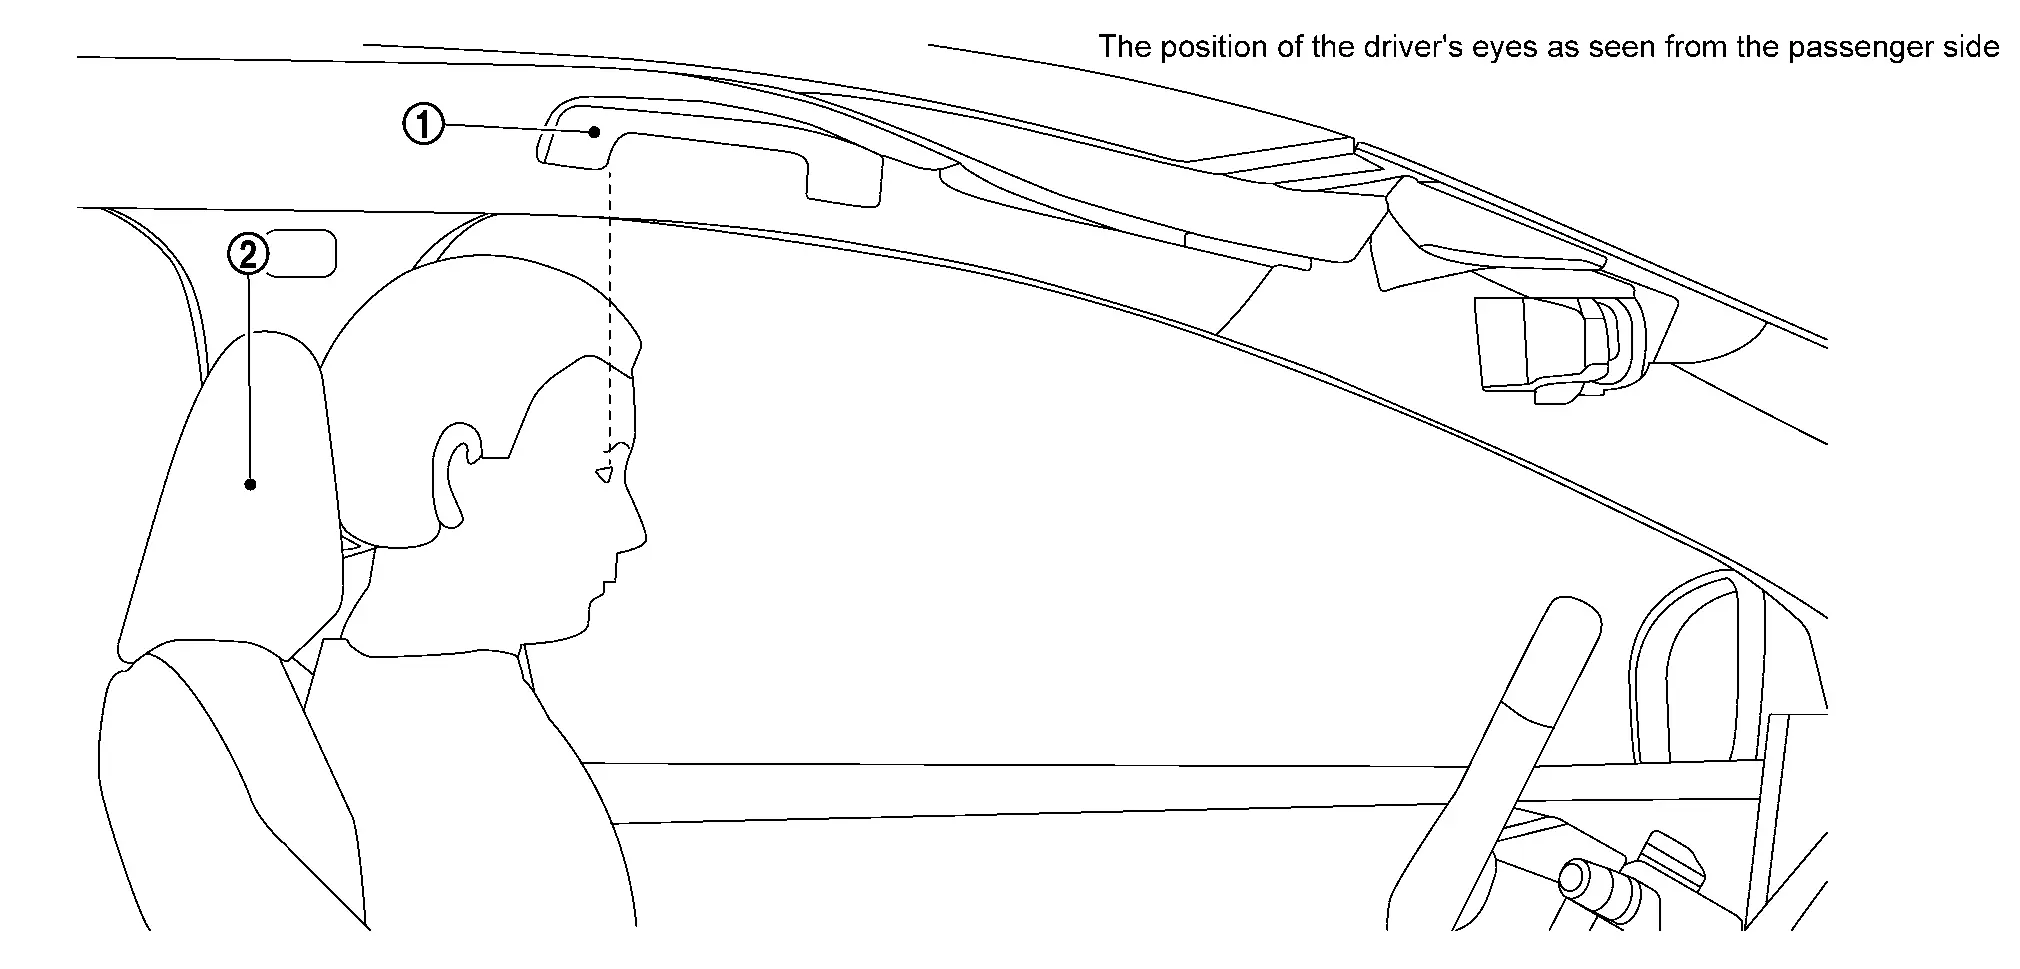
 | Assist grip |  | Head rest |
GO TO 2.
PERFORM FACE RECOGNITION CHECK
 With CONSULT
Ignition switch is ON.
Select "Work Support" in "Driver Monitor Camera".
Select “FACIAL RECOGNITION CHECK�.
Touch “Start�.
Check the note displayed on CONSULT and touch “Next�.
Follow CONSULT screen to check face recognition.
CAUTION:
Do not turn driver's face for 10 to 15 seconds approximately until the result is displayed.
Observe the following precautions while working.
Keep head on the headrest without moving seat position.
Do not wear sunglasses or masks.
Do not wear a hat or muffler that hides face.
Do not scratch face (do not hide eyes, nose, mouth).
Do not intentionally change facial expression (squinting, smiling, etc.).
Do not turn face any direction without instruction.
 NOTE:
NOTE:Face recognition check is performed as following order;
Front of the vehicle
 → Right front pillar
 → Navigation screen
 → Front of the vehicle → Right door mirror
 → Left door mirror
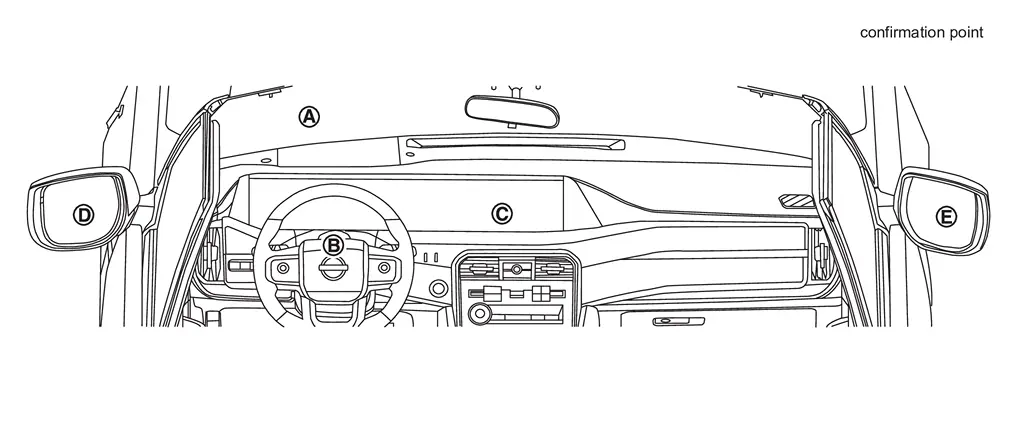
Perform twice only in front of the vehicle.
Confirm each check result.
NOTE:When the result is "NG" and the precaution is surely followed, touch "Next."
When the result is "NG" and the precaution is not followed, touch "Retry."
GO TO 3.
SAVE RESULT
With CONSULT
After completing all the work, touch "Screen Capture" to save the screen.
After saving the screen, touch "Save" to save the log information.
WORK END


Other materials:
Exploded View
Rear side spoiler Double-sided tape
[t: 2.5 mm (0.098 in)] : Clip : Always replace after every disassembly. ...
Removal and Installation
REMOVAL
Remove rear floor carpet. Refer to Removal & Installation.
Disconnect inside key antenna (luggage room) harness connector.
Remove inside key antenna (luggage room) fixing nuts , and then remove inside key antenna (luggage room carpet) .
INSTALLATION
Install in the reverse order of remo ...
Exploded View
Hood lock assembly Hood lock control cable assembly Hood lock control handle : Clip : Pawl : N·m (kg-m, in-lb) : Body grease ...

0.0077