Exploded View
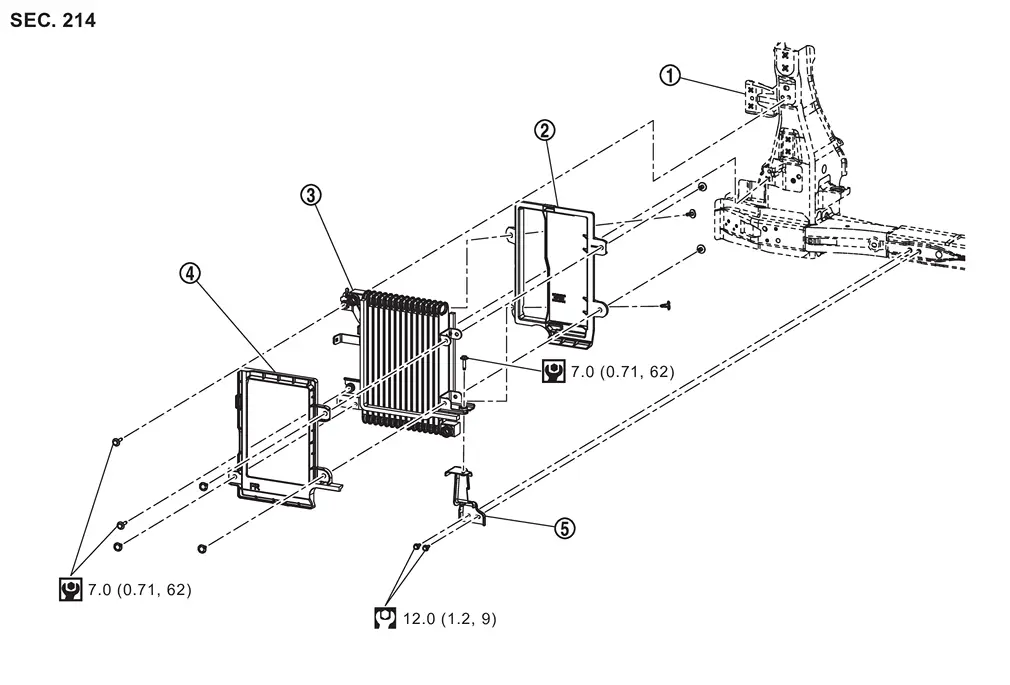
 |
Bracket |  |
A/T fluid cooler air guide RR |  |
A/T fluid cooler |
 |
A/T fluid cooler air guide FR |  |
Bracket | ||
 |
: N·m (kg-m, ft-lb) | ||||
 |
: N·m (kg-m, in-lb) | ||||
Removal and Installation
WARNING:
-
Jacking up or lift up the vehicle may the vehicle height to go down which cause a personal injury and/or damage to the air suspension component parts. Refer to Precaution for when Jacking and Lifting Up the vehicle with Electronic Air Suspension System.
REMOVAL
 NOTE:
NOTE:
When removing components such as hoses, tubes/lines, etc., cap or plug openings to prevent fluid from spilling.
CAUTION:
Perform this step when the engine is cold.
Remove Front bumper. Refer to Exploded View.
Remove clip ( ) and remove A/T fluid cooler air guide FR
  from A/T fluid cooler.
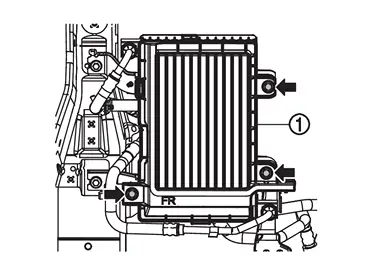
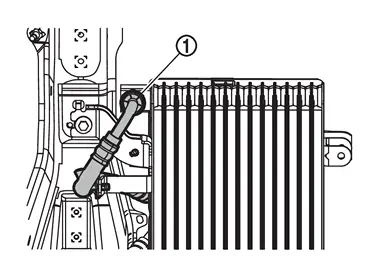
Remove A/T fluid cooler hose A from the A/T fluid cooler using the following procedure:
-
Remove A/T fluid cooler hose cap
from A/T fluid cooler hose A  .
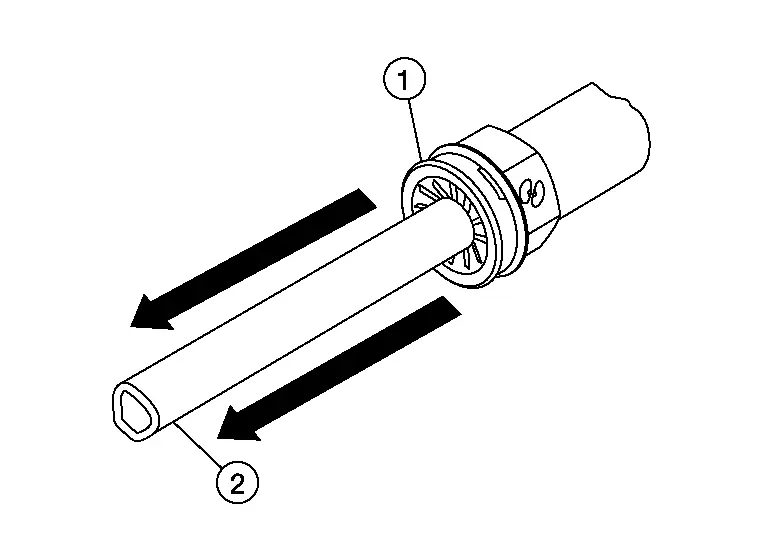
.
-
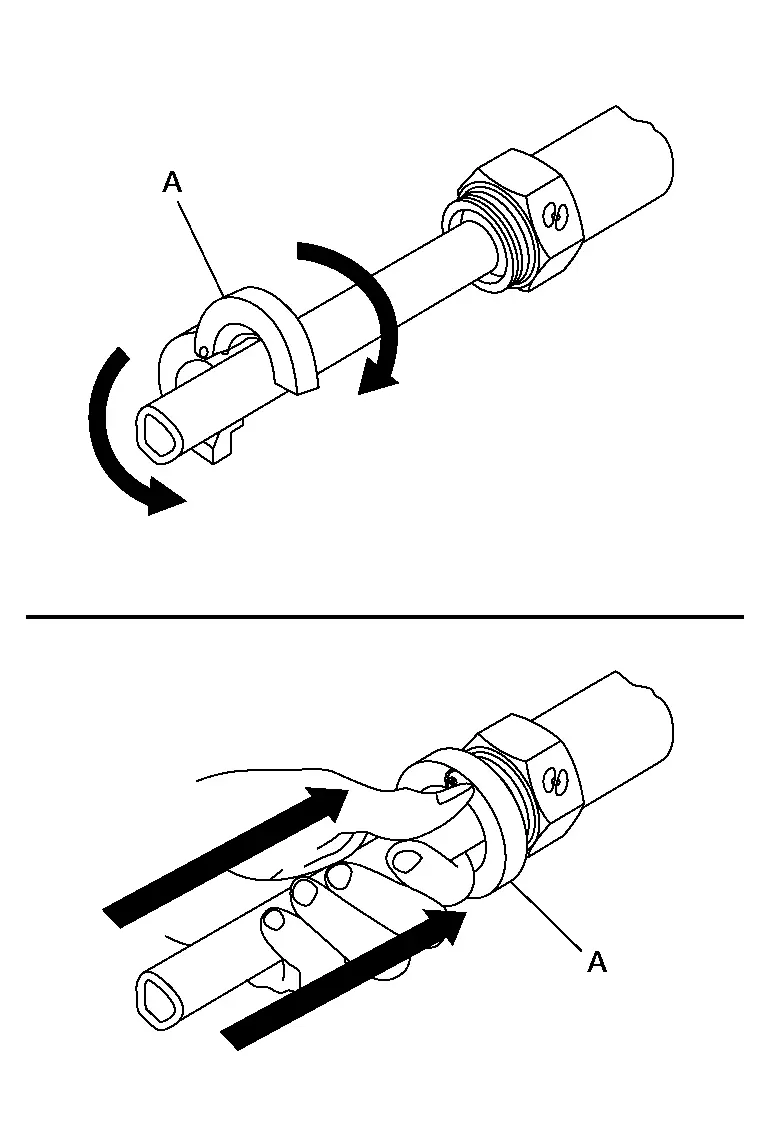
Install suitable disconnect tool (A) (commercial service tool) on to the A/T fluid cooler hose A at the A/T fluid cooler side.
-
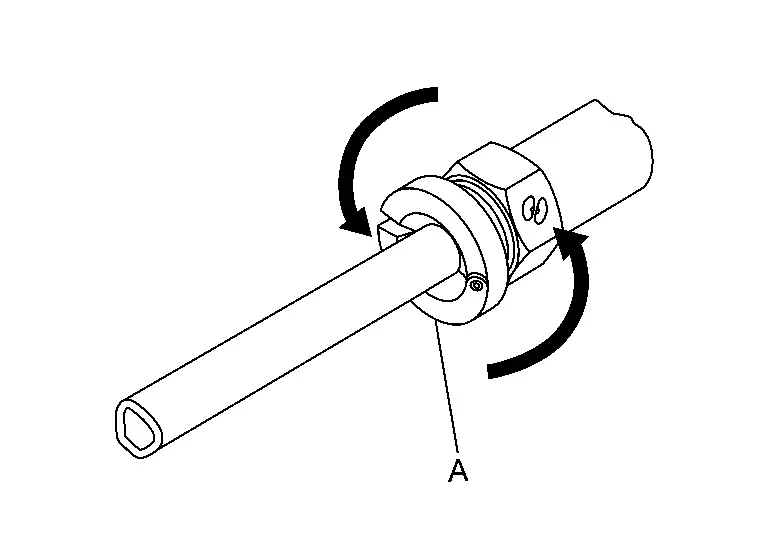
Rotate suitable disconnect tool (A) (commercial service tool) counter clockwise 60 degrees to release snap ring.
-
Remove A/T fluid cooler hose A
from the A/T fluid cooler.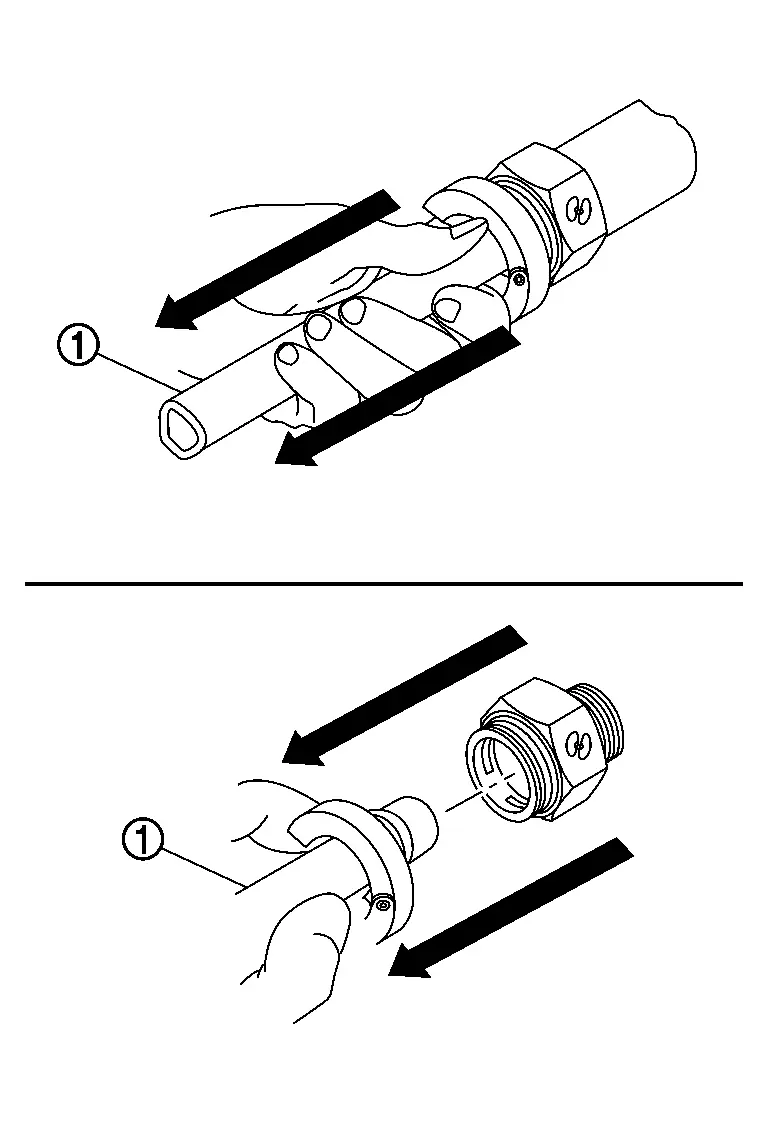
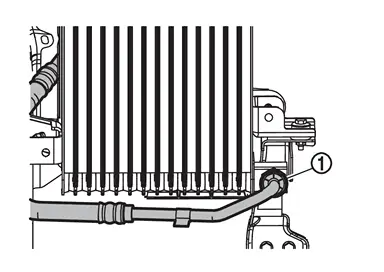
Remove A/T fluid cooler hose B from A/T fluid cooler using the following procedure:
-
Remove A/T fluid cooler hose cap
from A/T fluid cooler hose B . -
Install suitable disconnect tool (A) (commercial service tool) on to the A/T fluid cooler hose B at the A/T fluid cooler side.
-
Rotate suitable disconnect tool (A) (commercial service tool) counter clockwise 60 degrees to release snap ring.
-
Remove A/T fluid cooler hose B
from the A/T fluid cooler. -
Remove clip (
) from A/T fluid cooler.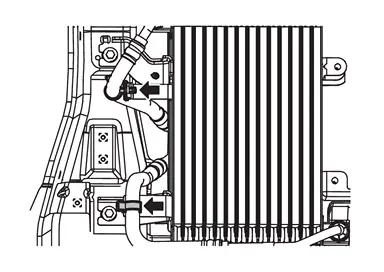
-
Remove A/T fluid cooler mount bolt (
) and remove A/T fluid cooler .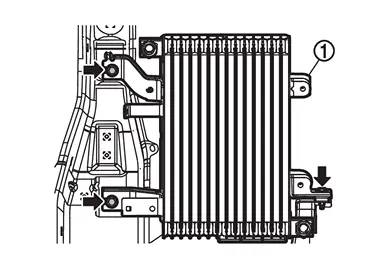
-
Remove clip (
) and remove A/T fluid cooler air guide RR from A/T fluid cooler.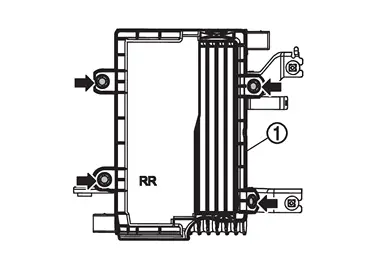
-
Remove bracket mounting bolt (
) and remove bracket .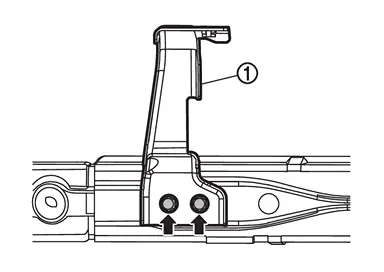
INSTALLATION
Installation is in the reverse order of removal.
Inspection and Adjustment
INSPECTION AFTER INSTALLATION
Check for A/T fluid leakage. Refer to Inspecton.
ADJUSTMENT AFTER INSTALLATION
Adjust A/T fluid level. Refer to Adjustment.
Other materials
Flexible seating
Basic information
The flexible seating system in the Nissan Armada is designed to deliver exceptional
versatility, allowing you to quickly adapt the interior layout for passengers or
cargo. Whether transporting people or maximizing storage space, the Nissan Armada
ensures both safety and conv ...
Diagnosis and Repair Workflow
Work Flow
OVERALL SEQUENCEDETAILED FLOWOBTAIN INFORMATION ABOUT SYMPTOM
Interview the customer to obtain as much information as possible about the conditions and environment under which the malfunction occurred.
>>
GO TO 2.
CHECK SYMPTOM
Check the symptom based on the information obtained ...
Rear View Monitor
Symptom Table
REAR VIEW MONITOR Symptoms Possible cause Inspection item
Camera image is not shown.
(vehicle width and predictive course line are displayed.)
Harness between rear view camera and AV control unit
Rear view camera
AV control unit
Display unit
Perform “Self Diagnostic ...