
Nissan Armada 2025-2026 Service and Repair Manual: Adjustment
PINION GEAR HEIGHT
If the hypoid gear set has been replaced, select the pinion height adjusting washer.
Use the formula below to calculate pinion height adjusting washer thickness.
| Washer selection equation: | |||
| T = T0 + (t1− t2) | |||
| T: | Correct washer thickness | ||
| T0: | Removed washer thickness | ||
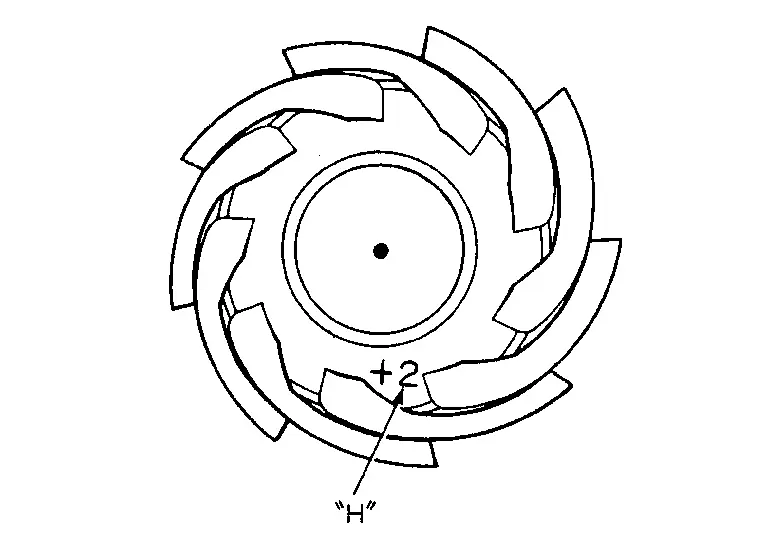
| t1: | Old drive pinion head letter “H × 0.01� (“H�: machined tolerance 1/100 mm × 100) | ||
| t2: | New drive pinion head letter “H × 0.01� (“H�: machined tolerance 1/100 mm × 100) | ||
| Example: | |||
| T = 3.21 + [(2 × 0.01) − (−1 × 0.01)] = 3.24 | |||
| T0: | 3.21 | ||
| t1: | +2 | ||
| t2: | −1 | ||
Select the proper pinion height adjusting washer. For selecting adjusting washer, refer to the latest parts information.
CAUTION:
If unable to find a washer of desired thickness, use a washer with thickness closest to the calculated value.
| Example: | ||
| Calculated value... T = 3.22 mm | ||
| Used washer... T = 3.21 mm | ||
COMPANION FLANGE RUNOUT
Fit a dial indicator onto the companion flange face (inner side of the propeller shaft mounting bolt holes).
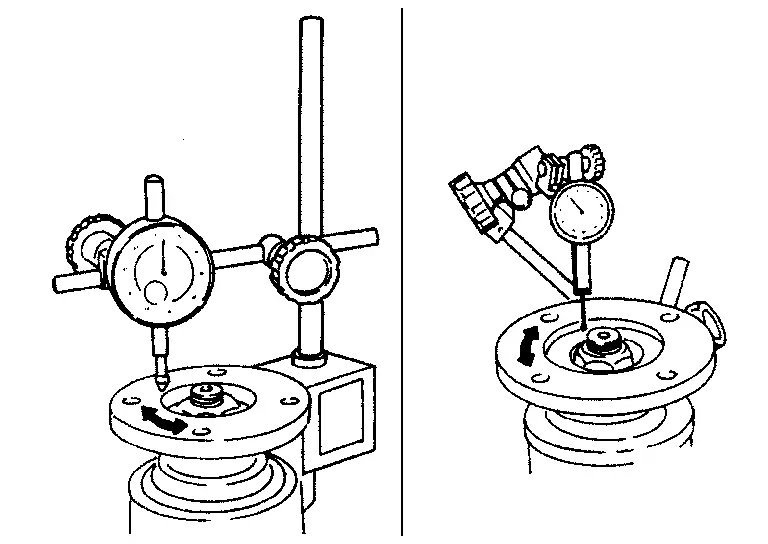
Rotate companion flange to check for runout.
| Companion flange face runout | : Refer to Companion Flange Runout. |
Fit a test indicator to the inner side of companion flange (socket diameter).
Rotate companion flange to check for runout.
| Inner side of the companion flange runout | : Refer to Companion Flange Runout. |
If the runout value is outside the runout limit, follow the procedure below to adjust.Check for runout while changing the phase between companion flange and drive pinion by 90° step, and search for the position where the runout is the minimum. If the runout value is still outside of the limit after the phase has been changed, possible cause will be an assembly malfunction of drive pinion and pinion bearing and malfunction of pinion bearing. Check for these items and repair if necessary. If the runout value is still outside of the limit after the check and repair, replace companion flange.
 Disassembly and Assembly
DISASSEMBLY
Remove side shaft assembly. Refer to Disassembly and Assembly.
Remove differential assembly. Refer to Disassembly and Assembly.
While holding companion flange with the flange wrench (A) (c ...
 Inspection
INSPECTION AFTER DISASSEMBLY
Drive Gear and Drive Pinion
Clean up the disassembled parts.
If the gear teeth never mesh or line-up correctly, determine the cause and adjust or replace as necessary.
If ...
Other materials:
Removal and Installation
REMOVAL
Remove radiator air guide upper. Refer to Removal and Installation.
Remove front combination lamp. Refer to Removal and Installation.
Remove active grille shutter upper side mounting bolts. Refer to Removal and Installation.
Remove hood lock assembly. Refer to Removal and Installation.
Disen ...
Exploded View
Brake tube Brake hose Lock plate Union bolt Copper washer To front brake tube. Refer to Exploded View. : Vehicle front : N·m (kg-m, ft-lb) : N·m (kg-m, in-lb) : Always replace after every disassembly. : Indicates that the part is connected at points with same symbol in actual vehicle. ...
HomeLink Universal Transceiver
Basic information
The HomeLink Universal Transceiver in the Nissan Armada offers a practical and
streamlined solution by combining the functions of up to three separate handheld
remote controls into one integrated system.
With the Nissan Armada HomeLink system, you can conveniently operate a w ...

0.0088