
Nissan Armada 2025-2026 Service and Repair Manual: Changing
WARNING:
| Recommended fluid and fluid capacity | Refer to Fluids and Lubricants. |
CAUTION:
Use only recommended A/T fluid. Never mix with other A/T fluid.
Start the engine.
Adjust the A/T fluid temperature to be approximately 50°C (122°F).
 NOTE:
NOTE:
Check with "Fluid temperature" in "Data monitor" in “TRANSMISSION� using CONSULT.
Stop the engine.
Lift up the vehicle.
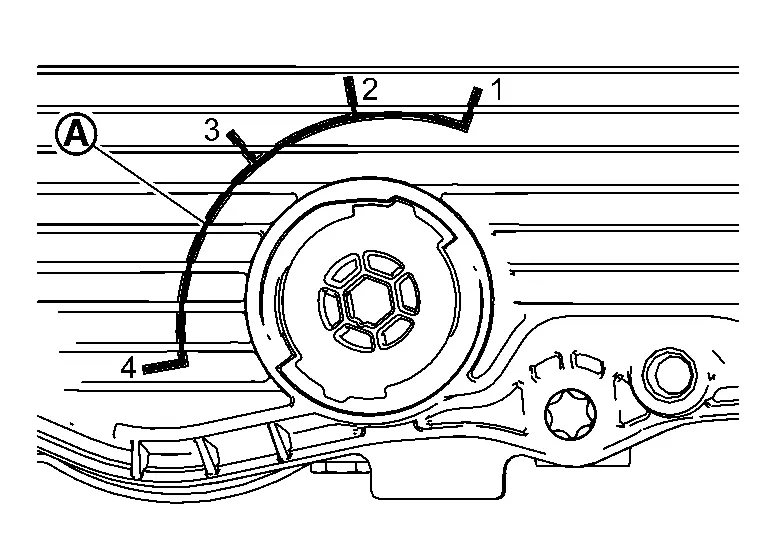
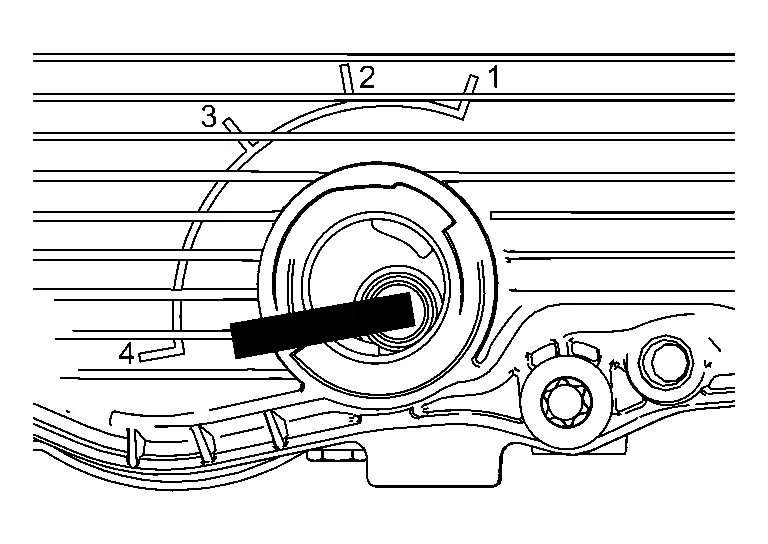
| (1) | : Closed |
| (2) | : Slow drain |
| (3) | : Overflow |
| (4) | : Drain |
NOTE:
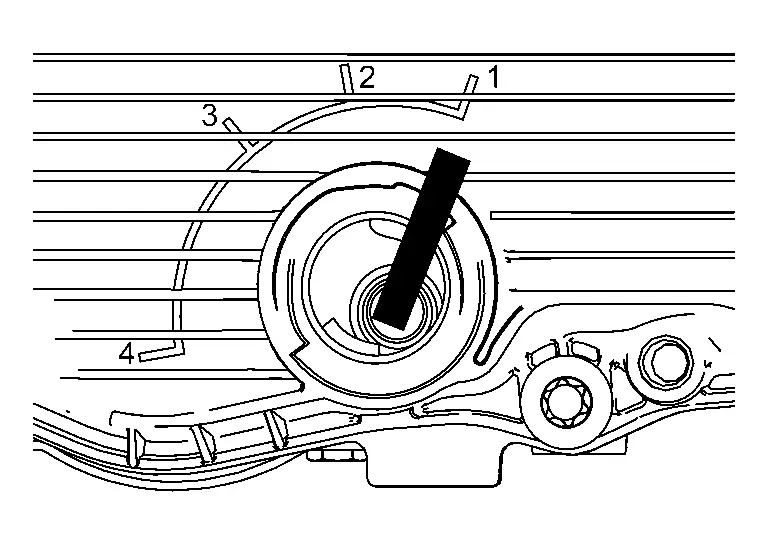
Install the A/T fluid injection plug (SST: NI-52972–1) and charge pipe adapter set (SST: NI-52584) to the overflow tube.
Install the drain plug and tighten it to the specified torque.
| Drain plug | : 6 N·m (0.61 kg-m, 53 in-lb) |
CAUTION:
Never overtighten the drain plug.
Lower the vehicle.
Check that the shift position is in the "P" position, then completely engage the parking brake.
Start the engine and let it idle for 3 minutes.
Stop the engine.
Repeat steps 4 – 13 (one time).
Start the engine.
Adjust the A/T fluid temperature to be approximately 50°C (122°F).
NOTE:
Check that the “Fluid temperature� in “Data monitor� is between 45°C (113°F) and 55°C (131°F) using CONSULT.
Lift up the vehicle.
Remove the drain plug to access the overflow tube using OFT position change wrench (SST: NI-52972–2).
Insert OFT position change wrench (SST: NI-52972–2) into the overflow tube, rotate to position (3)(overflow), remove OFT position change wrench (SST: NI-52972–2), and continue draining A/T fluid until it becomes drops.
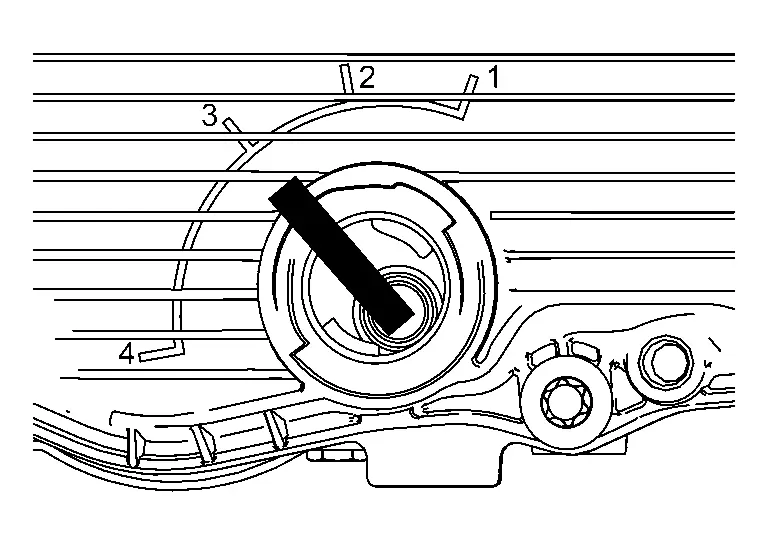
| (1) | : Closed |
| (2) | : Slow drain |
| (3) | : Overflow |
| (4) | : Drain |
Insert OFT position change wrench (SST: NI-52972–2) into overflow tube and rotate to position (1) (Closed).
Install the drain plug and tighten it to the specified torque.
| Drain plug | : 6 N·m (0.61 kg-m, 53 in-lb) |
CAUTION:
Never over tighten the drain plug.
Never reuse O-ring.
Clear the deterioration level data of A/T fluid. (When the control valve & TCM has not been replaced.)
Select "Work supports" in "TRANSMISSION" using CONSULT.
Select "Confirm AT/CVT fluid deterioration".
Touch "Start".
Touch "Clear".
Work end.
 Refilling
WARNING:
Recommended fluid and fluid capacity Refer to Fluids and Lubricants.
CAUTION:
Use only recommended A/T fluid. Never mix with other A/T fluid.
Using A/T fluid other than recommended A/T flu ...
 Adjustment
WARNING:
Recommended fluid and fluid capacity : Refer to Fluids and Lubricants.
CAUTION:
Use only recommended A/T fluid. Never mix with other A/T fluid.
Always maintain the A/T fluid temperature wi ...
Other materials:
Diagnosis Procedure
CHECK INTELLIGENT KEY SYSTEM SYMPTOM TABLE
Check Intelligent Key system symptom table. Refer to Diagnosis Procedure.
>>
GO TO 2.
CHECK OUTSIDE KEY ANTENNA
Use SIGNAL TECH II to check each outside key antenna. For the inspection method and how to use SIGNAL TECH II, refer to “NISSAN/INFINIT ...
Removal and Installation
WARNING:
Jacking up or lifting up the vehicle may the vehicle height to go down which cause a personal injury and/or damage to the air suspension component parts. Refer to Precaution for when Jacking and Lifting Up the Vehicle with Electronic Air Suspension System (With electronic air suspension).Wh ...
Vehicle Recovery (Freeing a Stuck Vehicle)
FREEING TRAPPED VEHICLE
WARNING:
Stand clear of a stuck vehicle.
Never allow anyone to stand near the towing line during the pulling operation.
Never spin the tires at high speed. This could cause them to explode and result in serious injury. Parts of the vehicle could also overheat and be damaged.
...

0.007