
Nissan Armada 2025-2026 Service and Repair Manual: Refilling
WARNING:
| Recommended fluid and fluid capacity | Refer to Fluids and Lubricants. |
CAUTION:
Use only recommended A/T fluid. Never mix with other A/T fluid.
Using A/T fluid other than recommended A/T fluid will cause deterioration in driveability and A/T durability, and may damage the A/T, which is not covered by the NISSAN new vehicle limited warranty.
When filling A/T fluid, be careful not to spill fluid on heat generating parts such as exhaust.
Lift up the vehicle.
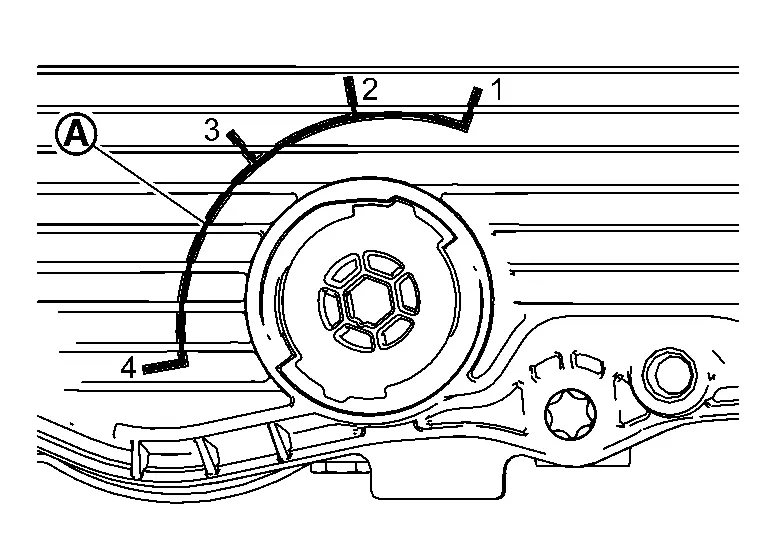
When the drain plug is installed to the oil pan, remove it with OFT position change wrench (SST: NI-52972–2).
Insert OFT position change wrench (SST: NI-52972–2) into the overflow tube, and check that the overflow tube is in position (1) (close).
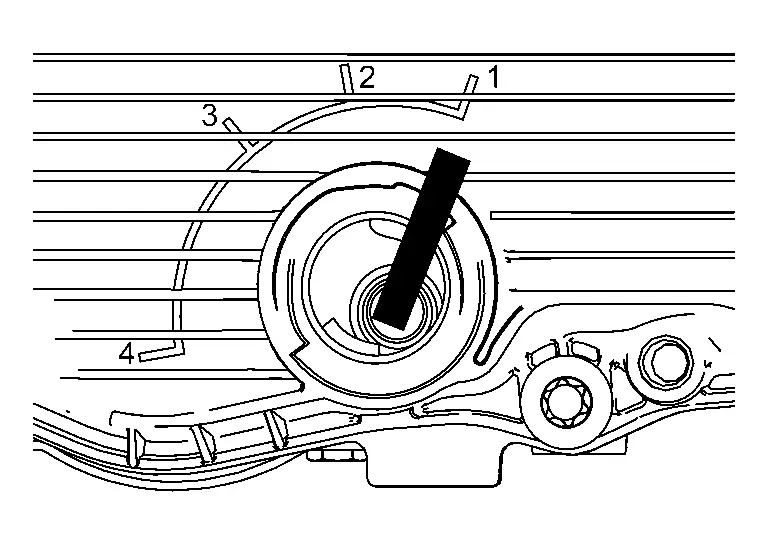
| (1) | : Closed |
| (2) | : Slow drain |
| (3) | : Overflow |
| (4) | : Drain |
 NOTE:
NOTE:
Install the A/T fluid injection plug (SST: NI-52972–1) and charge pipe adapter set (SST: NI-52584) to the oil pan.
Continue filling A/T fluid into the oil pan until A/T fluid comes out from the charging pipe.
Remove the A/T fluid injection plug (SST: NI-52972–1) and charge pipe adapter set (SST: NI-52584) from the oil pan.
Install the drain plug and tighten it to the specified torque.
| Drain plug | : 6 N·m (0.61 kg-m, 53 in-lb) |
CAUTION:
Replace with new O-ring of drain plug after adjusting A/T fluid level.
Never overtighten the drain plug.
Check A/T fluid deterioration level. (When the control valve & TCM are not replaced.)
Select "Work supports" in "TRANSMISSION" using CONSULT.
Select “Confirm AT/CVT fluid deterioration�.
When AT/CVT fluid deterioration data is 77,000 or less, adjust A/T fluid level. Refer to Adjustment.
When AT/CVT fluid deterioration data is 77,001 or more, change A/T fluid into fresh one. Refer to Changing. (Start the procedure from step 13 of "Changing.")
 Draining
WARNING:
Start the engine and let it run to warm up transmission.
Stop the engine.
Lift up the vehicle.
When the oil pan positioning mark is difficult to find, mark it with paint or like beforehand.
...
 Changing
WARNING:
Recommended fluid and fluid capacity Refer to Fluids and Lubricants.
CAUTION:
Use only recommended A/T fluid. Never mix with other A/T fluid.
Start the engine.
Adjust the A/T fluid temper ...
Other materials:
Removal and Installation
REMOVAL
Pull up and remove engagement with body from the seam of back door weather-strip.
CAUTION:
Never pull strongly on back door weather-strip.
When removing back door weather-strip, pull it away from the vehicle by holding back door weather-strip by the base part , and not the upper part, for pr ...
Diagnosis Procedure
CHECK INTELLIGENT KEY SYSTEM SYMPTOM TABLE
Check Intelligent Key system symptom table.
Refer to Diagnosis Procedure.
>>
GO TO 2.
CHECK INTELLIGENT KEY BATTERY
Check the Intelligent Key battery.
Refer to Component Inspection.
Is the inspection result normal?
YES>>
GO TO 3.
NO>>
...
Precautions for Removing Battery Terminal
NOTE:
NOTE:
NOTE:
The removal of 12V battery may cause a DTC detection error.
HOW TO DISCONNECT 12V BATTERY TERMINAL
Disconnect 12V battery terminal according to instruction described below.
Open the hood.
Turn ignition switch to the ON position.
Turn ignition switch to the OFF position with the d ...

0.0059