Around View Monitor
Work Flow
OVERALL SEQUENCE
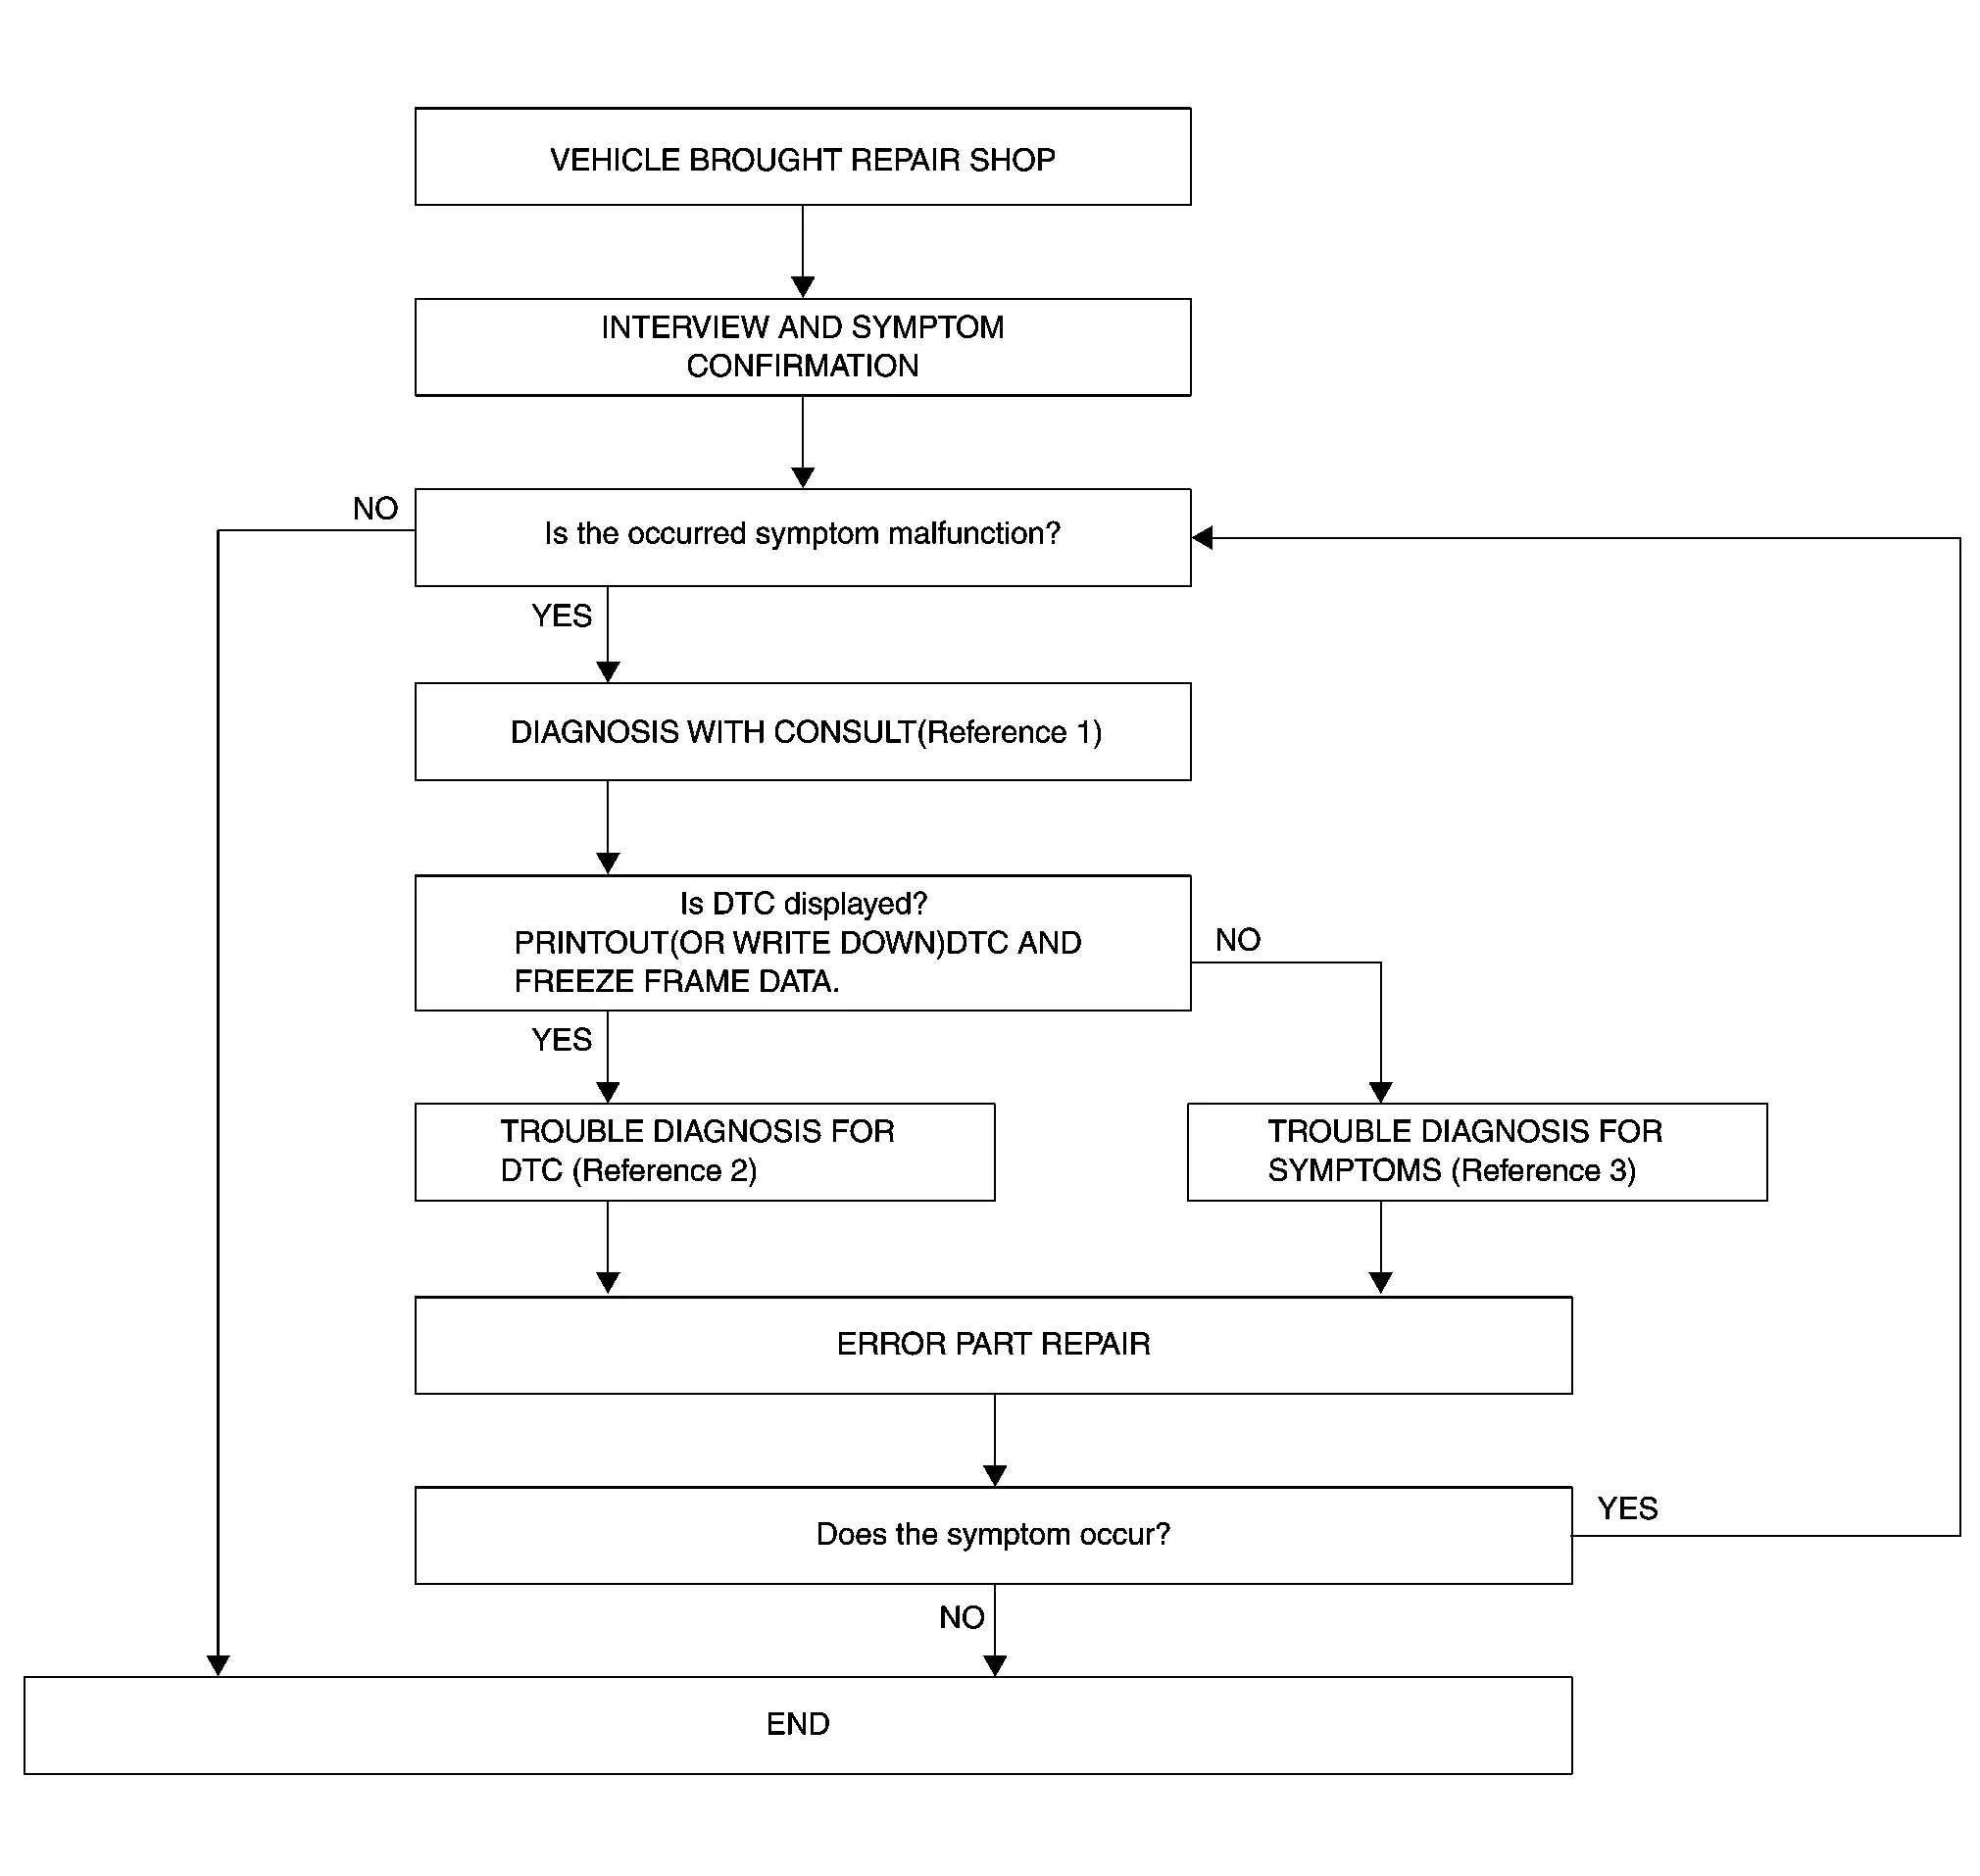
-
Reference 1··· Refer to Consult Function.
-
Reference 2··· Refer to DTC Index.
-
Reference 3··· Refer to Symptom Table.
DETAILED FLOW
INTERVIEW AND SYMPTOM CONFIRMATION
Check the malfunction symptoms by performing the following items.
-
Interview the customer to obtain the malfunction information (conditions and environment when the malfunction occurred).
-
Check the symptom.
Is the occurred symptom malfunction?
YES>>GO TO 2.
NO>>INSPECTION END
DIAGNOSIS WITH CONSULT
-
Connect CONSULT and perform a self-diagnosis for “AROUND VIEW MONITOR�. Refer to Consult Function.
 NOTE:
NOTE:
Skip to step 4 of the diagnosis procedure if “AROUND VIEW MONITOR� is not displayed.
-
When DTC is detected, follow the instructions below:
-
Record DTC and Freeze Frame Data.
-
Is DTC displayed?
YES>>GO TO 3.
NO>>GO TO 4.
TROUBLE DIAGNOSIS FOR DTC
-
Check the DTC indicated in the “Self-Diagnosis Results�.
-
Perform the relevant diagnosis referring to the DTC Index. Refer to DTC Index.
>>
GO TO 5.
TROUBLE DIAGNOSIS FOR SYMPTOMS
Perform the relevant diagnosis referring to the diagnosis chart by symptom. Refer to Symptom Table
>>
GO TO 5.
ERROR PART REPAIR
-
Repair or replace the identified malfunctioning parts.
-
Perform a self-diagnosis for “AROUND VIEW MONITOR� with CONSULT.
NOTE:
Erase the stored self-diagnosis results after repairing or replacing the relevant components if any DTC has been indicated in the “Self-Diagnosis Results�.
-
Check that the symptom does not occur.
Does the symptom occur?
YES>>GO TO 1.
NO>>INSPECTION END
Other materials
Rear Propeller Shaft
Exploded View
REMOVAL
Propeller shaft assembly
: vehicle front
: N·m (kg-m, ft-lb)
: Always replace after every disassembly.
DISASSEMBLY
Snap ring
Journal bearing
Journal
Sleeve yoke
Propeller shaft tube
Flange yoke
: vehicle front
: Always ...
Normal Operating Condition
Description
The following symptoms are normal operations, and they do not indicate a malfunction. Symptom Cause Action to take Reference
Exit assist function do not operate.
Exit assist function is disabled.
Change the settings.
Description
Memory function, exit assist function, entry ...
Back Door Opener Switch
Description
Automatic back door open/close function does not operate using back door opener switch.
Diagnosis Procedure
CHECK AUTO OPEN/CLOSE FUNCTION
Check auto open/close function using automatic back door switch.
Is the inspection result normal?
YES>>
GO TO 2.
NO>>
Refer to Diagnosi ...