Work Flow
OVERALL SEQUENCE
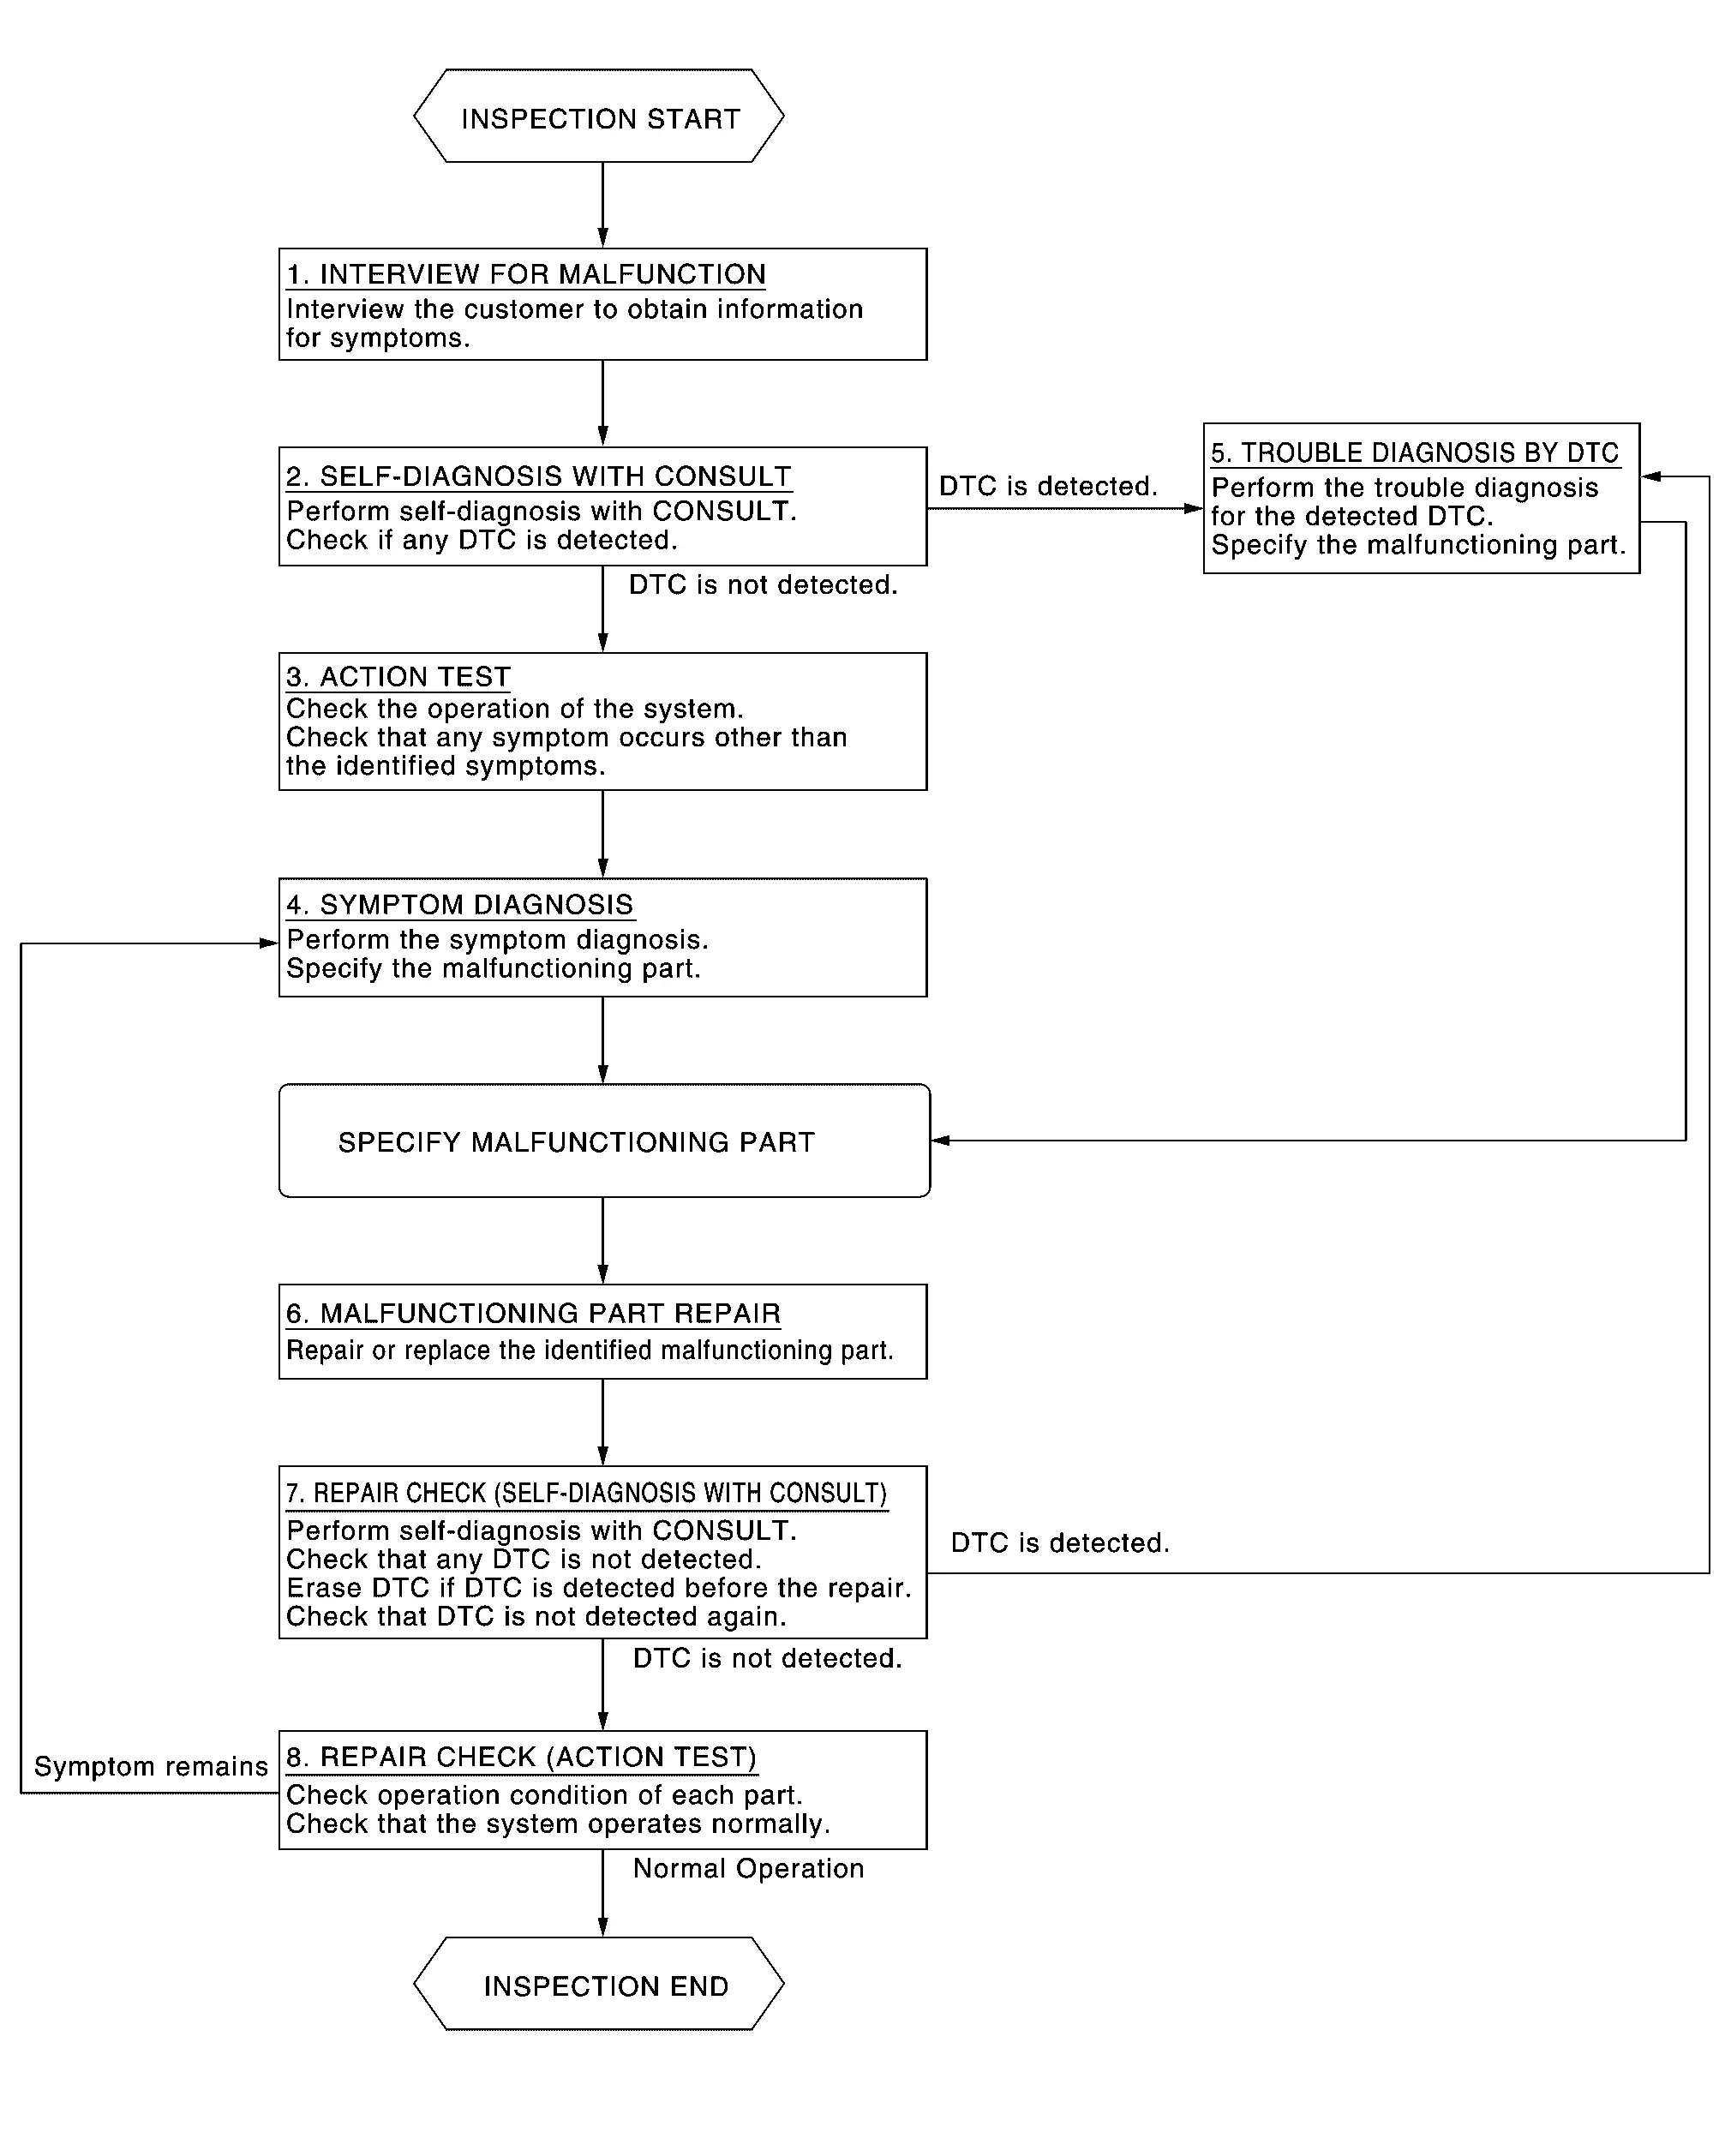
DETAILED FLOW
INTERVIEW FOR MALFUNCTION
It is also important to clarify the customer concerns before starting the inspection. Interview the customer about the concerns carefully and understand the symptoms fully.
 NOTE:
NOTE:
The customers are not professionals. Never assume that “maybe the customer means···” or “maybe the customer mentioned this symptom”.
>>
GO TO 2.
SELF-DIAGNOSIS WITH CONSULT
-
Perform “All DTC Reading” with CONSULT.
-
Check if any DTC is detected in self-diagnosis results of “LASER/RADAR”, “LANE CAMERA” and “ICC/ADAS 2”.
Is any DTC detected?
YES>>Record or print self-diagnosis results and freeze frame data (FFD). GO TO 5.
NO>>GO TO 3.
ACTION TEST
Perform the ProPILOT Assist 2.1 system action test to check the operation status. Refer to Work Procedure.
Check if any other malfunctions occur.
>>
GO TO 4.
SYMPTOM DIAGNOSIS
Perform the applicable diagnosis according to the diagnosis chart by symptom. Refer to Symptom Table.
>>
GO TO 6.
TROUBLE DIAGNOSIS BY DTC
-
Erase self-diagnostic results.
-
Ignition switch OFF → ON.
CAUTION:
Be sure to wait of 10 seconds after turning ignition switch OFF or ON.
-
Check the DTC in the self-diagnosis results.
-
Perform trouble diagnosis for the detected.
-
LASER/RADAR: Refer to DTC Index.
-
LANE CAMERA: Refer to DTC Index.
-
ICC/ADAS 2: Refer to DTC Index.
-
NOTE:
If Network-DTC is detected, first diagnose the CAN communication system.
>>
GO TO 6.
MALFUNCTIONING PART REPAIR
Repair or replace the identified malfunctioning parts.
>>
GO TO 7.
REPAIR CHECK (SELF-DIAGNOSIS WITH CONSULT)
-
Erases self-diagnosis results.
-
Perform “All DTC Reading” again after repairing or replacing the malfunctioning parts.
-
Check if any DTC is detected in self-diagnosis results of “LASER/RADAR”, “LANE CAMERA” and “ICC/ADAS 2”.
-
LASER/RADAR: Refer to DTC Index.
-
LANE CAMERA: Refer to DTC Index.
-
ICC/ADAS 2: Refer to DTC Index.
-
Is any DTC detected?
YES>>GO TO 5.
NO>>GO TO 8.
REPAIR CHECK (ACTION TEST)
Perform the ProPILOT Assist 2.1 system action test. Check if the malfunction symptom is solved or no other symptoms occur.
Is there any malfunction symptom?
YES>>GO TO 4.
NO>>INSPECTION END
Other materials
Luggage Side Upper Finisher
Removal and Installation
CAUTION:
Never damage the body panel.REMOVALCAUTION:
When removing, always use a remover tool that is made of plastic to prevent damage to the parts.Remove rear pillar finisher. Refer to Removal and Installation.
Remove back pillar garnish. Refer to Removal and Installation. ...
Precautions
Precaution for Supplemental Restraint System (SRS) "AIR BAG" and "SEAT BELT PRE-TENSIONER"
The Supplemental Restraint System such as “AIR BAG” and “SEAT BELT PRE-TENSIONER”, used along with a front seat belt, helps to reduce the risk or severity of injury to the driver and front passenger fo ...
Additional Service When Replacing Third Seat Control Unit Rh
Description
When after replacing third seat control unit RH, third seat RH position initialization must be performed. For details, refer to Work Procedure.
Work Procedure
REPLACE THIRD SEAT CONTROL UNIT RH
Replace third seat control unit RH. Refer to Removal and Installation.
>>
GO TO 2.
THI ...