
Nissan Armada 2025-2026 Service and Repair Manual: Disassembly and Assembly
CAUTION:
OUTSIDE SEAT CUSHION FINISHER OUTER
Disassembly
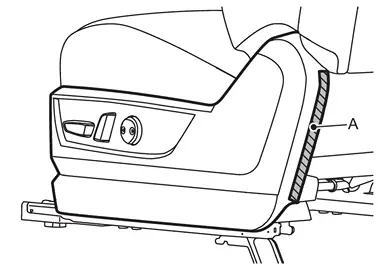
Apply protective tape (A) to prevent damage.
Disengage fixing clip(s) and pawls using a remover tool (A), and then remove outside seat cushion finisher outer.
With 4way power seat system
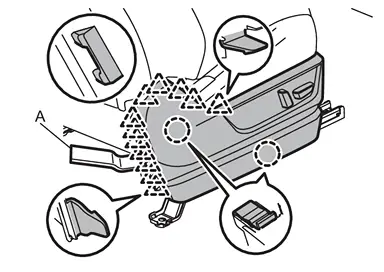

: Clip 
: Pawl With 8way power seat system
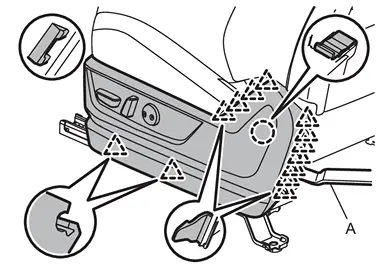
| : Clip |
| : Pawl |
Disengage harness fixing clips from outside seat cushion finisher outer, and then disconnect harness connectors.
CAUTION:
Before performing removal operation, check the installation position of harness fixing clips.
Remove the following parts after removing outside seat cushion finisher outer.
Power seat switch. Refer to Removal and Installation.
Lumbar support switch (if equipped). Refer to Removal and Installation.
Massage switch (if equipped). Refer to Removal and Installation.
Assembly
Assemble in the reverse order of disassembly.
INSIDE SEAT CUSHION FINISHER OUTER (WITH 4WAY POWER SEAT SYSTEM)
Disassembly
Remove seat cushion trim and pad. Refer to Disassembly and Assembly.
Remove seat belt buckle. Refer to Removal and Installation.
Apply protective tape (A) to prevent damage.
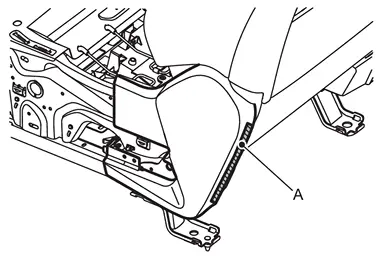
Disengage fixing clips and pawls using a remover tool (A), and then remove inside seat cushion finisher outer.
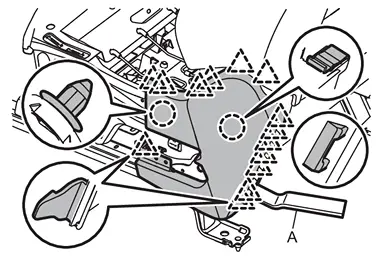
| : Clip |
| : Pawl |
Assembly
Assemble in the reverse order of disassembly.
INSIDE SEAT CUSHION FINISHER OUTER (WITH 8WAY POWER SEAT SYSTEM)
Disassembly
Remove seat belt buckle. Refer to Removal and Installation.
Apply protective tape (A) to prevent damage.
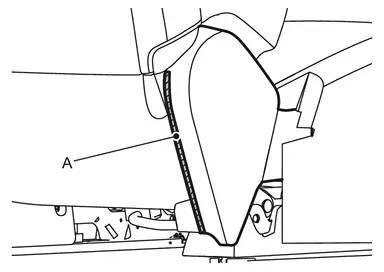
Disengage fixing clips and pawls using a remover tool (A), and then remove inside seat cushion finisher outer.
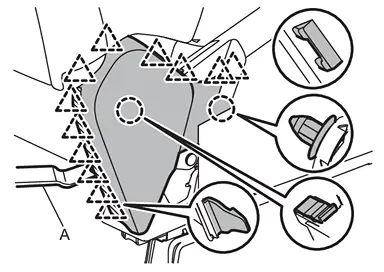
| : Clip |
| : Pawl |
Assembly
Assemble in the reverse order of disassembly.
INSIDE / OUTSIDE SEAT CUSHION FINISHER INNER
Disassembly
Remove seat cushion trim and pad. Refer to Disassembly and Assembly.
Remove inside and outside seat cushion finisher inner.
With 4way power seat system
Disengage fixing clip, and then remove inside and outside seat cushion finisher inner.
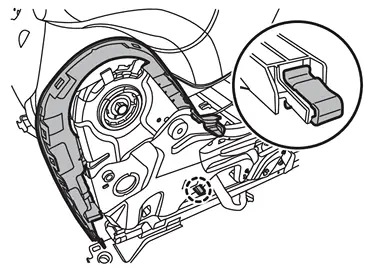
: Clip With 8way power seat system
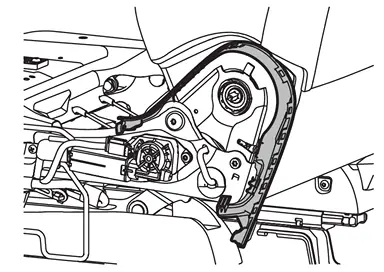
Assembly
Assemble in the reverse order of disassembly.
SLIDING MOTOR COVER
Disassembly
Disengage harness fixing clip of sliding motor cover.
CAUTION:
Before performing removal operation, check the installation position of harness fixing clip.
Disengage fixing pawls, and then remove sliding motor cover.
With 4way power seat system
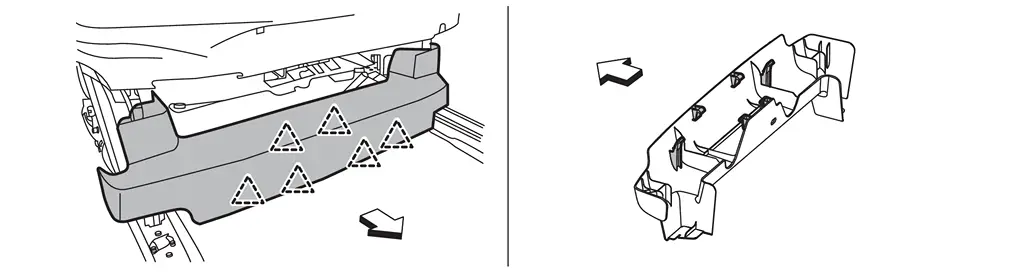
: Pawl 
: Vehicle front With 8way power seat system
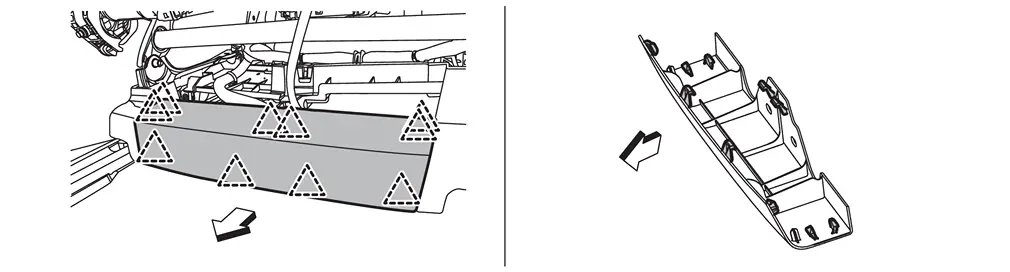
| : Pawl |
| : Vehicle front |
Assembly
Assemble in the reverse order of disassembly.
OUTSIDE SLIDE FINISHER
Disassembly
Remove outside seat cushion finisher outer.
Remove sliding motor cover.
Remove outside slide finisher fixing screws.
Disengage fixing clips according to numerical order 1→3 indicated by arrows as shown in the figure, and then remove outside slide finisher.
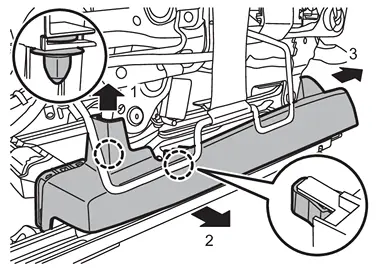
| : Clip |
Assembly
Assemble in the reverse order of disassembly.
INSIDE SLIDE FINISHER
Disassembly
Remove sliding motor cover.
Disengage harness fixing clip of inside slide finisher, and then disconnect harness connector.
CAUTION:
Remove inside slide finisher fixing screws.
Disengage fixing clip according to numerical order 1→2 indicated by arrows as shown in the figure, and then remove inside slide finisher.
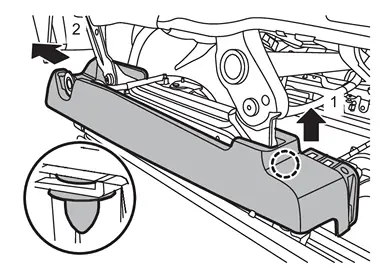
| : Clip |
Assembly
Assemble in the reverse order of disassembly.


Other materials:
Inspection
Check valve seat of reservoir tank cap.
: Metal plunger
Check if valve seat is swollen to the extent that the edge of the metal plunger cannot be seen when watching it vertically from the top.
Check if valve seat has no soil and damage.
Pull negative-pressure valve to open it, and check that ...
Precautions for Removing Battery Terminal
NOTE:
NOTE:
NOTE:
The removal of 12V battery may cause a DTC detection error.
HOW TO DISCONNECT 12V BATTERY TERMINAL
Disconnect 12V battery terminal according to instruction described below.
Open the hood.
Turn ignition switch to the ON position.
Turn ignition switch to the OFF position with the d ...
Engine oil
Checking engine oil level
Vehicle set-up
To ensure accurate engine oil level readings in your Nissan Armada, follow the
proper preparation steps below.
1. Park the Nissan Armada on a flat, level surface and securely apply the parking
brake.
2. Start the engine and allow it to reach no ...

0.0059