Exploded View
FRONT
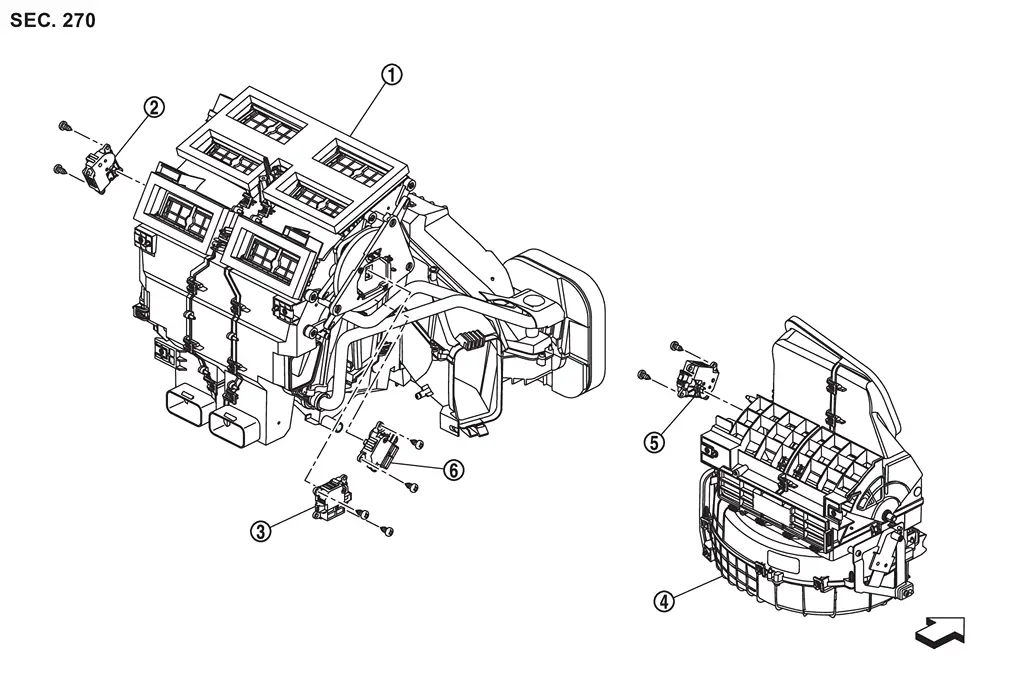
 |
Front heater & cooling unit assembly |  |
Front air mix door motor (driver side) |  |
Front mode door motor |
 |
Front blower unit assembly |  |
Intake door motor |  |
Front air mix door motor (passenger side) |
| : vehicle front | |||||
REAR
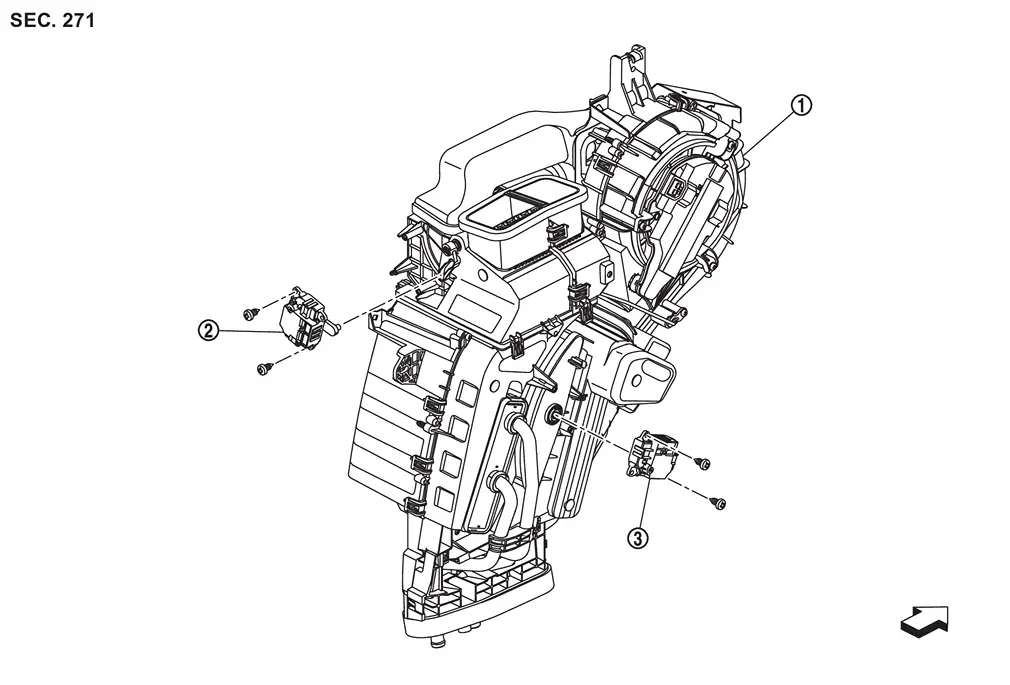
|
Rear A/C unit assembly | |
Rear mode door motor | |
Rear air mix door motor |
| : vehicle front | |||||
Intake Door Motor
Removal and Installation
REMOVAL
Remove instrument panel assembly. Refer to Removal and Installation.
Disconnect intake door motor harness connector  .
.
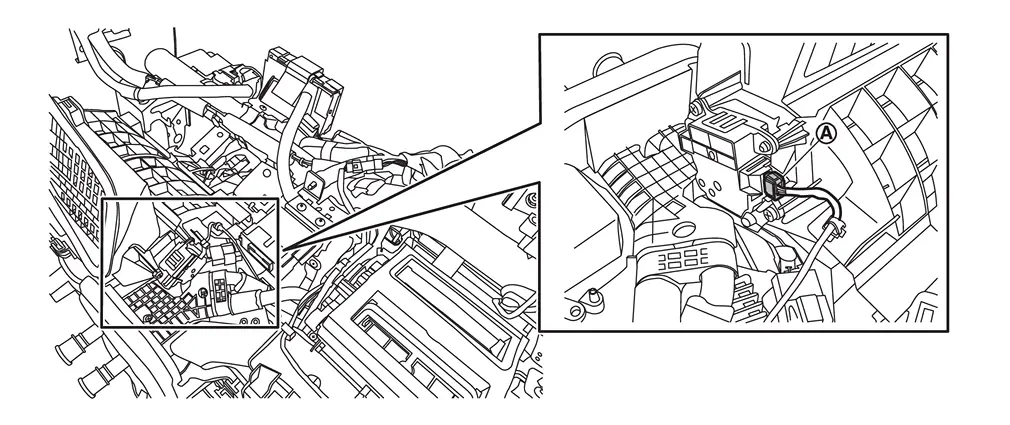
Remove fixing screws , and then remove intake door motor.
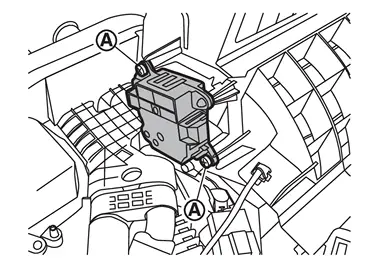
INSTALLATION
Install in the reverse order of removal.
Front Mode Door Motor
Removal and Installation
REMOVAL
Remove front heater & cooling unit assembly and front blower unit assembly. Refer to Removal and Installation.
Disconnect front mode door motor harness connector .
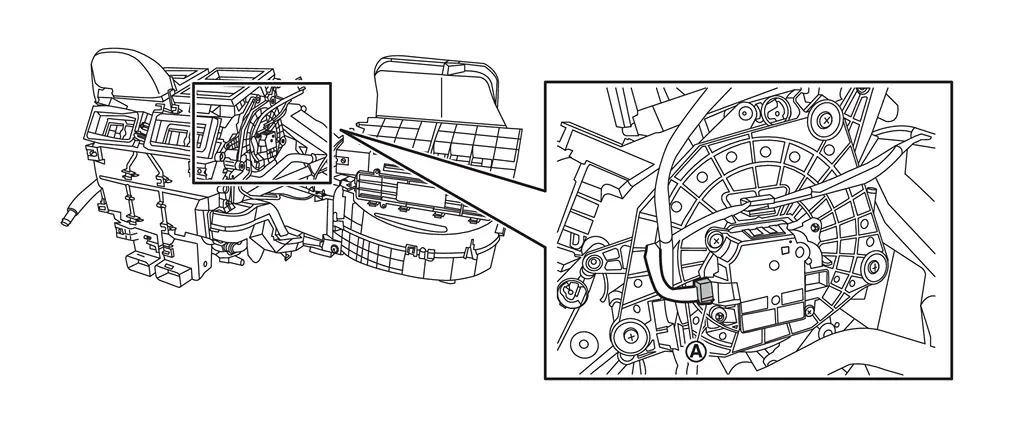
Remove fixing screws , and then remove front mode door motor.
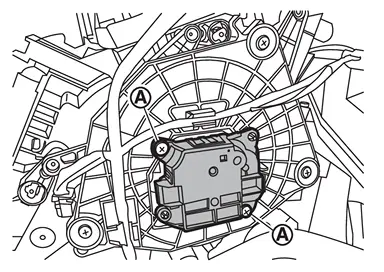
INSTALLATION
Install in the reverse order of removal.
Front Air Mix Door Motor
Removal and Installation
REMOVAL
Front Air Mix Door Motor (Driver Side)
Remove instrument lower panel LH and steering column cover lower. Refer to Removal and Installation.
Remove driver knee air bag module. Refer to Removal and Installation.
Remove side ventilator duct 2 LH. Refer to Removal and Installation.
Disconnect front air mix door motor (driver side) harness connector .
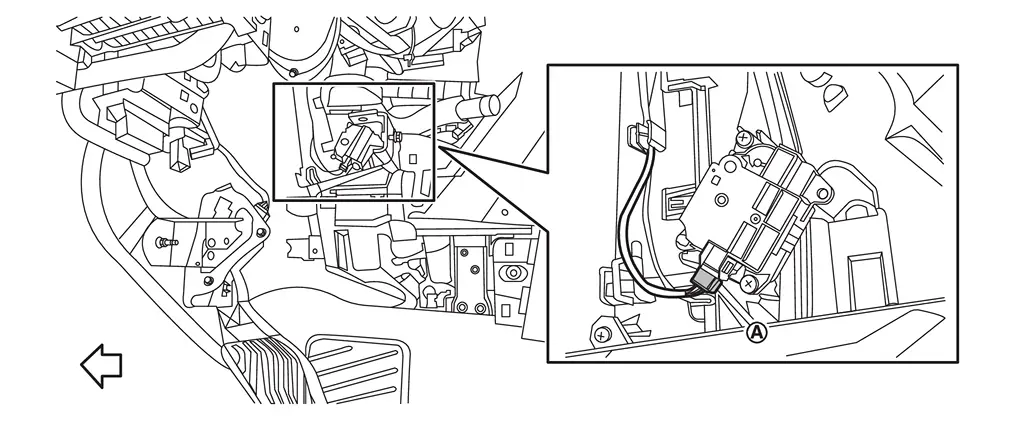
| : vehicle front |
Remove fixing screws , and then remove front air mix door motor (driver side).
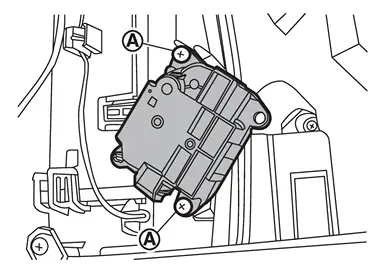
Front Air Mix Door Motor (Passenger Side)
Remove front heater & cooling unit assembly. Refer to Removal and Installation.
Remove front heater core. Refer to Removal and Installation.
Remove fixing screws , and then remove front air mix door motor (passenger side).
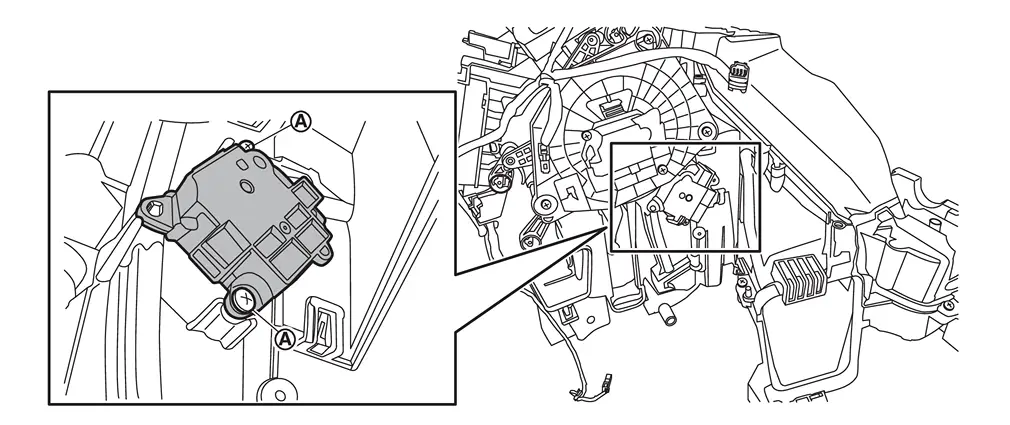
INSTALLATION
Install in the reverse order of removal.
Rear Mode Door Motor
Removal and Installation
REMOVAL
Remove luggage side lower finisher RH. Refer to Removal and Installation.
Disconnect rear mode door motor harness connector .
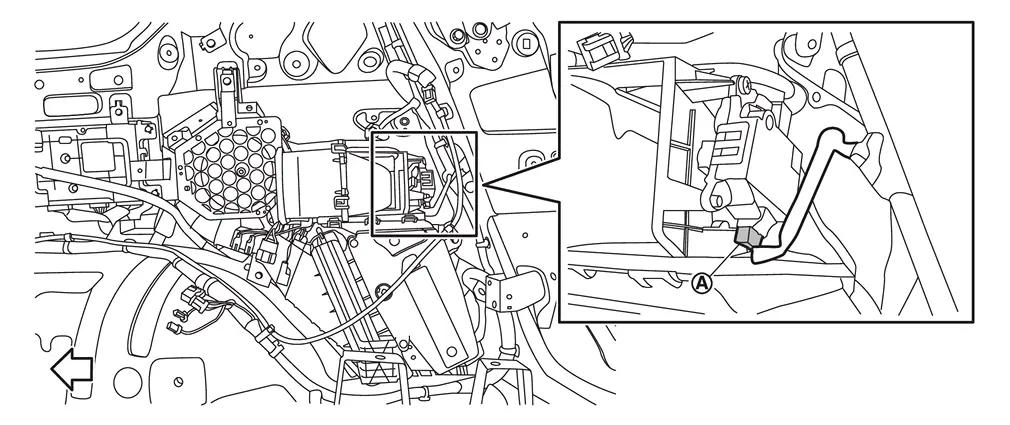
| : vehicle front |
Remove fixing screws , and then remove rear mode door motor.
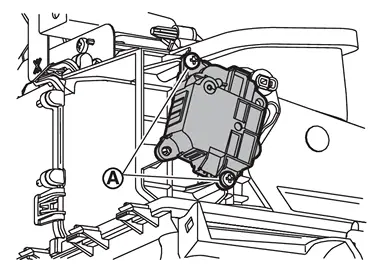
INSTALLATION
Install in the reverse order of removal.
Rear Air Mix Door Motor
Removal and Installation
REMOVAL
Remove rear A/C unit assembly. Refer to Removal and Installation.
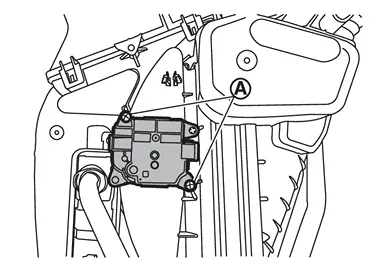
Disconnect rear air mix door motor harness connector .
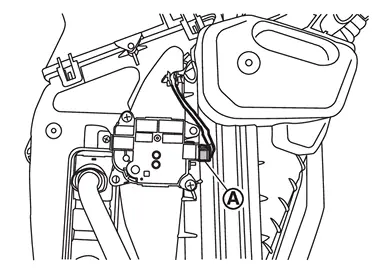
Remove fixing screws , and then remove rear air mix door motor.
INSTALLATION
Install in the reverse order of removal.
Other materials
Engine Lubrication System Tools and Preparation
Special Service Tools
The actual shapes of TechMate tools may differ from those of special service tools illustrated here.
Tool number
(TechMate No.)
Tool name Description
ST25051001
(NI-25695-1)
Oil pressure gauge
Measuring oil pressure
Maximum measuring range: 2,452 kPa (25 kg/cm2, 356 psi ...
Electric Power Steering Warning Lamp Does Not Turn Off
Description
Power steering warning lamp does not turn OFF several seconds after engine started.
Diagnosis Procedure
PERFORM SELF-DIAGNOSIS
With CONSULT
Perform self-diagnosis for “EPS/DIRECT ADAPTIVE STEERING 3�.
Is any DTC detected?
YES>>
Check the DTC. Refer to DTC Index.
NO>>
GO ...
Diagnosis Sensor Unit
Exploded View
Diagnosis sensor unit
: vehicle front
: Always replace after every disassembly.
: N·m (kg-m, in-lb)
Removal and Installation
WARNING:
Always observe the following items for preventing accidental activation.
Before servicing, ignition swit ...