Exploded View
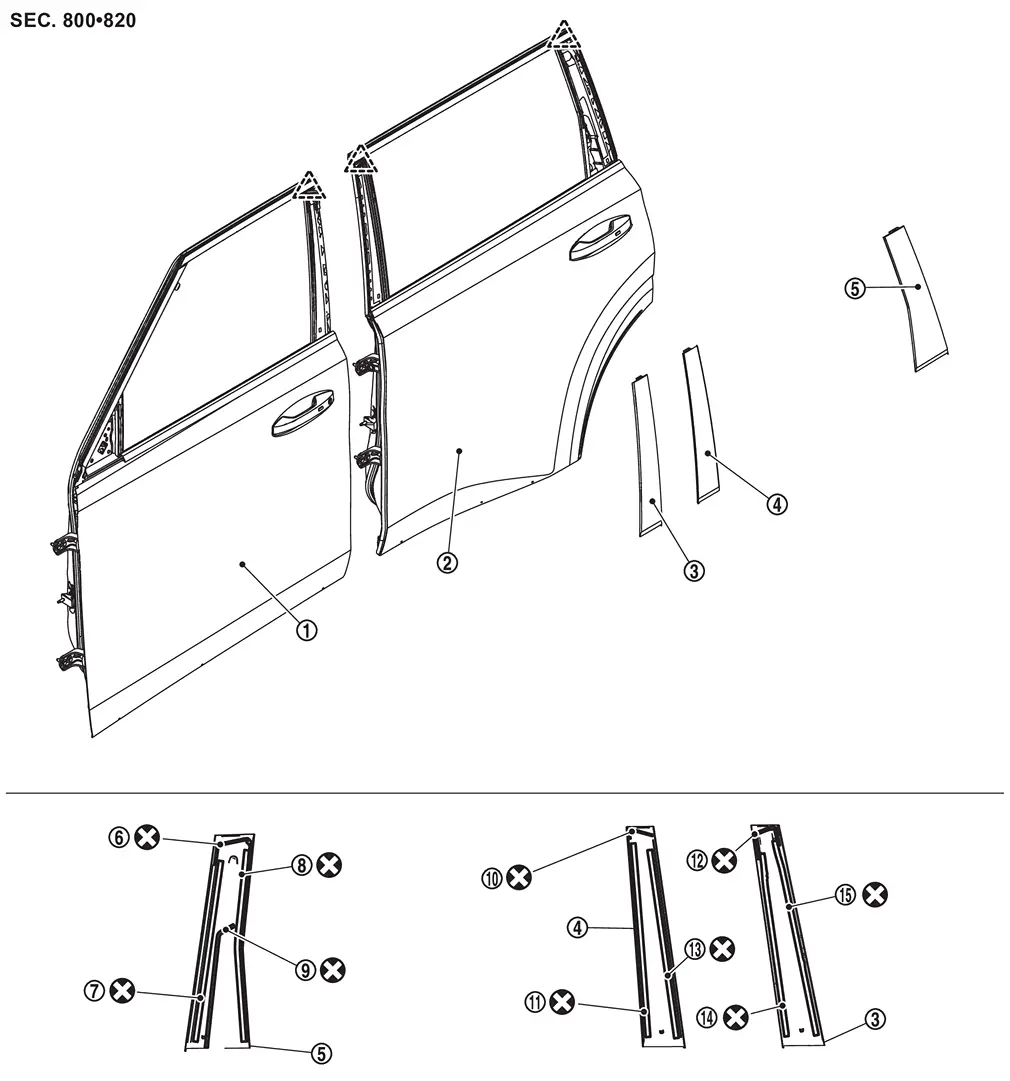
 |
Front door panel |  |
Rear door panel |  |
Front door sash cover |
 |
Rear door sash cover front |  |
Rear door sash cover rear |  |
EPT seal [t: 2.0 mm (0.079 in)] |
 |
Double-sided tape [t: 2.5 mm (0.098 in)] |
 |
Double-sided tape [t: 0.8 mm (0.031 in)] |
 |
EPT seal [t: 6.0 mm (0.236 in)] |
 |
EPT seal [t: 3.0 mm (0.118 in)] |  |
Double-sided tape [t: 0.8 mm (0.031 in)] |
 |
EPT seal [t: 5.0 mm (0.197 in)] |
 |
Double-sided tape [t: 2.5 mm (0.098 in)] |
 |
Double-sided tape [t: 2.0 mm (0.079 in)] |
 |
Double-sided tape [t: 0.8 mm (0.031 in)] |
 |
: Pawl | ||||
 |
: Always replace after every disassembly. | ||||
Front Door Sash Cover
Removal and Installation
REMOVAL
Remove front door outside molding. Refer to Removal and Installation.
Remove front door glass run of upper side. Refer to Removal and Installation.
Remove front door weather-strip of upper side. Refer to Removal and Installation.
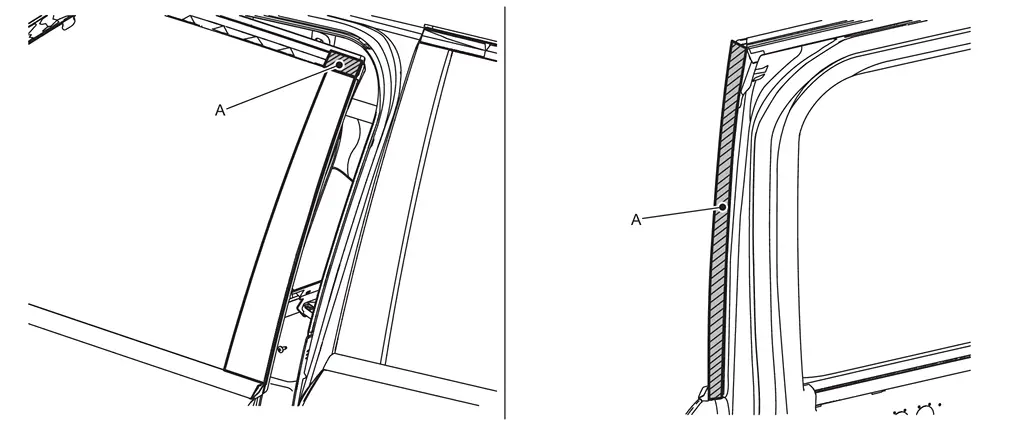
Apply protective tapes (A) on the part to protect it from damage.
Disengage fixing pawl using remover tool (A).
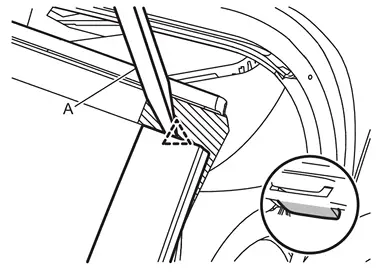
CAUTION:
-
Never damage the front door panel.
-
Never lift the front door sash cover with excessive force.
|
: Pawl |
Insert a remover tool (A) between front door panel and front door sash cover, and then cut double-sided tape using a cutter (B) while lifting front door sash cover.
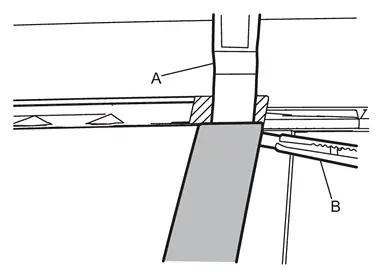
Remove front door sash cover.
CAUTION:
Remove double-sided tape remaining on front door panel and back of front door sash cover with a double-sided tape remover, after removing front door sash cover.
INSTALLATION
Note the following items, and then install in the reverse order of removal.
CAUTION:
-
Always replace double-sided tape and EPT seal with new ones, if front door sash cover is reused.
-
Degrease front door sash cover mounting surface of front door panel.
-
Paint grain or dust on mounting surface of front door sash cover may spoil exterior appearance if it remains. Clean the mounting surface and check that no paint grain or dust remains, before starting the operation.
-
Never wash the vehicle within 24 hours after installing so as to keep adhesive.
 NOTE:
NOTE:
-
The following table shows the specified values for checking normal installation status.
-
Fitting adjustment cannot be performed.
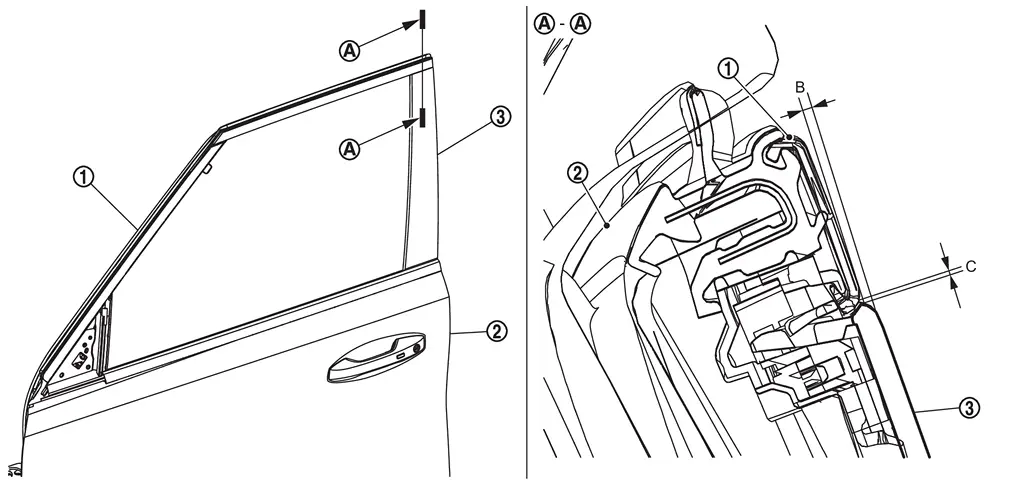
Front door sash molding Front door panel Front door sash cover B : 0.2 - 2.0 mm (0.008 - 0.079 in) C : 0.1 mm (0.004 in)
Rear Door Sash Cover
Removal and Installation
REMOVAL
Rear Door Sash Cover Front
Remove rear door outside molding. Refer to Removal and Installation.
Remove rear door glass run of upper side. Refer to Removal and Installation.
Remove rear door weather-strip of upper side. Refer to Removal and Installation.
Apply protective tape (A) on the part to protect it from damage.
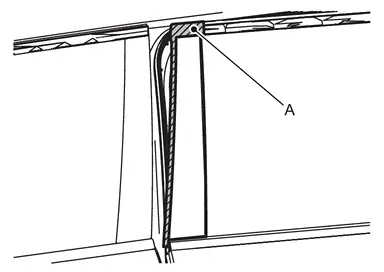
Disengage fixing pawl using remover tool (A).
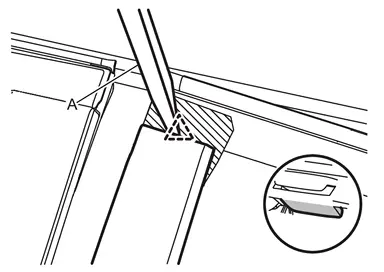
CAUTION:
-
Never damage the rear door panel.
-
Never lift the rear door sash cover front with excessive force.
|
: Pawl |
Insert a remover tool (A) between rear door panel and rear door sash cover front, and then cut double-sided tape using a cutter (B) while lifting rear door sash cover front.
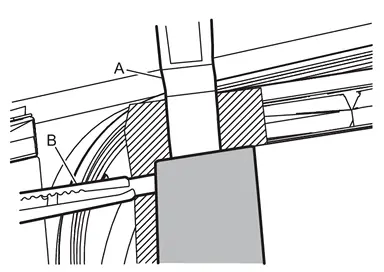
Remove rear door sash cover front.
CAUTION:
Remove double-sided tape remaining on rear door panel and back of rear door sash cover front with a double-sided tape remover, after removing rear door sash cover front.
Rear Door Sash Cover Rear
Remove rear door outside molding. Refer to Removal and Installation.
Remove rear door glass run of upper side. Refer to Removal and Installation.
Remove rear door weather-strip of upper side. Refer to Removal and Installation.
Apply protective tape (A) on the part to protect it from damage.
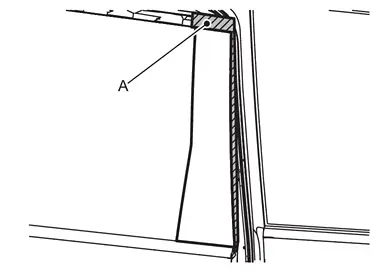
Disengage fixing pawl using remover tool (A).
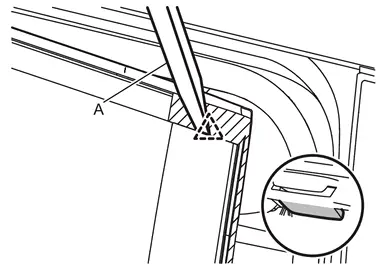
CAUTION:
-
Never damage the rear door panel.
-
Never lift the rear door sash cover rear with excessive force.
|
: Pawl |
Insert a remover tool (A) between rear door panel and rear door sash cover rear, and then cut double-sided tape using a cutter (B) while lifting rear door sash cover rear.
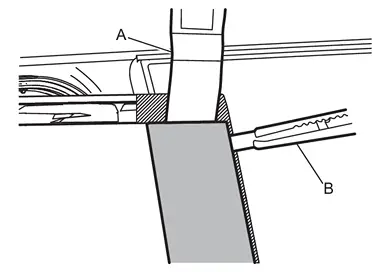
Remove rear door sash cover rear.
CAUTION:
Remove double-sided tape remaining on rear door panel and back of rear door sash cover rear with a double-sided tape remover, after removing rear door sash cover rear.
INSTALLATION
Note the following items, and then install in the reverse order of removal.
CAUTION:
-
Always replace double-sided tape and EPT seal with new ones, if rear door sash cover (front and rear) is reused.
-
Degrease rear door sash cover (front and rear) mounting surface of rear door panel.
-
Paint grain or dust on mounting surface of rear door sash cover (front and rear) may spoil exterior appearance if it remains. Clean the mounting surface and check that no paint grain or dust remains, before starting the operation.
-
Never wash the vehicle within 24 hours after installing so as to keep adhesive.
NOTE:
-
The following table shows the specified values for checking normal installation status.
-
Fitting adjustment cannot be performed.
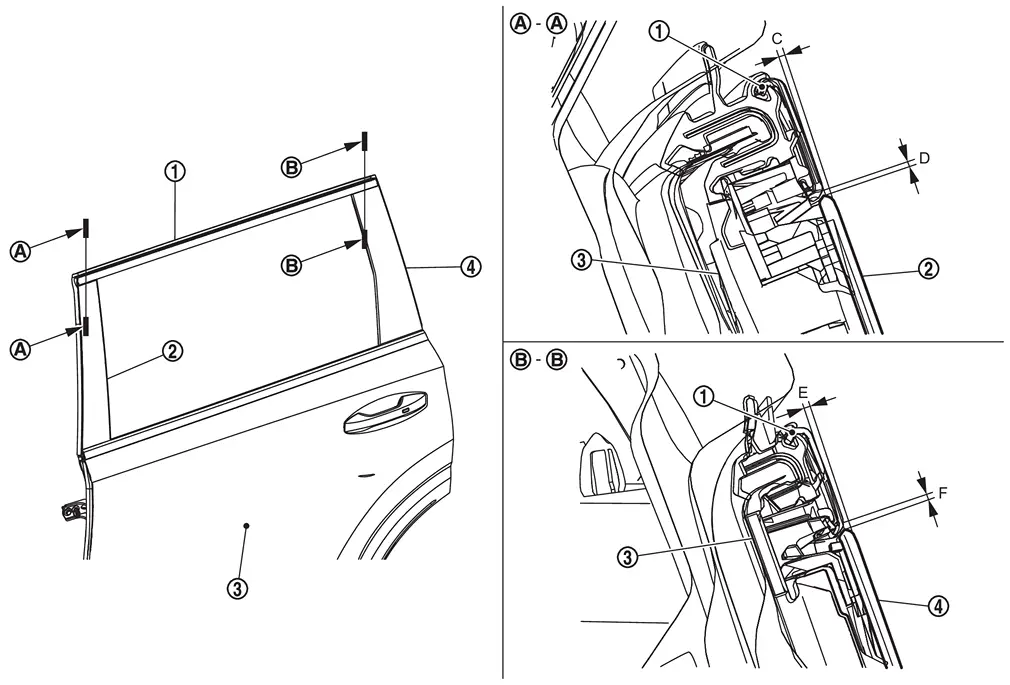
Rear door sash molding Rear door sash cover front Rear door panel Rear door sash cover rear C : 0.2 - 2.0 mm (0.008 - 0.079 in) D : 0.1 mm (0.004 in) E : 0.2 - 2.0 mm (0.008 - 0.079 in) F : 0.1 mm (0.004 in)
Other materials
Safety note
WARNING
Never disassemble or modify the Nissan Armada system components. Doing
so may result in malfunction, fire, electric shock, or serious injury.
If the Nissan Armada system shows abnormal behavior, such as freezing,
loss of sound, or delayed response, discontinue use immediately.
...
Service After Replacing or Removing Engine Parts
Description
×:Applicable Part name Service performed Service Manual item Reference
Replacement Removal
ECM
×
—
Additional service when replacing ECM
Refer to Work Procedure.
Accelerator pedal position sensor
×
×*1
Accelerator pedal released position learning
Refer to ...
Glass & Window System Tools and Preparation
Special Service Tools
The actual shapes of TechMate tools may differ from those of special service tools illustrated here.
Tool number
(TechMate No.)
Tool name Description
(NI-39570)
Chassis ear
Locates the noise
(NI-50397)
NISSAN Squeak and Rattle Kit
Repairs the cause of noise
C ...