Exploded View
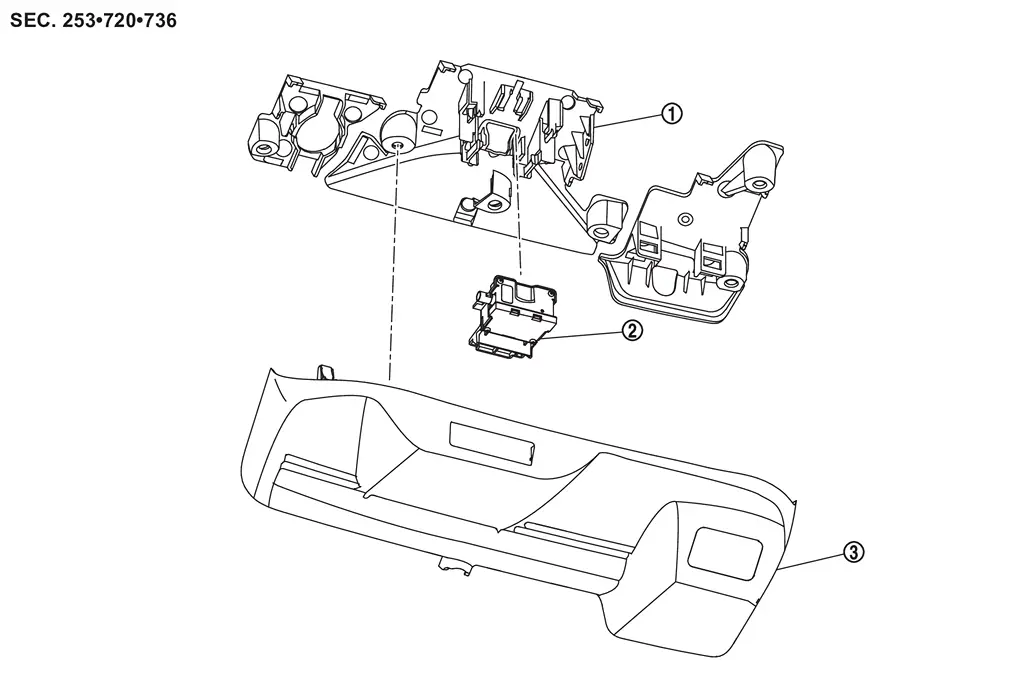
 |
Bracket |  |
Driver assistance camera |  |
Cover |
Removal and Installation
REMOVAL
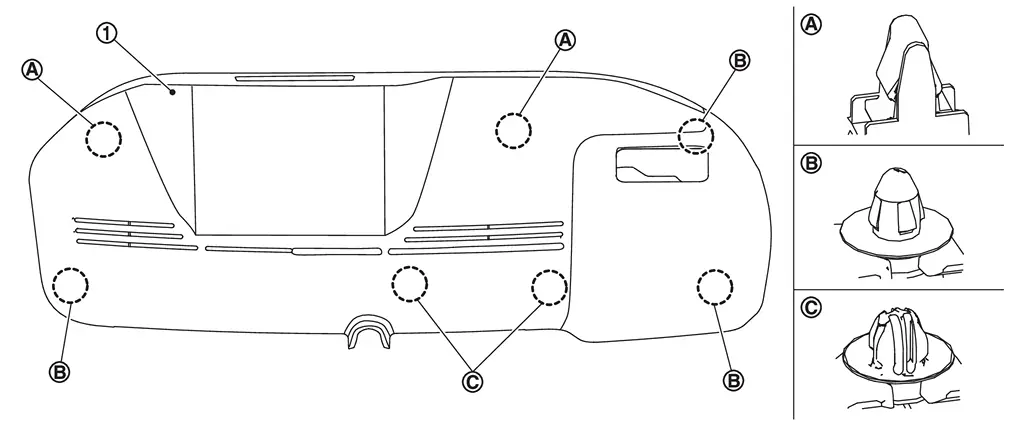
Using a suitable tool, release clips  , and remove cover .
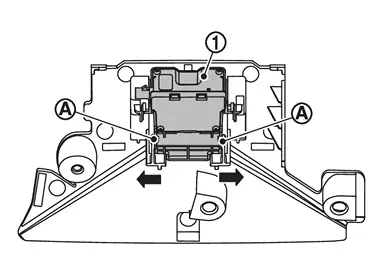
Disconnect front camera unit harness connector.
Release pawls  of bracket, and remove front camera unit from bracket.
INSTALLATION
Installation is in the reverse order of removal.
CAUTION:
-
Do not touch or shock the driver assistance camera lens area or drop the driver assistance camera.
-
Make sure that the driver assistance camera harness is not twisted after installation.
-
Align the cover clips with the bracket holes and install by hand. Do not use excessive force.
-
Perform camera aiming every time the driver assistance camera is removed and installed. Refer to Work Procedure.
Other materials
Rear window defroster and outside mirror defroster
Example
In the Nissan Armada, the rear window and outside mirror defroster switch is
conveniently located on the front climate control panel for quick and easy access.
To clear fog or frost from the rear window and outside mirrors in the Nissan
Armada, start the engine and press the defros ...
Oil Pan (upper)
Exploded View
Oil pan (upper)
O-ring 1
Engine oil pressure control solenoid valve
O-ring 2
Engine oil level sensor
O-ring 3
Oil level gauge guide
O-ring 4
Oil level gauge
Comply with the installation procedure when tightening. Refer to Disassembly and Assembly.
: ...
Luggage Room
Removal and Installation
REMOVALRemove rear floor carpet. Refer to Removal & Installation.
Disconnect inside key antenna (luggage room) harness connector.
Remove inside key antenna (luggage room) fixing nuts , and then remove inside key antenna (luggage room carpet) .
INSTALLATIONInstall in the ...