
Nissan Armada 2025-2026 Service and Repair Manual: ENGINE COOLANT : Refilling
WARNING:
REFILLING (FOR COOLANT REFILL TOOL)
WARNING:
If the multi-way control valve is not fully open, engine over heat risk may increase when driving caused by air remaining(LLC is not fully filled) in the coolant hose.
CAUTION:
Do not put additive such as waterleak preventive, since it may cause cooling waterway clogging.
When refilling use Genuine NISSAN Long Life Antifreeze/Coolant (blue) or equivalent in its quality mixed with water (distilled or demineralized). Refer to Fluids and Lubricants.
Check the tightening condition of hose clamp, drain plug, and others.
Do not start engine when reservoir tank does not contain engine coolant.
Electric water pump may be activated under the status of ignition switch ON. To prevent damage, electric water pump must not be activated when engine coolant is insufficient.
Close drain plug.
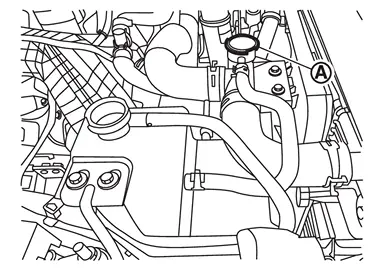
Set the coolant refill tool [SST:KV991J0070(NI-45695-A)] (A) to the reservoir tank.
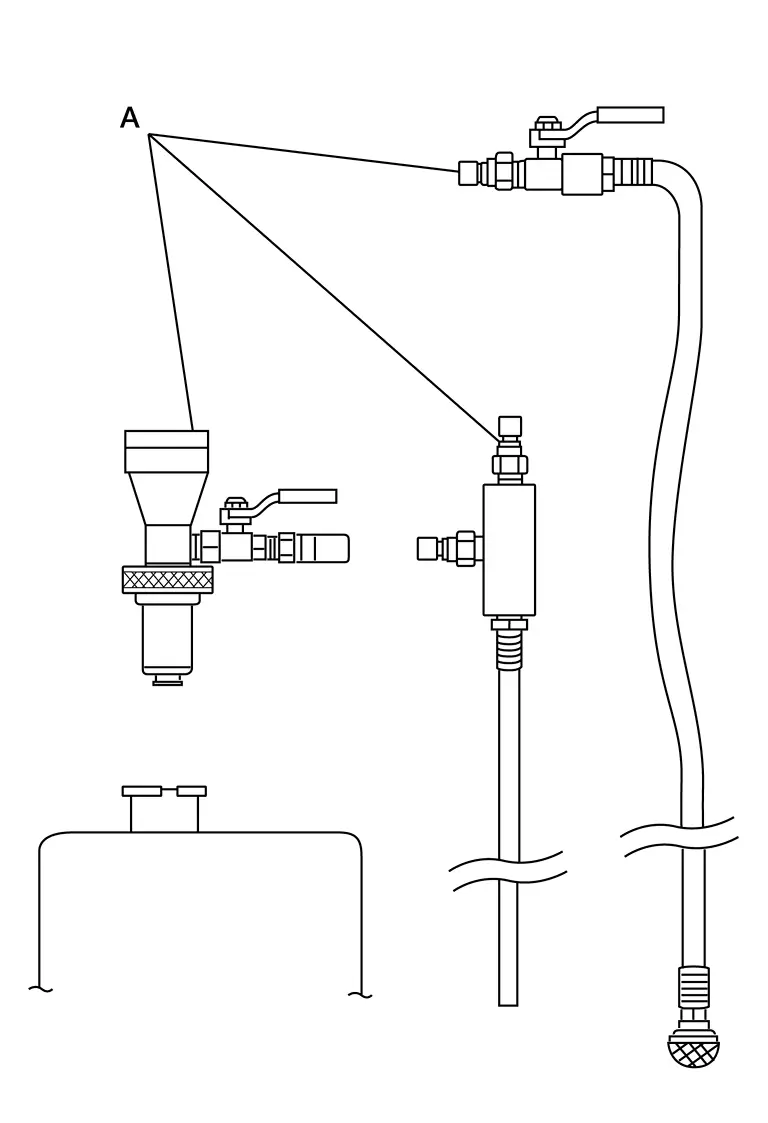
Set vacuum water injection machine [commercial tool: capable negative pressure is 90 kPa (675 mmHg, 27 inHg) or more] to the reservoir tank.
Perform water injection according to each instruction manual.
Confirm that the value of the vacuum gauge is about 96 kPa (720 mmHg, 28 inHg) and start the refilling of engine coolant
CAUTION:
Internal pressure applied to the radiator when water is injected must be 196kPa (1470 mmHg, 58 inHg) or less.
Refill engine coolant up to radiator to specified level.
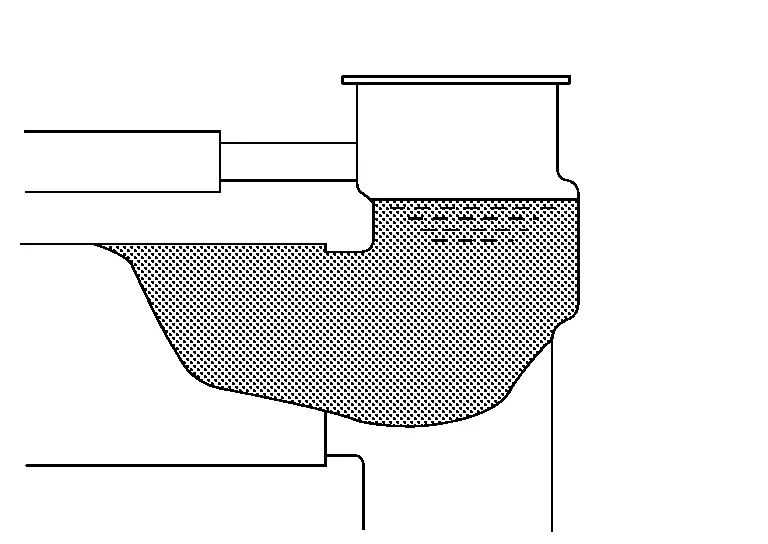
Refill engine coolant up to "MAX" line level of reservoir tank and tighten the cap.
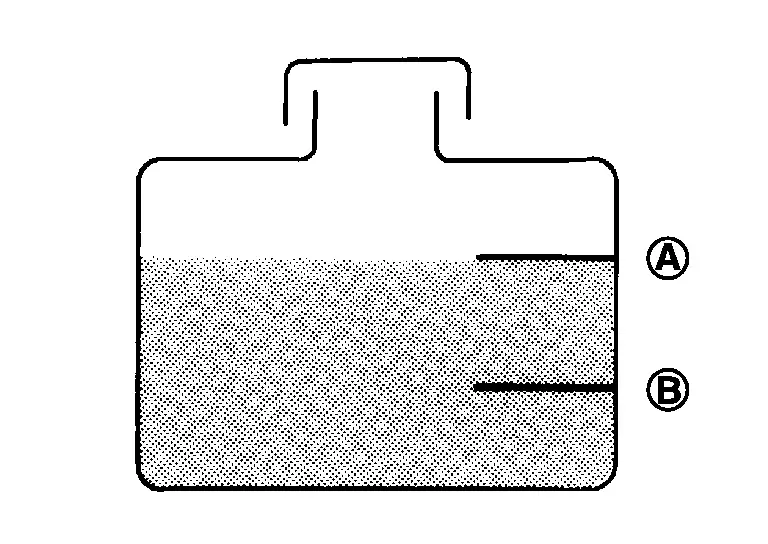
 | : MAX |
 | : MIN |
Start the engine and warm it up.
CAUTION:
Watch water temperature gauge so as not to overheat engine.
Stop the engine and cool down.
If necessary, refill radiator up to filler neck with engine coolant.
CAUTION:
Never adhere the engine coolant to electronic equipments (alternator etc.).
Refill reservoir tank to “MAX� level line with engine coolant.
| : MAX |
| : MIN |
CAUTION:
Never adhere the engine coolant to electronic equipments (alternator etc.).
REFILLING(EXCEPT FOR COOLANT REFILL TOOL)
WARNING:
CAUTION:
Check the tightening condition of hose clamp, drain plug, and others.
Do not start engine when reservoir tank does not contain engine coolant.
Close drain plug.
Remove cap  of the front heater outlet pipe assembly
  .
.
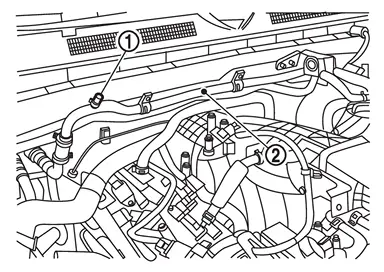
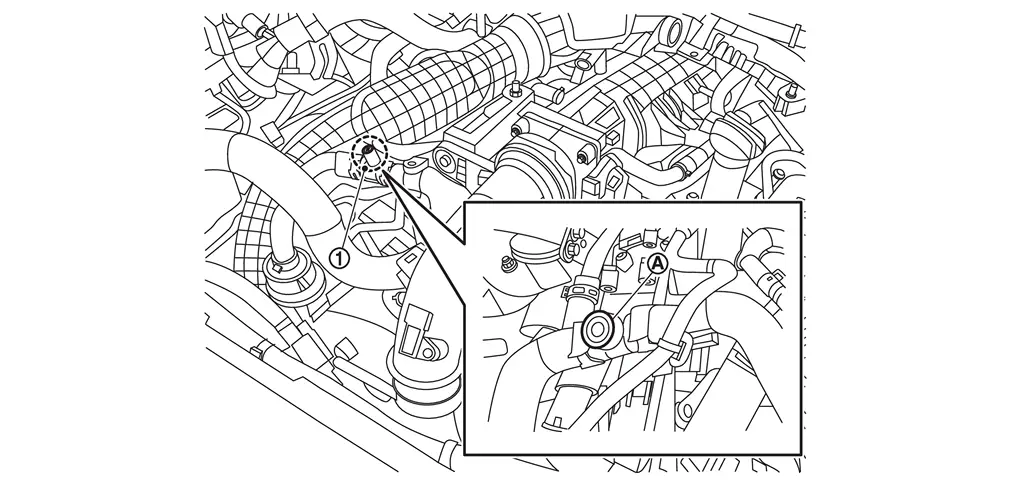
Remove drain plug of the connector .
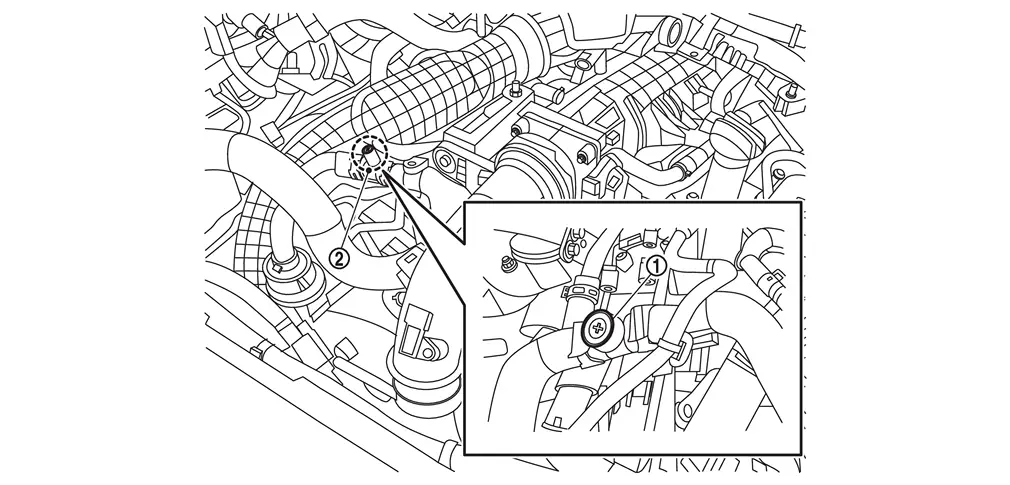
Pour engine coolant from the part of the radiator pipe assembly.
When the engine coolant comes out from the part of the connector , stop water injection.
Pour coolant slowly in to the reservoir tank at of less than 3 â„“ (3-1/8 US qt, 2-5/8 lmp qt) a minute to allow air in system to escape.
| Engine coolant capacity | Refer to ENGINE COOLANT : Service Data. |
| (With reservoir tank at “MAX� level) |
Install reservoir tank cap.
Pour coolant slowly in to the radiator pipe assembly at of less than 3 â„“ (3-1/8 US qt, 2-5/8 lmp qt) a minute to allow air in system to escape.
Install radiator cap.
Install cap  of the front heater outlet pipe assembly .
Warm up engine until opening thermostat. Standard for warming-up time is approximately 10 minutes at 3,000 rpm.
Check thermostat opening condition by touching radiator hose (lower) to see a flow of warm water.
CAUTION:
Watch water temperature gauge so as not to overheat engine.
Stop the engine and cool down to less than approximately 50°C (122°F).
Cool down using fan to reduce the time.
Check the engine coolant level. If the level is low, refill with reservoir tank to “MAX� level line with engine coolant and repeat the steps from Step 11.
: MAX : MIN CAUTION:
Never adhere the engine coolant to electronic equipments (alternator etc.).
Check flow noise, according to the following steps.
CAUTION:
To check flow noise, turn OFF the radio and close the windows, doors, and the hood.
Allow the engine to become cold [approximately 50°C (122°F) or less]. Start the engine, maintain 1000 rpm for approximately 30 seconds, and increase the engine speed from 1000 to 3000 rpm. Repeat this cycle three times. Check that flow noise can be heard from the heater core during the Step b operation. If flow noise can be heard, repeat from Step 11 of Refilling to Step c of Flow Noise Verification Method. Check that the reservoir tank cap is tightened. ENGINE COOLANT : Draining
WARNING:
WARNING:
To avoid being scalded, never change engine coolant when the engine is hot.
Wrap a thick cloth around reservoir tank cap and carefully remove reservoir tank cap.
First, turn reservoi ...
 ENGINE COOLANT : Flushing
WARNING:
Install reservoir tank if removed, and radiator drain plug.
CAUTION:
Be sure to clean drain plug and install with new O-ring.
Tightening torque Refer to RADIATOR : Exploded View.
If wate ...
Other materials:
Inspection
Open and close rear door. Check that rear door hinge and rear door check link rotation portion moves smoothly.
Check rear door hinge rotating part for lubrication condition. Apply body grease if necessary.
: Body grease
Check rear door check link rotating part for lubrication condition. Apply ...
Removal and Installation
REMOVAL
Front Air Mix Door Motor (Driver Side)
Remove instrument lower panel LH and steering column cover lower. Refer to Removal and Installation.
Remove driver knee air bag module. Refer to Removal and Installation.
Remove side ventilator duct 2 LH. Refer to Removal and Installation.
Disconnect fr ...
Inspection
WARNING:
FLUID LEAKAGE
Check transfer surrounding area (oil seal, drain plug, and filler plug etc.) for fluid leakage.
FLUID LEVEL
Remove filler plug . Then check that fluid is filled up from mounting hole for the filler plug.
CAUTION:
Never start engine while checking fluid level.
Install filler ...

0.005