
Nissan Armada 2025-2026 Service and Repair Manual: EXHAUST SYSTEM : Removal & Installation
WARNING:
REMOVAL
Remove spare tire. Refer to Removal & Installation.
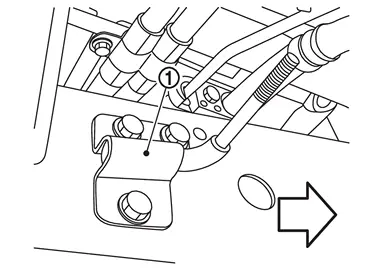
Remove rear muffler with the following procedure: Loosen the mounting nut  of the mounting bracket
  .
.
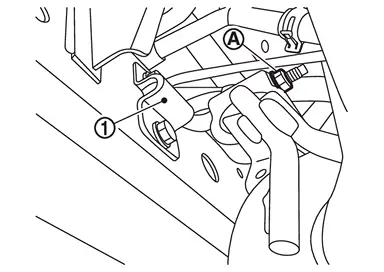
CAUTION:
Be careful not to hit the rear muffler with the tool.
Remove mounting rubber 1 and rear muffler  from the vehicle as a set.
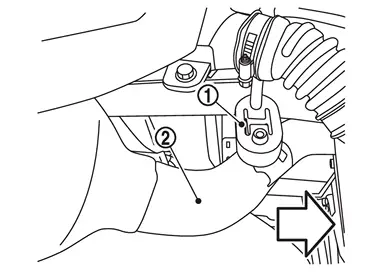
 : Vehicle front : Vehicle front |
from the mounting bracket , and remove the mounting rubber 3 and rear muffler  as a set from the mounting bracket.
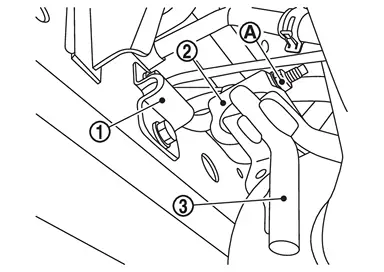
and mounting rubber 3 from rear muffler .
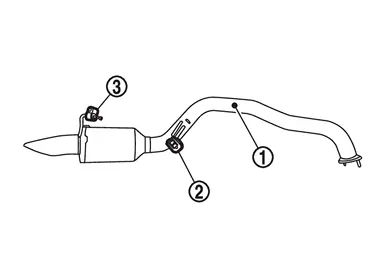
if necessary.
| : Vehicle front |
Disconnect each connection and remove the main muffler.
INSTALLATION
Note the following items, and install in the reverse order of removal.
Temporarily tighten bolts and nuts when installing exhaust pipe assembly. Tighten them to the specified torque when connecting the vehicle rear to the vehicle front.
CAUTION:
Always replace exhaust tube gaskets with new ones when reassembling.
If heat insulator is badly deformed, repair or replace it. If deposits such as mud pile up on the heat insulator, remove them.
When installing heat insulator avoid large gaps or interference between heat insulator and each exhaust pipe.
Remove deposits from the sealing surface of each connection. Connect them securely to avoid gases leakage.
Check each part for unusual interference, and then tighten them to the specified torque.
When installing each mounting rubber, avoid twisting or unusual extension in up/down and right/left directions.
 EXHAUST SYSTEM : Exploded View
Mounting rubber 1 Main muffler Mounting rubber 2 Gasket Mounting bracket Mounting rubber 3 Rear muffler Mounting rubber 4 To catalyst. Refer to Exploded View. : N·m (kg-m, ft-lb) : Always ...
 EXHAUST SYSTEM : Inspection (Removal & Installation)
INSPECTION AFTER INSTALLATION
Check clearance between tail tube and rear bumper is even.
With engine running, check exhaust tube joints for gas leakage and unusual noises.
Check to ensure that mountin ...
Other materials:
Undercoating
WARNING:
The underside of the floor and wheelhouse are undercoated to prevent rust, vibration, noise and stone chipping. Therefore, when such a panel is replaced or repaired, apply undercoating to that part. Use an undercoating which is rust resistant, soundproof, vibration-proof, shock-resistant, a ...
Disassembly and Assembly
WHEEL SIDE
Disassembly
Fix shaft with a vise.
CAUTION:
Protect shaft when fixing with a vise using aluminum or copper plates.
Remove dust shield from joint sub-assembly.
Remove boot bands and then remove boot from joint sub-assembly.
Screw the drive shaft puller (commercial service tool) (A) 30 mm ...
Head restraints/headrests
Basic information
The head restraints/headrests in the Nissan Armada are an essential part of the
overall safety system, designed to work together with seat belts and airbags to
provide enhanced protection for occupants. Proper use and adjustment of head restraints
in the Nissan Armada can si ...

0.0059