
Nissan Armada 2025-2026 Service and Repair Manual: Exploded View
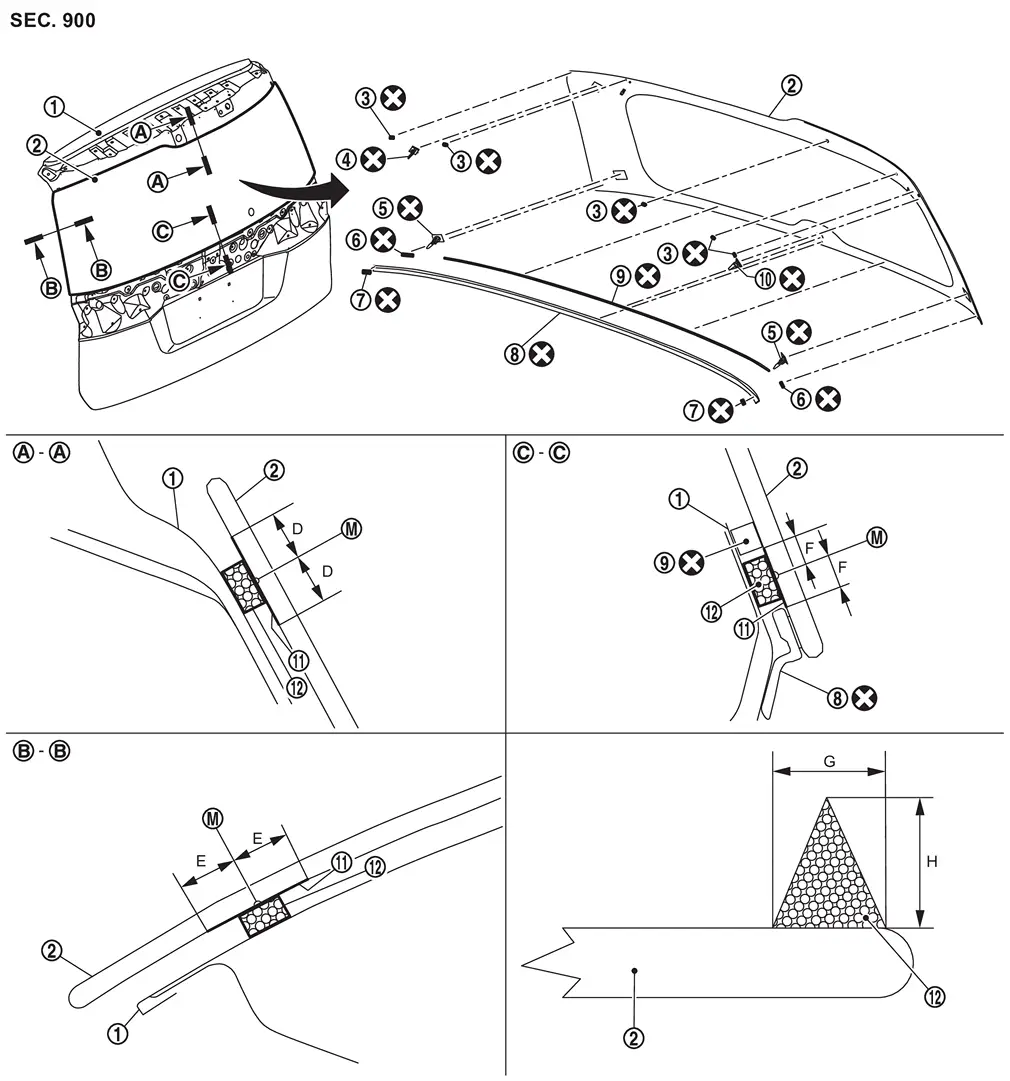
 | Back door outer panel |  | Back door window glass |  | Spacer A |
 | Clip upper RH |  | Clip lower |  | Spacer B |
 | Spacer C |  | Back door window glass molding |  | Dam sealant rubber |
 | Clip upper LH |  | Glass primer |  | Adhesive |
 | Adhesive mark | ||||
 | : Always replace after every disassembly. | ||||
Unit: mm (in)
| Portion | Primer range | Adhesive range | |||
|---|---|---|---|---|---|
| G | H | ||||
| Back door window glass – Back door outer panel |  – – | D | From adhesive mark, more than 7.5 (0.30) | 7.0 + 2.0, - 0.0 (0.28 + 0.08, - 0.0) | 12.0 + 2.0, - 0.0 (0.47 + 0.08. - 0.0) |
 – – | E | From adhesive mark, more than 7.5 (0.30) | |||
 – – | F | From adhesive mark, 4.8 (0.19) | |||

 Removal and Installation
CAUTION:
There are some cautions for the clips of "Reuse" removal/install procedure. If you want reuse back door window glass, you should be read each caution at first.
Never damage painted surface an ...
Other materials:
Removal and Installation
REMOVAL
Fully open hood assembly.
Remove front wiper arm (LH and RH). Refer to Removal and Installation.
Remove cowl top side seal.
Disconnect front washer tube connector.
CAUTION:
When washer tube is disconnected, washer fluid may come out so prepare a container to receive washer fluid and never a ...
Removal and Installation
REMOVAL
CAUTION:
Never damage body side outer panel.
Remove rear side spoiler. Refer to Removal and Installation.
Remove luggage side upper finisher. Refer toRemoval and Installation .
Disconnect window antenna connectors .
Cut the adhesive using a piano wire.Apply protective tapes (A) on body sid ...
Fuel-filler door
Basic information
CAUTION
Avoid directing high-pressure water, such as from a pressure washer,
onto or around the Nissan Armada fuel-filler door area.
Always ensure the fuel-filler door is securely closed before using an
automatic or high-pressure car wash.
Opening the fuel-filler do ...

0.0051