Exploded View
REMOVAL
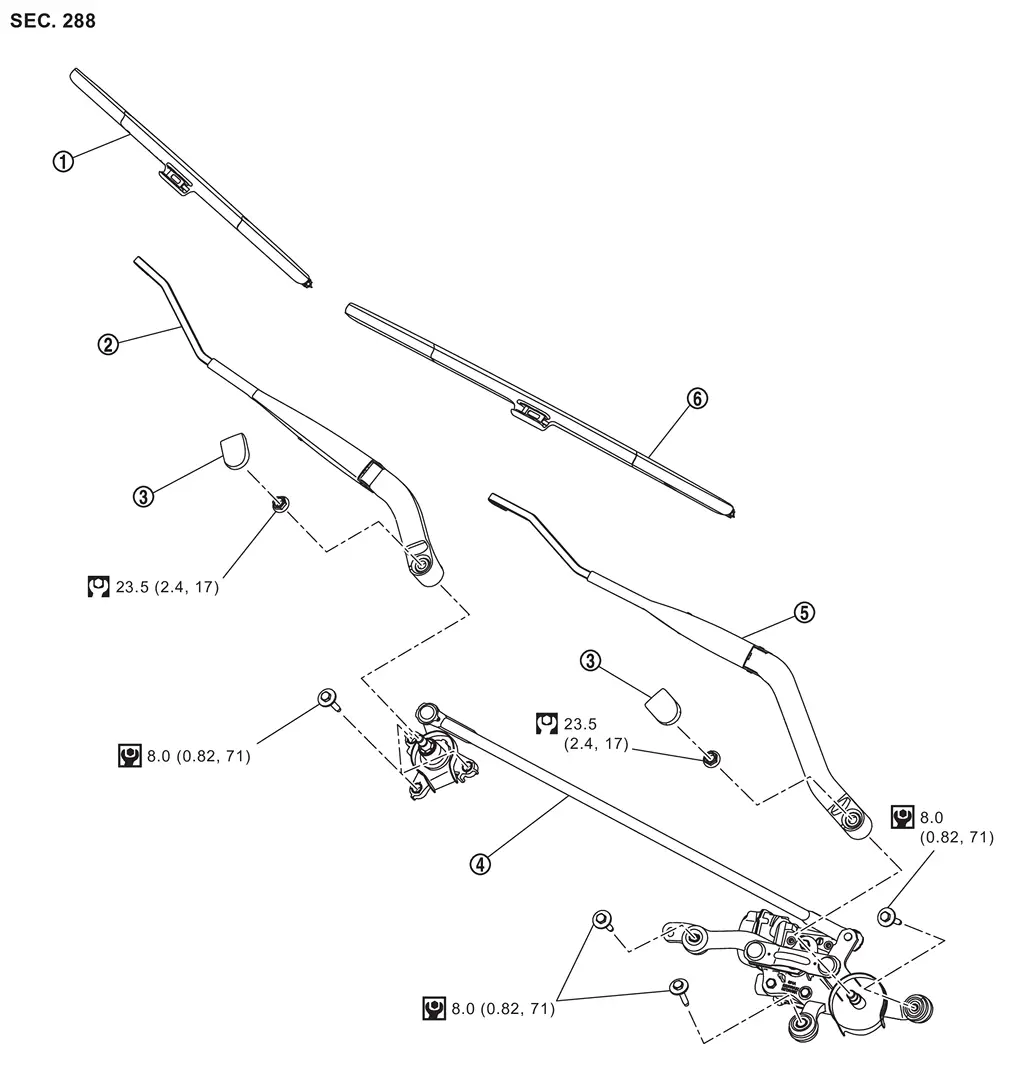
 |
Front wiper blade RH |  |
Front wiper arm RH |  |
Front wiper arm cap |
 |
Front wiper drive assembly |  |
Front wiper arm LH |  |
Front wiper blade LH |
 |
: N·m (kg-m, in-lb) | ||||
 |
: N·m (kg-m, ft-lb) | ||||
DISASSEMBLY
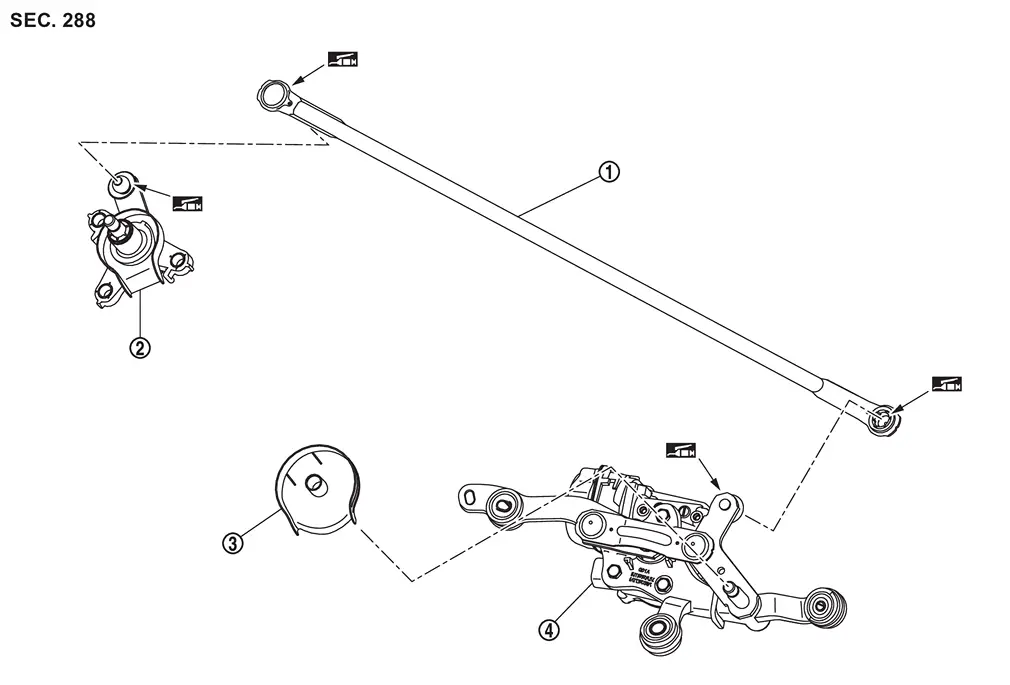
|
Front wiper linkage | |
Front wiper pivot assembly | |
Pivot cover |
|
Front wiper motor assembly | ||||
 |
: Body grease | ||||
Front Wiper Arm
Removal and Installation
CAUTION:
Clean windshield glass and front wiper refill so that windshield glass may not be damaged by dust, etc.
REMOVAL
Operate front wiper to the auto stop position. Refer to System Description.
Fully open hood assembly.
Remove front wiper arm cap.
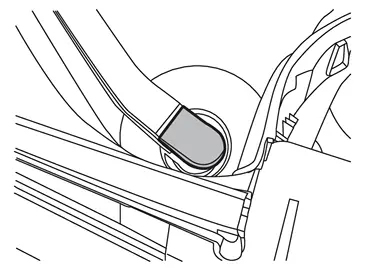
Remove front wiper arm mounting nut.
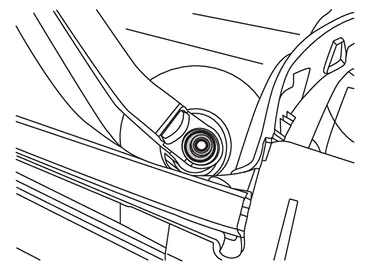
Remove front wiper arm.
INSTALLATION
Note the following items, and then install in the reverse order of removal.
CAUTION:
-
Clean front wiper arm installation location as shown in the figure, and then fully insert front wiper arm to prevent nut from being loosened by shakiness.
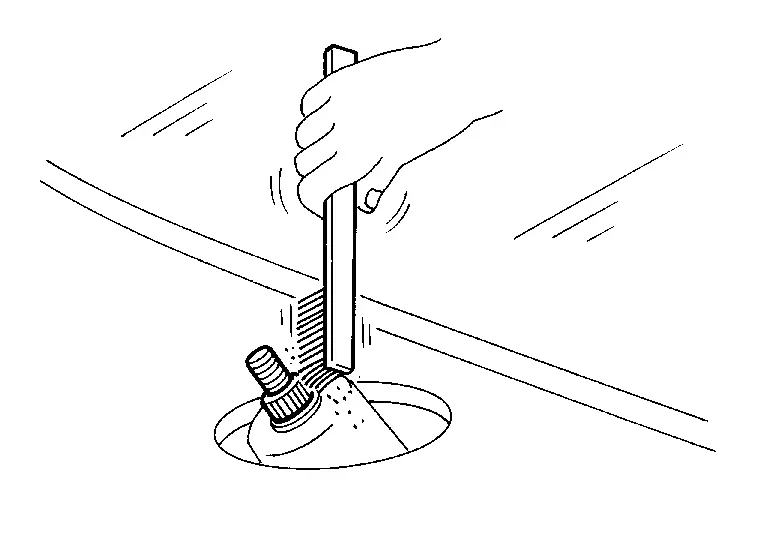
-
Before installation, operate front wiper to the auto stop position.
-
When installation, install so that it is within the specified position. And after installation, operate front wiper, and then check that front wiper blades stop at the specified position. Refer to Adjustment.
Adjustment
WIPER BLADE POSITION ADJUSTMENT
Adjust clearance between the end of cowl top cover/front fender cover RH and the top of front wiper blade center.
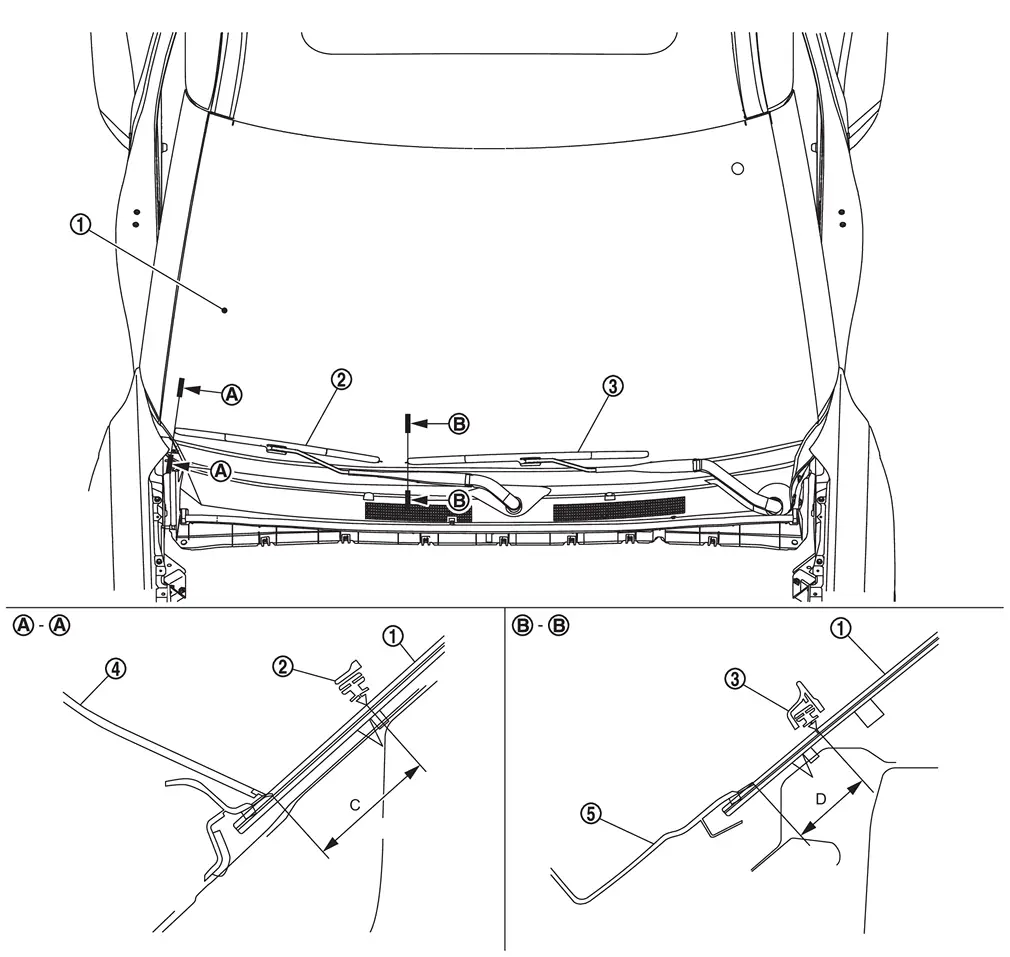
|
Windshield glass | |
Front wiper blade RH | |
Front wiper blade LH |
|
Front fender cover RH | |
Cowl top cover |
| C | : 20.8 ± 7.5 mm (0.82 ± 0.30 in) |
| D | : 13.0 ± 7.5 mm (0.51 ± 0.30 in) |
Front Wiper Blade
Removal and Installation
CAUTION:
Clean windshield glass and front wiper refill so that windshield glass may not be damaged by dust, etc.
REMOVAL
Operate front wiper to the auto stop position. Refer to System Description.
Lift up front wiper arm, and then lock back front wiper arm.
Slide to remove front wiper blade while pressing lever  according to the numerical order 1→2 indicated by arrows as shown in the figure.
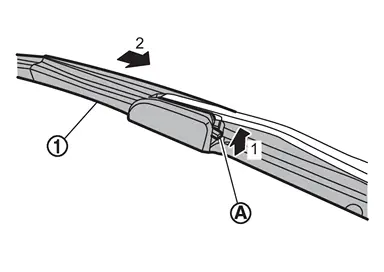
CAUTION:
After front wiper blade is removed, wrap front wiper arm with a shop cloth and fold it down so that front wiper arm does not fall against and damage windshield glass.
 NOTE:
NOTE:
When sliding front wiper blade, let front wiper blade and front wiper arm in parallel.
INSTALLATION
Install in the reverse order of removal.
Front Wiper Drive Assembly
Removal and Installation
REMOVAL
Remove cowl top cover. Refer to Removal and Installation.
Remove front wiper drive assembly mounting bolts .
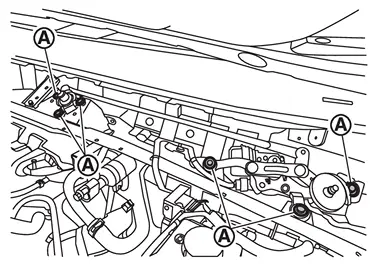
Disconnect front wiper drive assembly harness connector and remove harness clip, and then remove front wiper drive assembly.
CAUTION:
Never drop front wiper motor or cause it to come into contact with other parts.
INSTALLATION
Note the following items, and then install in the reverse order of removal.
CAUTION:
-
When installing, temporarily tighten all mounting bolts, and then tighten bolts to specified torque. Refer to Exploded View.
-
When front wiper drive assembly is replaced, before installing front wiper arm, operate front wipers to set front wiper motor to the auto stop position, and then install front wiper arms.
Disassembly and Assembly
DISASSEMBLY
Remove front wiper drive assembly. Refer to Removal and Installation.
Remove front wiper linkage from front wiper motor assembly and front wiper pivot assembly.
ASSEMBLY
Note the following item, and then assemble in the reverse order of disassembly.
CAUTION:
Before assembly, apply body grease to joint parts of front wiper linkage, front wiper pivot assembly, and front wiper motor assembly. For the grease point, refer to Exploded View.
Other materials
Electric Ivt Control Actuator Position Learning
Description
Electric intake valve timing control (IVT) module requires the learning of camshaft reference position. This learning must be performed where the following operations are performed:
Replacement of electric IVT control module
Replacement of intake/Exhaust camshaft position sensor
Rep ...
Vdc Off Switch
Removal & Installation
REMOVALNOTE:
The VDC OFF switch is integrated with the select switch unit.Remove front center console switch finisher assembly. Refer to Removal and Installation.
Remove the screws , and remove select switch unit with multi function switch from front center console switc ...
Sonar Sensor (front)
Exploded View
CITY MODELS
Front bumper fascia
Corner sensor front LH holder
Corner sensor front LH
Center sensor front LH holder
Center sensor front LH
Center sensor front RH holder
Center sensor front RH
Corner sensor front RH
Corner sensor front RH holder
vehicle fro ...