
Nissan Armada 2025-2026 Service and Repair Manual: FRONT BRAKE CALIPER ASSEMBLY : Disassembly & Assembly
DISASSEMBLY
CAUTION:
Never drop parts.
 NOTE:
NOTE:
When disassembling, torque member, brake pad, and pad retainer are not required to remove. Refer to Removal and Installation.
Remove sliding pin bolts and then remove cylinder body from torque member.
CAUTION:
Never drop brake pad by fixing it with suitable tape.
Remove sliding pin boots from torque member.
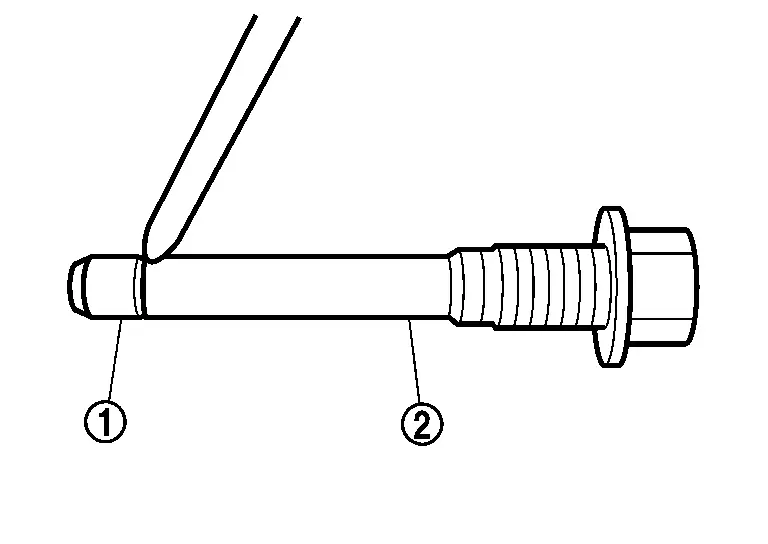
Remove bushing  from sliding pin
  .
.
Place a wooden block as shown in the figure, and blow air into union bolt mounting hole to remove pistons and piston boots.
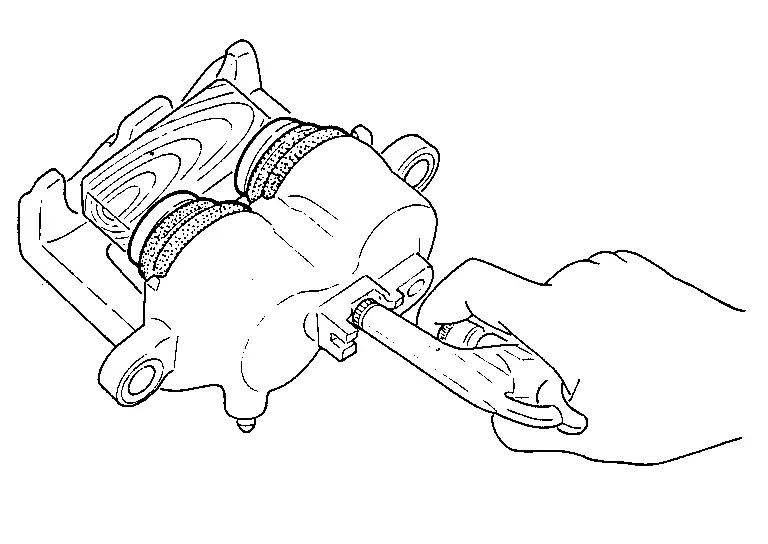
CAUTION:
Never get fingers caught in the pistons.
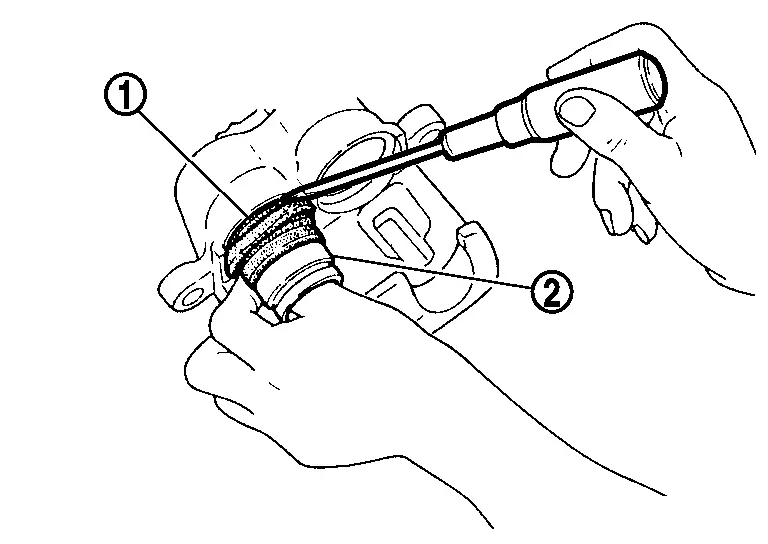
Remove piston seals from cylinder body using seal pick tool.
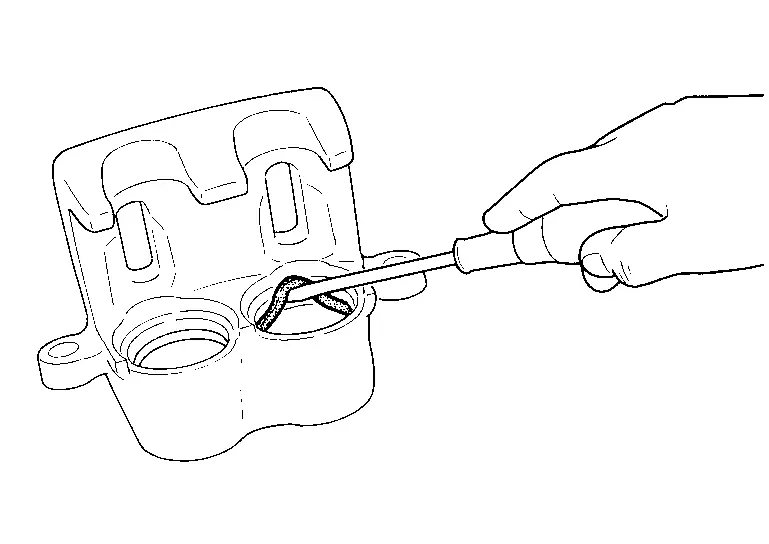
CAUTION:
Be careful not to damage a cylinder inner wall.
Remove bleeder valve and cap.
Perform inspection after disassembly. Refer to FRONT BRAKE CALIPER ASSEMBLY : Inspection.
ASSEMBLY
CAUTION:
Never drop parts.
Install bleeder valve and cap.
Apply new brake fluid to piston seals , and install them to cylinder body.
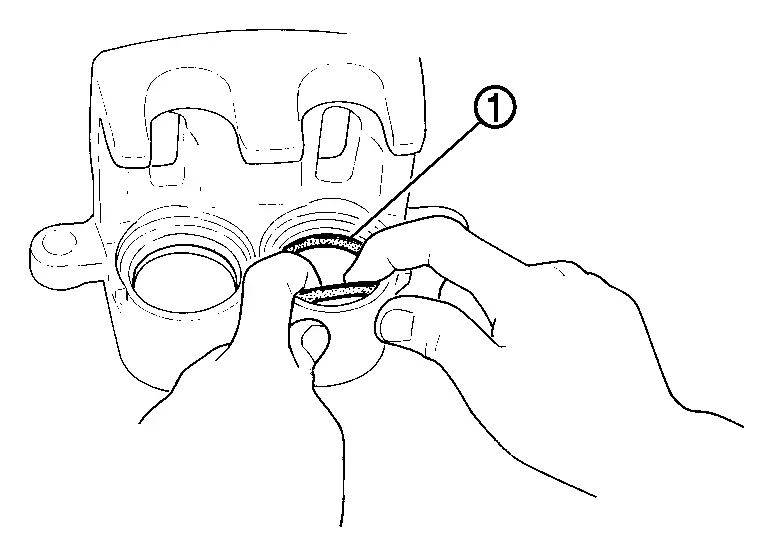
CAUTION:
Never reuse piston seals.
Apply new brake fluid to piston boots . Cover piston end with piston boot, and then install cylinder side lip of piston boot securely into groove on cylinder body.
CAUTION:
Never reuse piston boots.
Apply new brake fluid to pistons . Push piston into cylinder body and then install piston-side lip of piston boot into the piston groove.
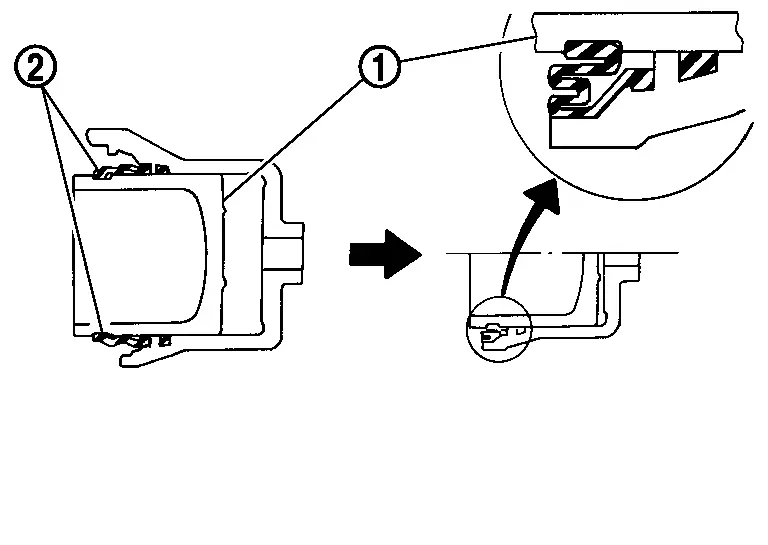
CAUTION:
Press the pistons evenly and vary the pressing point to prevent cylinder inner wall from being rubbed.
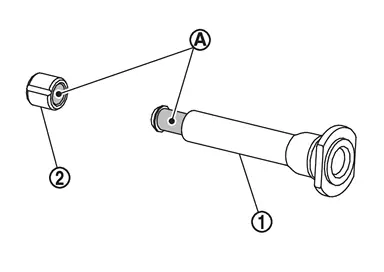
Apply rubber grease to mating faces  between sliding pin and bushing , and install bushing to sliding pin.
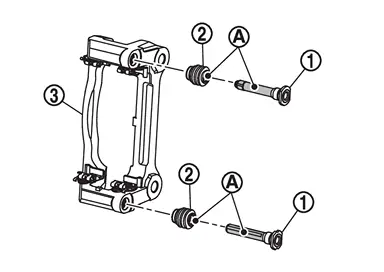
Apply rubber grease to mating faces between sliding pins and sliding pin boots , and install sliding pins and sliding pin boots to torque member  .
.
Install cylinder body to torque member and tighten sliding pin bolts to the specified torque. Refer to FRONT BRAKE CALIPER ASSEMBLY : Exploded View.
 FRONT BRAKE CALIPER ASSEMBLY : Removal & Installation
WARNING:
REMOVAL
WARNING:
Remove dust covering brake caliper assembly and brake pad with a dust collector. Never splatter the dust with an air blow gun.
CAUTION:
Never drop parts after removal.
If the ...
 FRONT BRAKE CALIPER ASSEMBLY : Inspection
INSPECTION AFTER DISASSEMBLY
Check the following items and replace if necessary.
Cylinder Body
Check cylinder inner wall for rust, wear, cracks or damage.
CAUTION:
Always clean with new brake fluid. N ...
Other materials:
Work Flow (With EXP-800 NI or GR8-1200 NI)
CHARGING SYSTEM DIAGNOSIS WITH EXP-800 NI OR GR8-1200 NI
To test the charging system, use the following special service tools:
EXP-800 NI Battery and electrical diagnostic analyzer
GR8-1200 NI Multitasking battery and electrical diagnostic station
NOTE:
Refer to the applicable Instruction Manual fo ...
Work Procedure
STEP 1
Fully close the back door manually.
>>
GO TO 2.
STEP 2
Operate back door opener switch and perform automatic back door open operation.
>>
GO TO 3.
STEP 3
The back door fully opens.
Check that automatic back door warning buzzer sounds normally.
Does automatic back door warning ...
Removal and Installation
WARNING:
Before servicing, disconnect battery negative terminal. Refer to Precautions for Removing Battery Terminal.
CAUTION:
Always apply the parking brake before performing removal and installation.
REMOVAL
CAUTION:
When removing, always use a remover tool that is made of plastic.
Disengage fixing ...

0.0064