
Nissan Armada 2025-2026 Service and Repair Manual: Removal and Installation
WARNING:
Before servicing, disconnect battery negative terminal. Refer to Precautions for Removing Battery Terminal.
CAUTION:
Always apply the parking brake before performing removal and installation.
REMOVAL
CAUTION:
When removing, always use a remover tool that is made of plastic.
Disengage fixing clip and metal clips according to numerical order 1→3 indicated by arrows as shown in the figure, and then remove instrument lower cover LH.
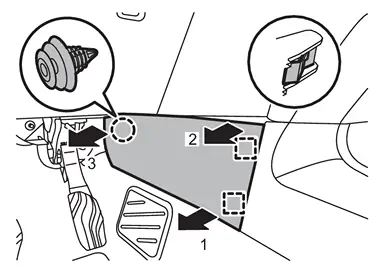
 | : Clip |
 | : Metal clip |
Remove instrument lower cover RH.Apply protective tape (A) on the part to protect it from damage.
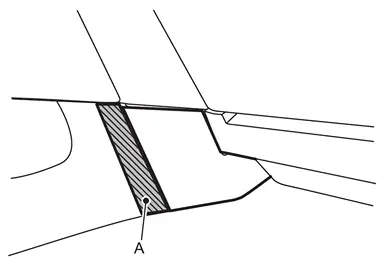
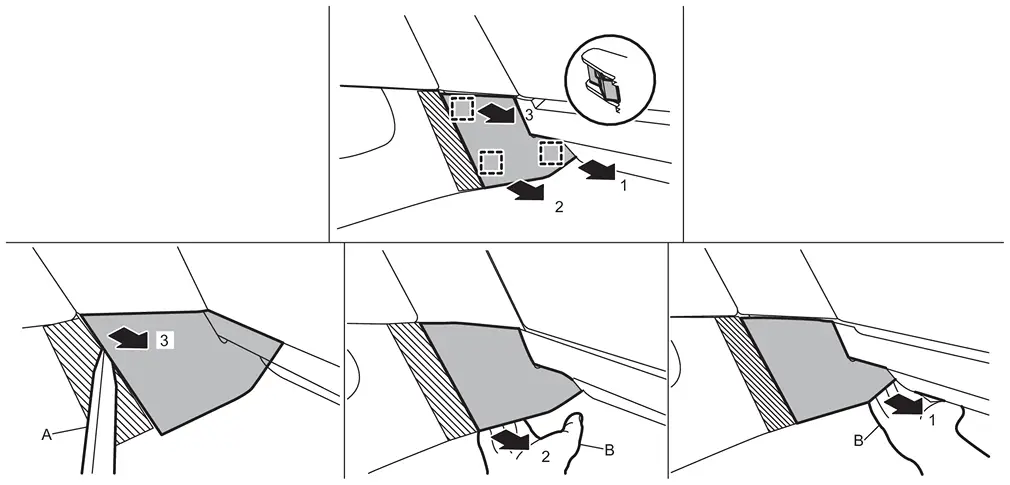
| : Metal clip |
Disengage fixing metal clips according to numerical order 1→2 indicated by arrows as shown in the figure, and then remove front center console side finisher upper LH.
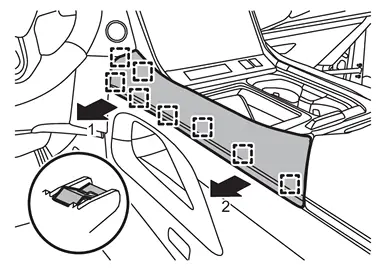
| : Metal clip |
Disengage fixing metal clips according to numerical order 1→2 indicated by arrows as shown in the figure, and then remove front center console side finisher upper RH.
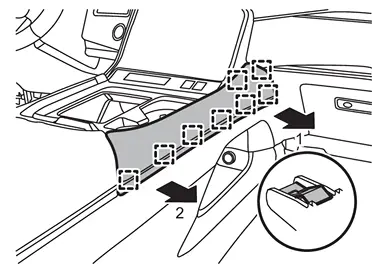
| : Metal clip |
Disengage fixing metal clips according to numerical order 1→2 indicated by arrows as shown in the figure, and then remove front center console side finisher lower LH.
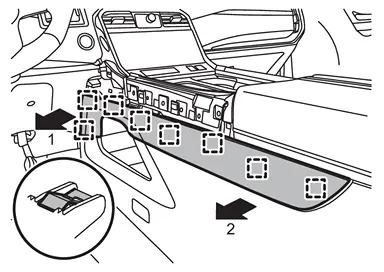
| : Metal clip |
Disengage fixing metal clips according to numerical order 1→2 indicated by arrows as shown in the figure, and then remove front center console side finisher lower RH.
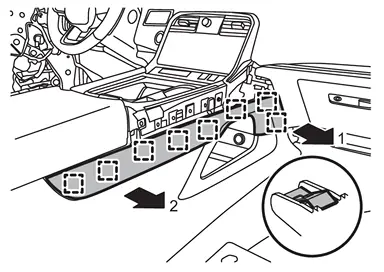
| : Metal clip |
Remove front center console cup holder assembly.Disengage fixing metal clips according to numerical order 1→2 indicated by arrows as shown in the figure.
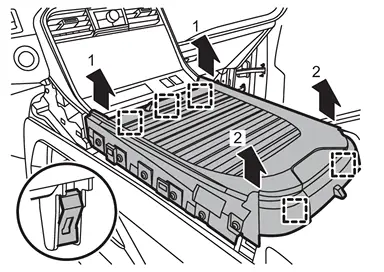
| : Metal clip |
Remove front center console switch finisher assembly.Remove fixing screws  .
.
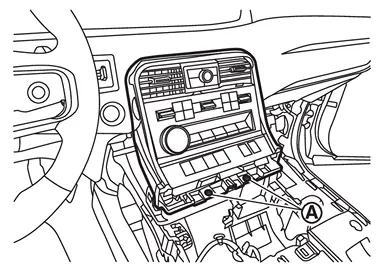
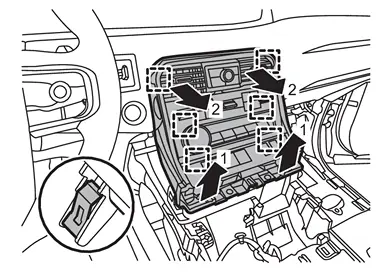
| : Metal clip |
Remove front center console bracket.Remove fixing screws .
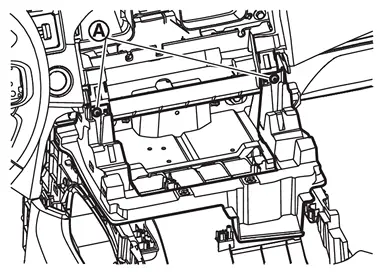
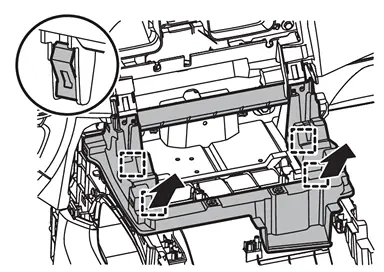
| : Metal clip |
Remove front center console rear finisher assembly.Disengage front center console rear finisher assembly fixing pawls and metal clips by hands according to arrows direction as shown in the figure.
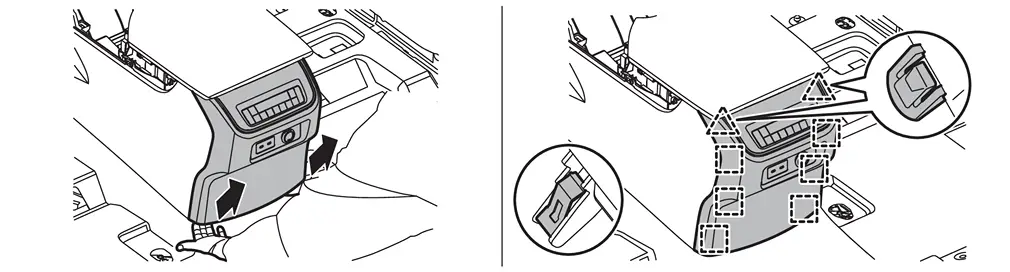
 | : Pawl |
| : Metal clip |
Remove front center console mask (LH and RH).Apply protective tapes (A) on the part to protect it from damage.
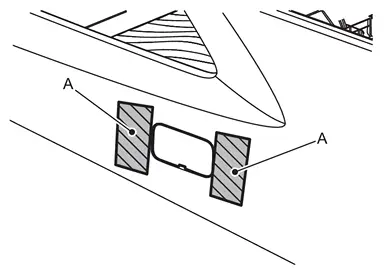
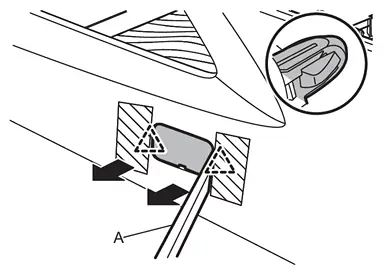
| : Pawl |
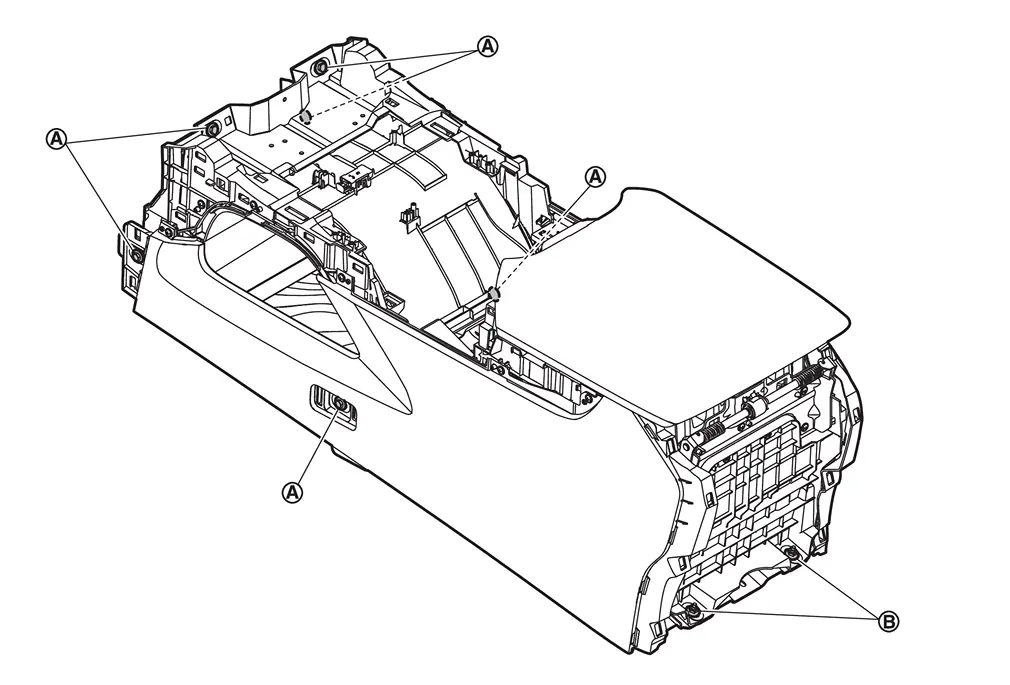
Remove front center console body assembly.Disconnect harness connector and disengage harness fixing clips on front center console body assembly. Remove front center console body mounting bolts and nuts  .
.
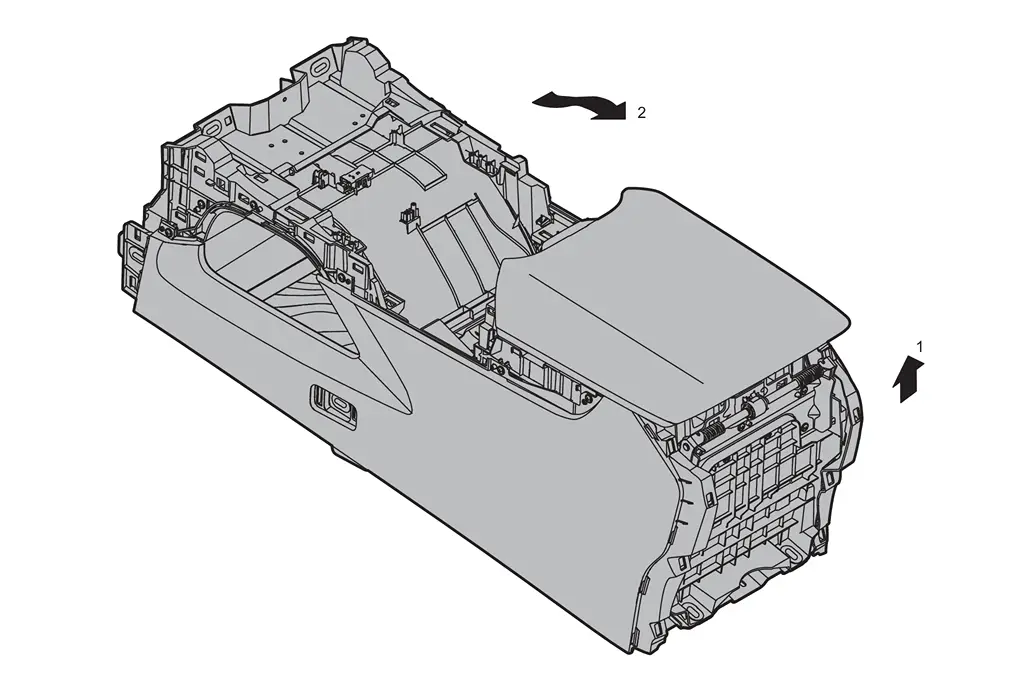
INSTALLATION
Install in the reverse order of removal.
 Exploded View
REMOVAL
Front center console switch finisher assembly Front center console bracket Front center console side finisher upper LH Front center console side finisher lower LH Instrument lower cover L ...
 Disassembly and Assembly
DISASSEMBLY
CAUTION:
When disassemble, always use a remover tool that is made of plastic.
Front Center Console Switch Finisher Assembly
Remove preset switch. Refer to Removal & Installation.
Remov ...
Other materials:
Inspection
If a A/C compressor is malfunctioning (internal noise, insufficient cooling), check the compressor oil.
COMPRESSOR OIL JUDGMENT
Remove the A/C compressor. Refer to Removal and Installation.
Sample a compressor oil and judge on the figure.
Judgement result 1
Replace A/C compressor only.
Judgement r ...
Symptom Table
The diagnostics item numbers show the sequence for inspection. Inspect in order from item 1.
Perform diagnoses of symptom table 1 before symptom table 2.
SYMPTOM TABLE 1
Diagnostic item Reference Symptom Poor performance Driving performance Strange noise Shift point is high in “D� positi ...
Inspection
INSPECTION AFTER REMOVAL
Camshaft Runout
Put V-block on precise flat table, and support No. 2 and 4 journals of camshaft.
CAUTION:
Never support No. 1 journal (on the side of camshaft sprocket) because it has a different diameter from the other three locations.
A : Dial indicator
Set a dial in ...

0.0051