Adjustment
PREPARATION BEFORE ADJUSTING
 NOTE:
NOTE:
For details, refer to the regulations in your own country.
Before performing aiming adjustment, check the following.
-
Adjust the tire pressure to the specification.
-
Fill with fuel, engine coolant, and each oil.
-
Maintain the unloaded vehicle condition. (Remove luggage from the passenger compartment and the luggage room.)
NOTE:
Never remove the temporary tire, jack, and on-vehicle tool.
-
Wipe out dirt on the front fog lamp.
CAUTION:
Never use organic solvent (thinner, gasoline, etc).
-
Ride alone on the driver seat.
AIMING ADJUSTMENT SCREW
Turn the aiming adjusting screw for adjustment.
-
City model
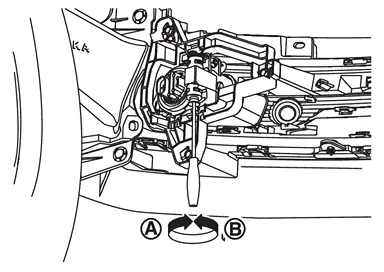
 : UP
: UP  : DOWN
 -
Off road model
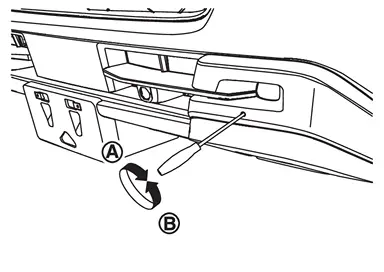 : UP : DOWN
AIMING ADJUSTMENT PROCEDURE
Place the screen.
NOTE:
-
Stop the vehicle facing the wall.
-
Place the board on a plain road vertically.
Face the vehicle with the screen. Maintain 10 m (32.8 ft) between the front fog lamp center and the screen.
Start the engine. Turn the front fog lamp ON.
CAUTION:
Never cover the lens surface with a tape, etc. The lens is made of resin.
NOTE:
Shut off the headlamp light with the board to prevent from illuminating the adjustment screen.
Adjust the cutoff line with the aiming adjustment screw so that the distance (X) between the horizontal center line of front fog lamp (H) and cutoff line becomes 100 mm (3.94 in).
Front fog lamp light distribution on the screen
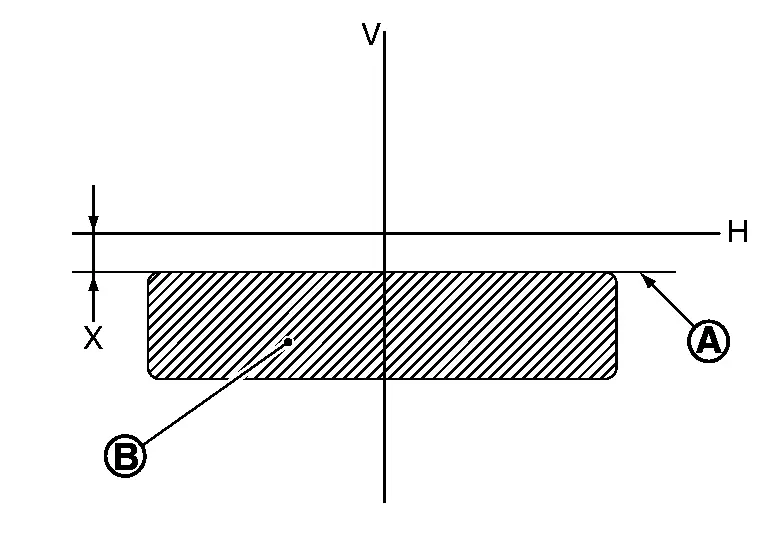
|
: Cutoff line |
|
: High illuminance area |
| H | : Horizontal center line of front fog lamp |
| V | : Vertical center line of front fog lamp |
| X | : Cutoff line height |
Other materials
Rear Door Hinge
Removal and Installation
REMOVALRemove rear door assembly. Refer to Removal and Installation.
Remove rear door hinge mounting bolts, and then remove rear door hinge from vehicle body.INSTALLATIONNote the following items, and then install in the reverse order of removal.CAUTION:
Before installation ...
Sunshade Motor Assembly
Exploded View
Refer to Exploded View.
Removal and Installation
REMOVALCAUTION:
Before removing sunshade motor, check that sunshade is fully opened.
After removing sunshade motor, never attempt to rotate sunshade motor assembly as a single unit.
Remove headlining to make work space. Refer to Rem ...
Charging System Preliminary Inspection
Inspection Procedure
CHECK 12V BATTERY TERMINALS CONNECTION
Check if 12V battery terminals are clean and tight.
Is the inspection result normal?
YES>>
GO TO 2.
NO>>
Repair 12V battery terminals connection.
CHECK “B” TERMINAL CONNECTION
Check if “B” terminal (alternator ground h ...