Exploded View
Refer to Exploded View.
Removal and Installation
CAUTION:
Always work with a helper.
REMOVAL
Remove moonroof unit assembly. Refer to Removal and Installation.
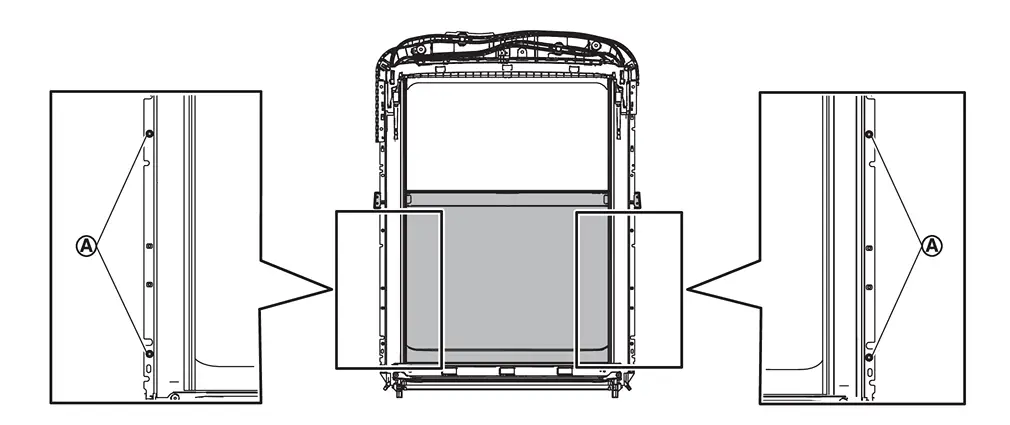
Remove rear moonroof glass fixing screws  , and then remove rear moonroof glass.
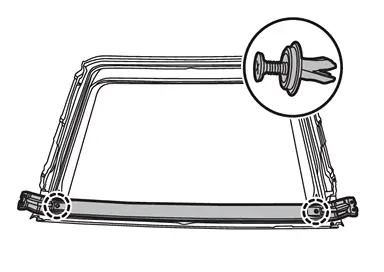
Remove fixing clips, and then remove center reinforce frame from rear moonroof glass.
 |
: Clip |
INSTALLATION
Note the following items, and then install in the reverse order of removal.
CAUTION:
-
After installing the rear moonroof glass, perform the leak test and check that there is no malfunction.
-
After installation, perform fitting adjustment. Refer to Adjustment.
Adjustment
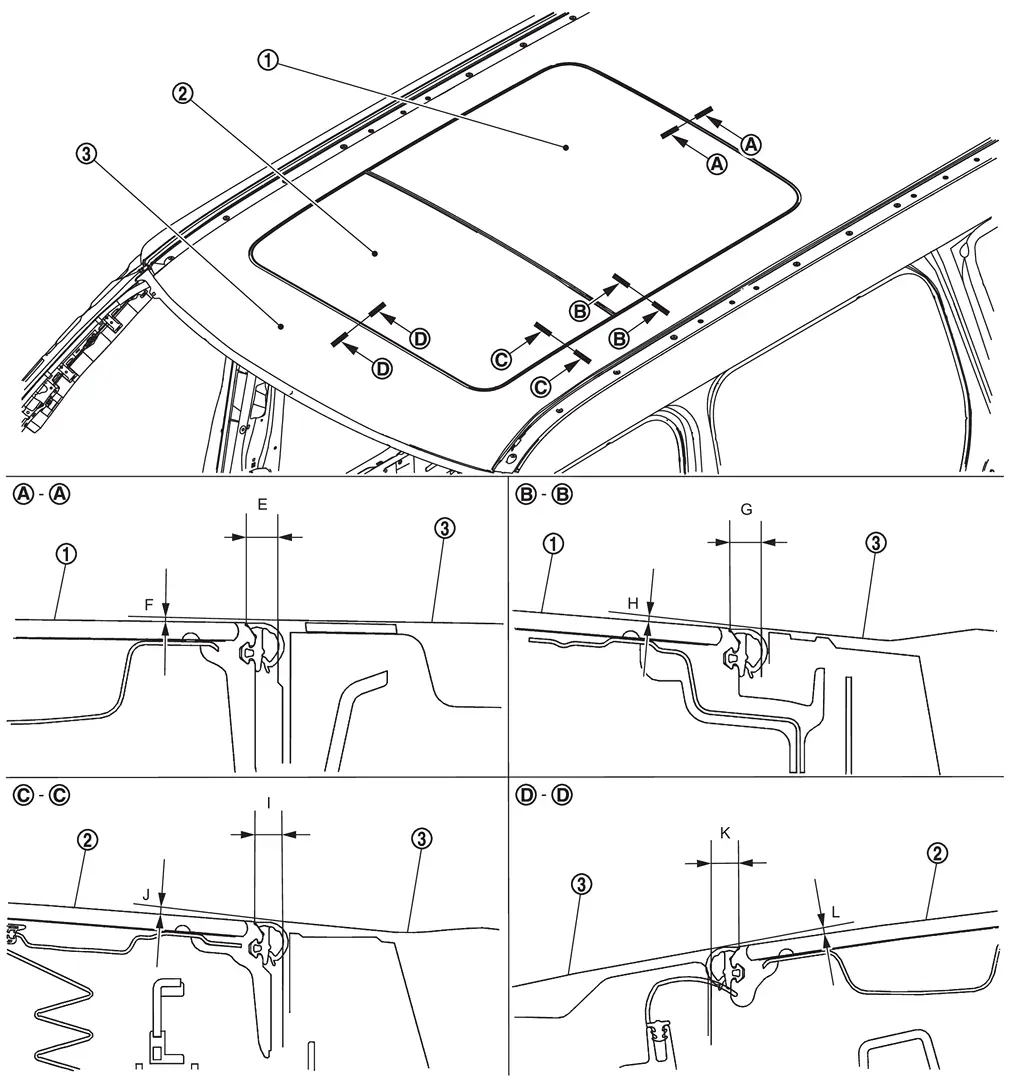
 |
Rear moonroof glass |  |
Glass lid |  |
Roof panel |
If the clearance and the surface height are out of specification, adjust them according to the procedures shown below.
 NOTE:
NOTE:
Standard of surface height is given assuming that the glass upper side status is (+), and the glass lower side status is (−) relative to the roof panel.
Unit: mm [in]
| Portion | Standard | |||
|---|---|---|---|---|
| Roof panel – Rear moonroof glass | – |
E | Clearance |
6.4 – 8.0 [0.252 – 0.315] |
| F | Surface height |
(−2.4) – (+1.0) [(−0.094) – (+0.039)] |
||
 – – |
G | Clearance |
6.1 – 8.3 [0.240 – 0.327] |
|
| H | Surface height |
(−2.4) – (+1.0) [(−0.094) – (+0.039)] |
||
| Roof panel – Glass lid |  – – |
I | Clearance |
6.4 – 8.0 [0.252 – 0.315] |
| J | Surface height |
(−2.4) – (+1.0) [(−0.094) – (+0.039)] |
||
 – – |
K | Clearance |
6.4 – 8.0 [0.252 – 0.315] |
|
| L | Surface height |
(−2.4) – (+1.0) [(−0.094) – (+0.039)] |
||
Loosen rear moonroof glass fixing screws.
Adjust the clearance of rear moonroof glass and roof panel according to the fitting standard dimension.
To prevent rear moonroof glass from moving after adjustment, first tighten the fixing screw of front left, and then tighten the fixing screw of rear right.
Tighten remaining fixing screws, being careful to prevent rear moonroof glass from moving.
CAUTION:
After adjusting the moonroof unit assembly, perform additional service. Refer to Work Procedure.
Other materials
Memory seat
Basic information
The Nissan Armada memory seat system is designed to enhance comfort and personalization
by allowing drivers to store and recall their preferred driving positions effortlessly.
This advanced Nissan Armada feature includes:
Memory storage function
User profile linking to st ...
Air Breather
Exploded View
Clip A
Air breather tube
Clip B
Air breather hose A
Clip C
Clip D
Hose connector
Air breather hose B
Bracket
Clip E
Hose clamp
Air breather
Rear final drive assembly
: vehicle front
: N·m (kg-m, in-lb)
: Alway ...
Advanced Ambient Light (rear Door Upper)
Exploded View
Advanced ambient light (rear door upper) is integrated structure with rear door finisher. For exploded view of rear door finisher, refer to Exploded View.
Replacement
CAUTION:
Disconnect the battery negative terminal or remove power circuit fuse when performing the operation for prev ...