
Nissan Armada 2025-2026 Service and Repair Manual: How to Check Terminal
HARNESS REPAIR KIT
When making a harness repair, refer to Connector Repair and Parts Lookup.
HOW TO PROBE CONNECTORS
Connector damage and an intermittent connection can result from improperly probing of the connector during circuit checks.
The probe of a digital multimeter (DMM) may not correctly fit the connector cavity. To correctly probe the connector, follow the procedures below using a “T� pin. For the best contact grasp the “T� pin using an alligator clip.
Probing from Harness Side
Standard type (not waterproof type) connector should be probed from harness side with “T� pin.
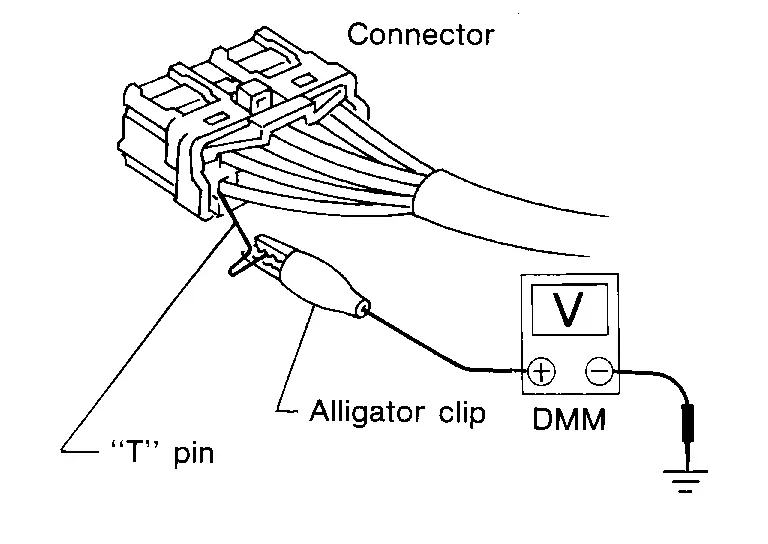
If the connector has a rear cover such as a ECM connector, remove the rear cover before probing the terminal.
Do not probe waterproof connector from harness side. Damage to the seal between wire and connector may result.
Probing from Terminal Side
FEMALE TERMINAL
There is a small notch above each female terminal. Probe each terminal with the “T� pin through the notch.
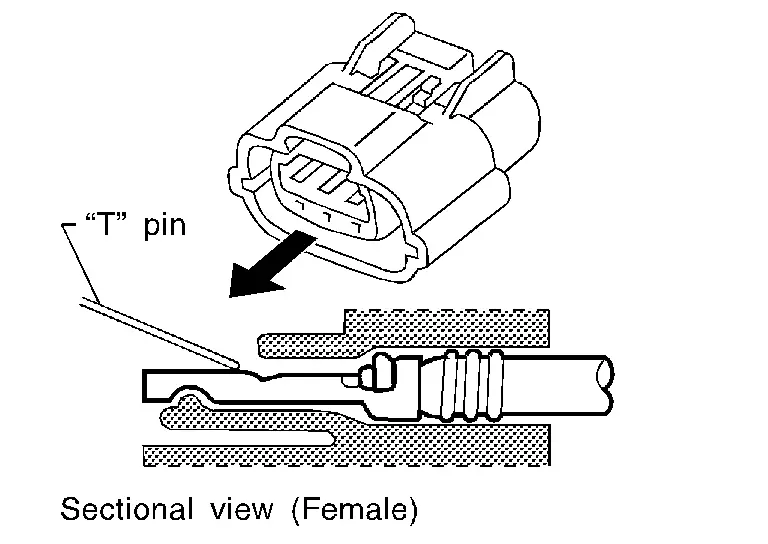
Do not insert any object other than the same type male terminal into female terminal.
Some connectors do not have a notch above each terminal. To probe each terminal, remove the connector retainer to make contact space for probing.
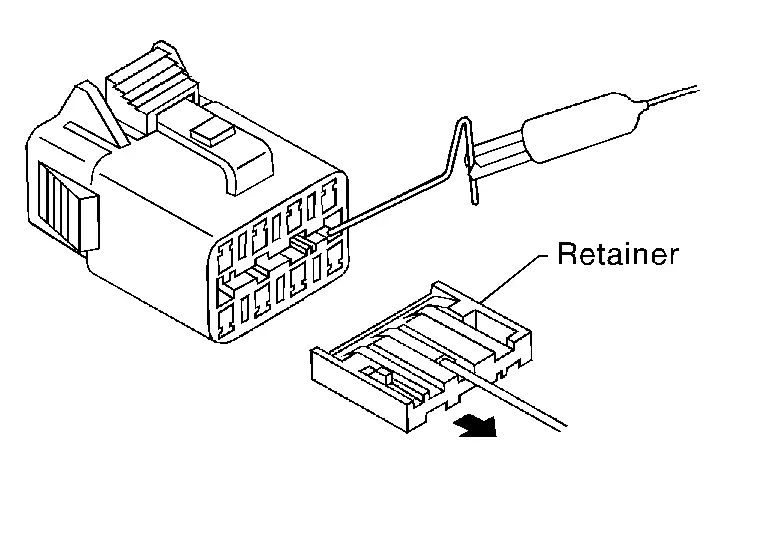
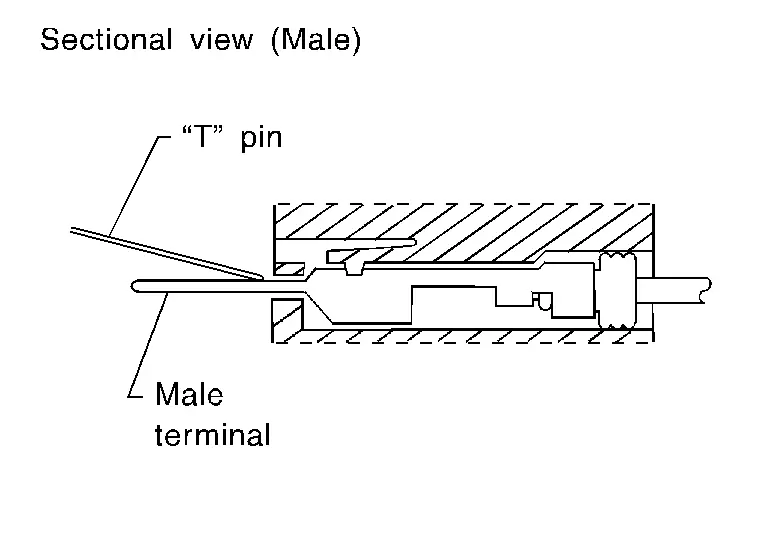
MALE TERMINAL
Carefully probe the contact surface of each terminal using a “T� pin.
CAUTION:
Never bend terminal.
How to Check Enlarged Contact Spring of Terminal
An enlarged contact spring of a terminal may create intermittent signals in the circuit.
If the intermittent open circuit occurs, follow the procedure below to inspect for open wires and enlarged contact spring of female terminal.
Assemble a male terminal and approx. 10 cm (3.9 in) of wire.
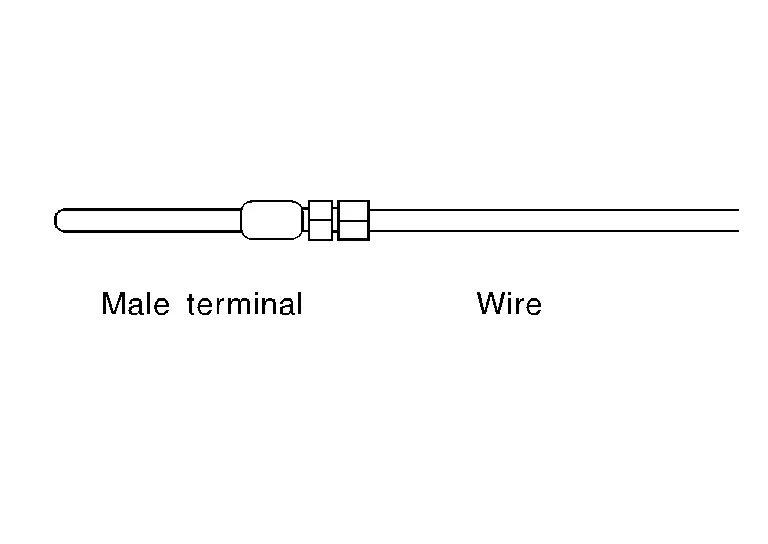
 NOTE:
NOTE:Use a male terminal which matches the female terminal.
Disconnect the suspected faulty connector and hold it terminal side up.
While holding the wire of the male terminal, try to insert the male terminal into the female terminal.
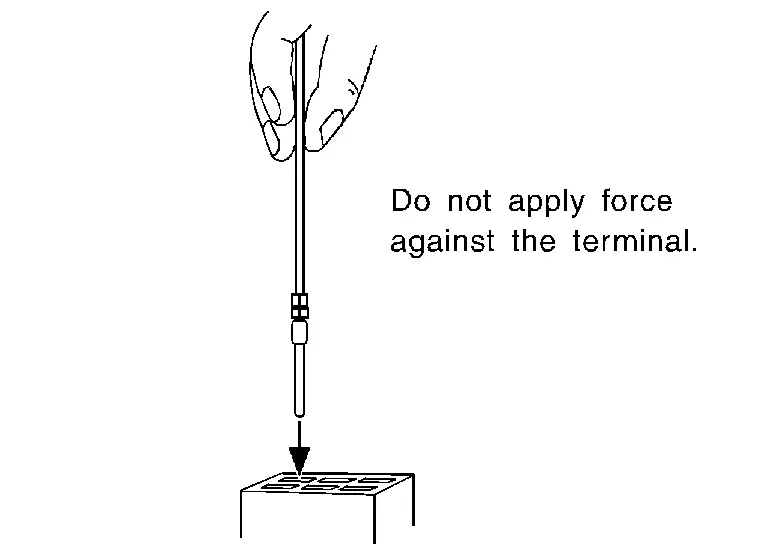
CAUTION:
Never force the male terminal into the female terminal with your hands.
While moving the connector, check whether the male terminal can be easily inserted or not.
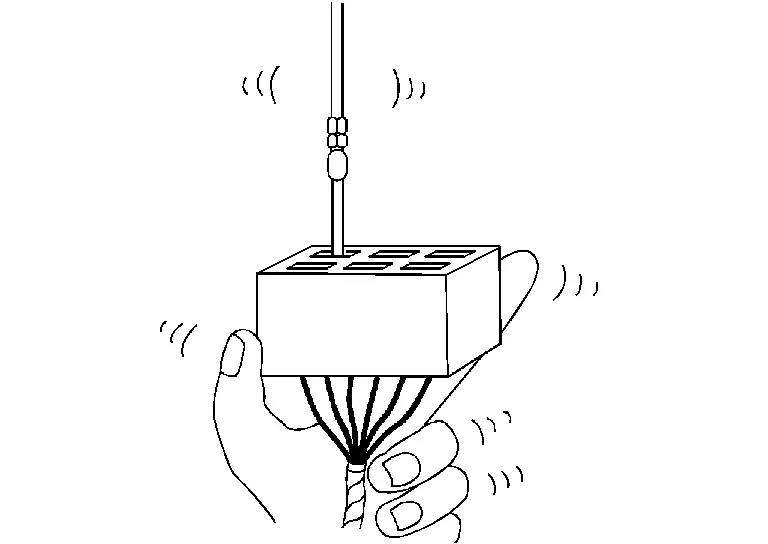
If the male terminal can be easily inserted into the female terminal, replace the female terminal.
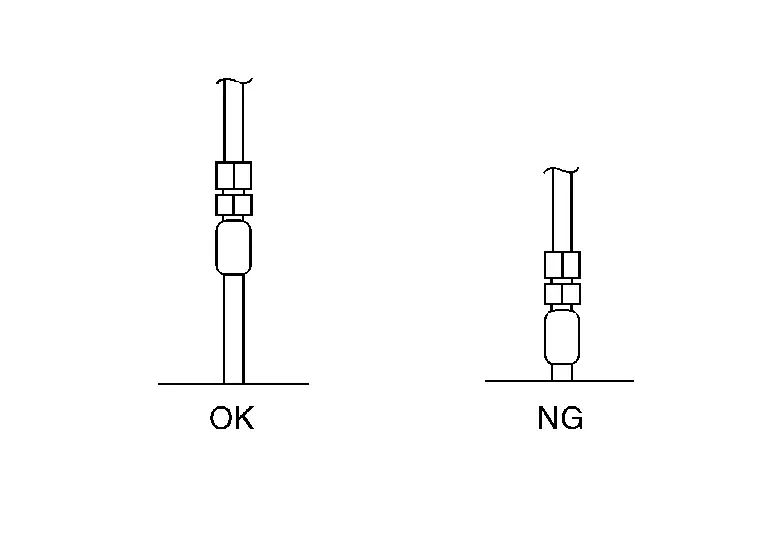
Waterproof Connector Inspection
If water enters the connector, it can short interior circuits. This may lead to intermittent problems.
Check the following items to maintain the original waterproof characteristics.
RUBBER SEAL INSPECTION
Most waterproof connectors are provided with a rubber seal between the male and female connectors. If the seal is missing, the waterproof performance may not meet specifications.
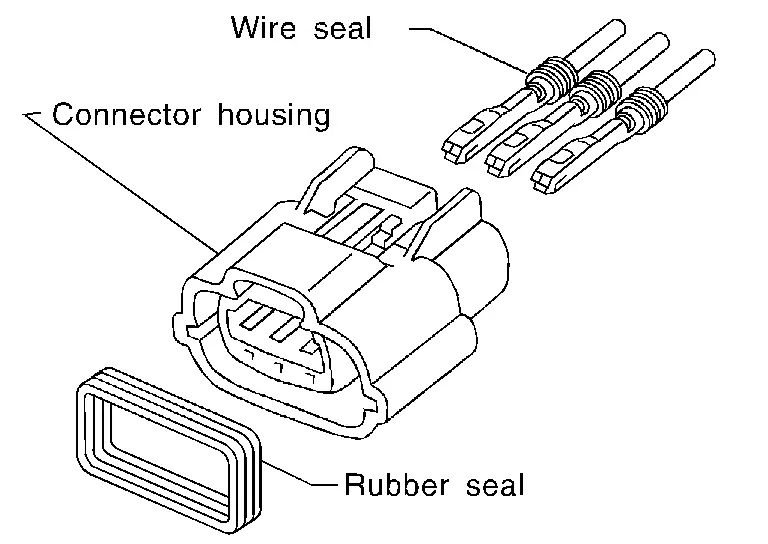
The rubber seal may come off when connectors are disconnected. Whenever connectors are reconnected, check the rubber seal is properly installed on either side of male or female connector.
WIRE SEAL INSPECTION
The wire seal must be installed on the wire insertion area of a waterproof connector. Be sure that the seal is installed properly.
Terminal Lock Inspection
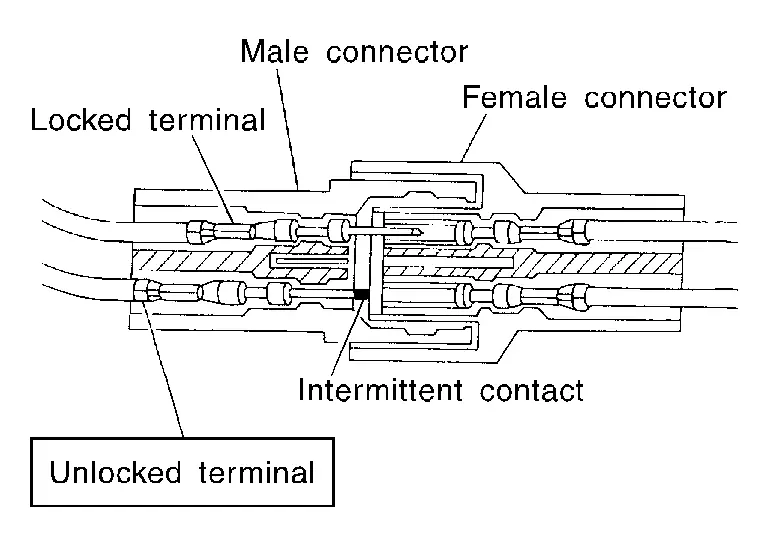
Check for unlocked terminals by pulling wire at the end of connector. An unlocked terminal may create intermittent signals in the circuit.
 Control Units and Electrical Parts
PRECAUTIONS
Never reverse polarity of battery terminals.
Install only parts specified for a vehicle.
Before replacing the control unit, check the input and output and functions of the component parts. ...
 Intermittent Incident
DESCRIPTION
Sometimes the symptom is not present when the vehicle is brought in for service. If possible, re-create the conditions present at the time of the incident. Doing so may help avoid a No Tro ...
Other materials:
Removal and Installation
CAUTION:
Never damage the body panel.
REMOVAL
Front Kicking Plate
Disengage front kicking plate fixing pawls according to numerical order 1→3 indicated by arrows as shown in the figure, and then remove front kicking plate.
: Pawl : Vehicle front
Rear Kicking Plate
Disengage rear kicking plate ...
Removal and Installation
WARNING:
REMOVAL
The ignition switch OFF.
CAUTION:
Wait for 60 seconds after the ignition switch OFF.
Disconnect negative battery terminal. Refer to Removal and Installation
Disconnect the transfer control actuator connector .
Remove harness clip .
Remove transfer control actuator mounting bolt ...
Inspection
WARNING:
FLUID LEAKAGE
FLUID LEVEL
CAUTION:
Never start engine while checking fluid level.
Install filler plug on transfer and then tighten to the specified torque.
CAUTION:
Never reuse filler plug.
Specified torque : 37.5 N·m (3.8 kg-m, 28 ft-lb) ...

0.005