Exploded View
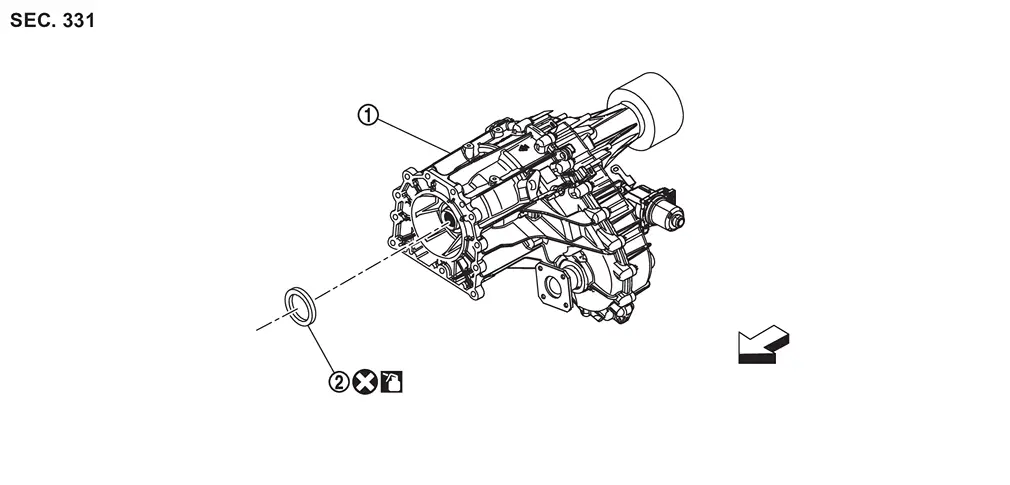
 |
Transfer assembly |  |
Input oil seal | ||
 |
: vehicle front | ||||
 |
: Always replace after every disassembly. | ||||
 |
: Apply transfer fluid. | ||||
Removal and Installation
WARNING:
-
Jacking up or lift up the vehicle may the vehicle height to go down which cause a personal injury and/or damage to the air suspension component parts. Refer to Precaution for when Jacking and Lifting Up the vehicle with Electronic Air Suspension System.
REMOVAL
Remove transfer assembly from vehicle. Refer to Removal and Installation.
Remove input oil seal.
CAUTION:
Never damage the front case and input shaft.
INSTALLATION
Note the following, and install in the reverse order of removal.
-
Install input oil seal with a drift (A) (commercial service tool) within the dimension (L) shown as follows.
L : 1.5 – 2.5 mm (0.059 – 0.098 in) 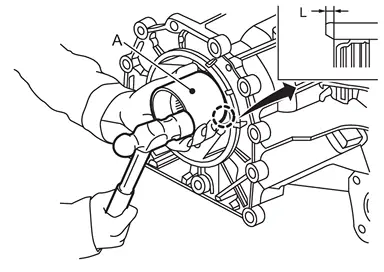
CAUTION:
-
Never reuse input oil seal.
-
Apply transfer fluid onto circumference of oil seal.
-
When installing, never incline input oil seal.
-
Never handle the oil seal inner periphery and oil seal lip.
-
Other materials
Maintenance schedules
Basic information
To ensure your Nissan Armada delivers reliable performance, optimal safety, and
long-term efficiency, NISSAN provides two distinct maintenance schedules tailored
to different driving conditions. These schedules are carefully designed to cover
both mileage and time intervals, ...
Accelerator Control System
Exploded View
Accelerator pedal assembly
Accelerator pedal bracket
: N·m (kg-m, ft-lb)
: N·m (kg-m, in-lb)
Removal and Installation
REMOVALCAUTION:
Never disassemble accelerator pedal assembly.
Never remove ...
Front Heater Outlet Pipe Assembly
Removal and Installation
REMOVALDrain engine coolant from cooling system. Refer to ENGINE COOLANT : Draining.
Remove engine cover. Refer to Removal and Installation.
Remove air inlet tube 1. Refer to Removal & Installation.
Remove front heater outlet pipe assembly mounting nuts and mounting bol ...