Exploded View
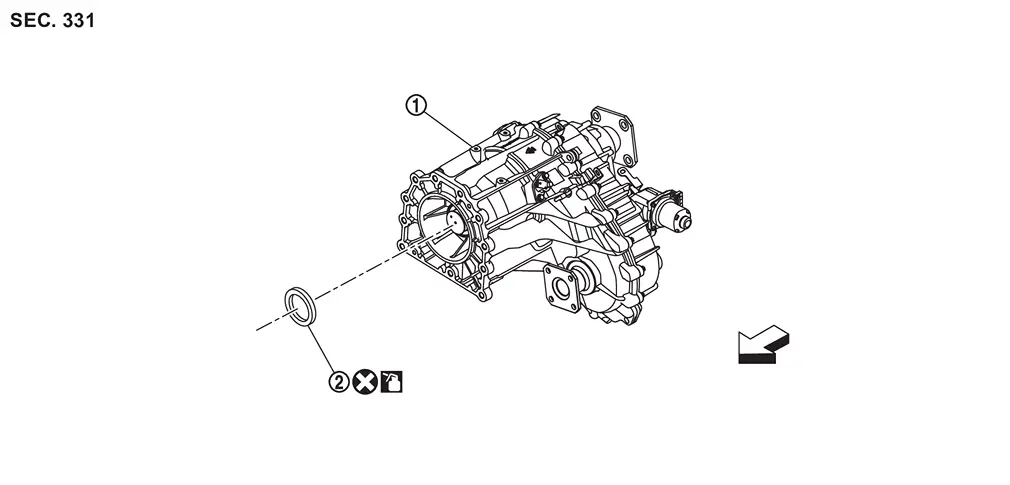
 |
Transfer assembly |  |
Input oil seal | ||
 |
: vehicle front | ||||
 |
: Always replace after every disassembly. | ||||
 |
: Apply transfer fluid. | ||||
Removal and Installation
WARNING:
-
Jacking up or lift up the vehicle may the vehicle height to go down which cause a personal injury and/or damage to the air suspension component parts. Refer to Precaution for when Jacking and Lifting Up the vehicle with Electronic Air Suspension System.
REMOVAL
Remove transfer assembly from vehicle. Refer to Removal and Installation.
Remove input oil seal.
CAUTION:
Never damage the front case and input shaft.
INSTALLATION
Note the following, and install in the reverse order of removal.
-
Install input oil seal with a drift (A) (commercial service tool) within the dimension (L) shown as follows.
L : 1.5 – 2.5 mm (0.059 – 0.098 in) 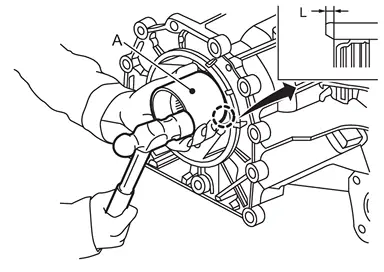
CAUTION:
-
Never reuse input oil seal.
-
Apply transfer fluid onto circumference of oil seal.
-
When installing, never incline input oil seal.
-
Never handle the oil seal inner periphery and oil seal lip.
-
Other materials
Front Heater and Ventilation Seat System
Symptom Table
Symptom Possible causeInspection item
Front heater and ventilation seat system does not operate
Only the display unit operation does not operate
Check AV system
Display unit and multifunction switch operation does not operate
Fuse
Front seat heater power supply/ground/LIN signal cir ...
Battery
Exploded View
Without ProPILOT ASSIST 2.1
Battery fix frame
Battery cover
Negative cable
Battery current sensor
12V battery
Battery fix rod
Battery fix rod clip
Battery tray
Battery positive terminal
Battery positive terminal cover
Battery terminal with fusible link ...
Diagnosis and Repair Work Flow
Work Flow
OVERALL SEQUENCE
Reference 1··· CONSULT Function.
Reference 2··· DTC Index (6 Speaker Models).
Reference 3··· Symptom Table.
DETAILED FLOWINTERVIEW AND SYMPTOM CONFIRMATION
Check the malfunction symptoms by performing the following items.
Interview the customer to obtain ...