Exploded View
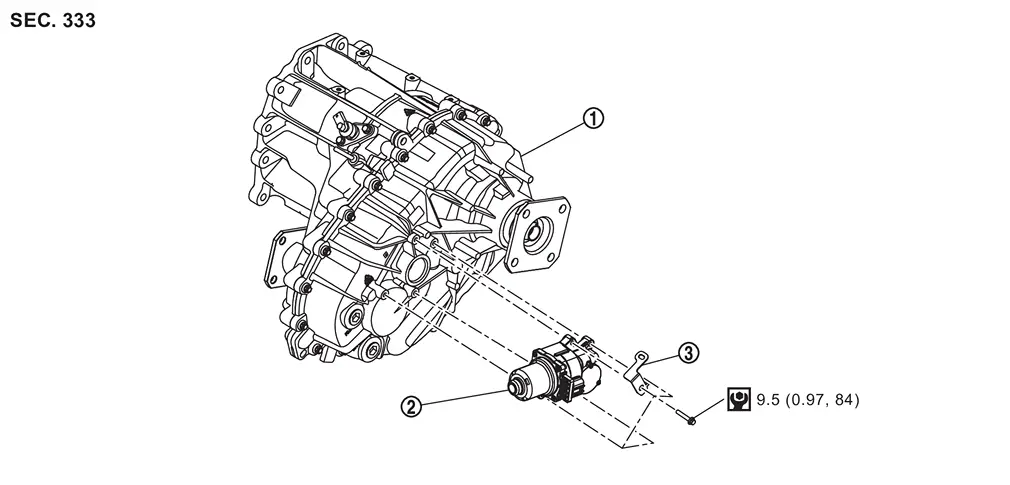
 |
Transfer assembly |  |
Transfer control actuator |  |
bracket |
 |
: N·m (kg-m, in-lb) |
Removal and Installation
WARNING:
-
Jacking up or lift up the vehicle may the vehicle height to go down which cause a personal injury and/or damage to the air suspension component parts. Refer to Precaution for when Jacking and Lifting Up the vehicle with Electronic Air Suspension System.
REMOVAL
The ignition switch OFF.
CAUTION:
Wait for 60 seconds after the ignition switch OFF.
Disconnect negative battery terminal. Refer to Removal and Installation
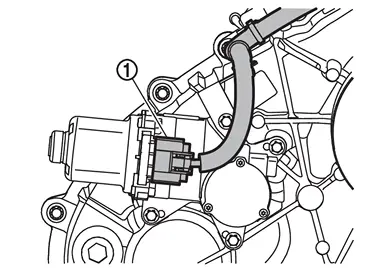
Disconnect the transfer control actuator connector .
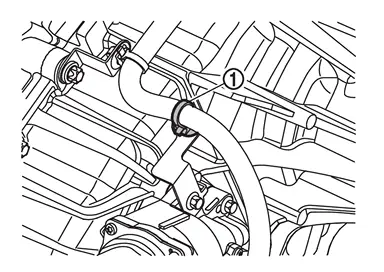
Remove harness clip .
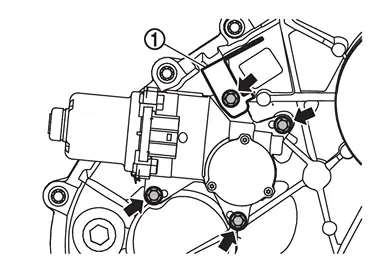
Remove transfer control actuator mounting bolt ( ) and remove bracket .
Remove transfer control actuator .
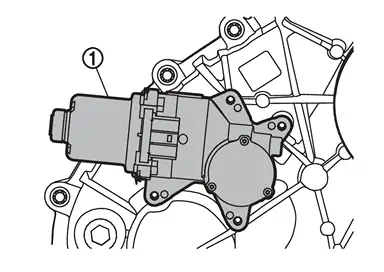
INSTALLATION
Note the following, and install in the reverse order of removal.
-
Never damage oil seal of transfer control actuator.
-
Never contaminate or damage the oil seal mounting surface.
-
Perform inspection after installation. Refer to Inspection.
Inspection
INSPECTION AFTER REMOVAL
Check the oil seal assembled transfer control actuator for wear, crack and damage. Replace if there is malfunction.
Check the transfer assembly as follows.Install the suitable tool (A) to transfer assembly as shown in the figure.
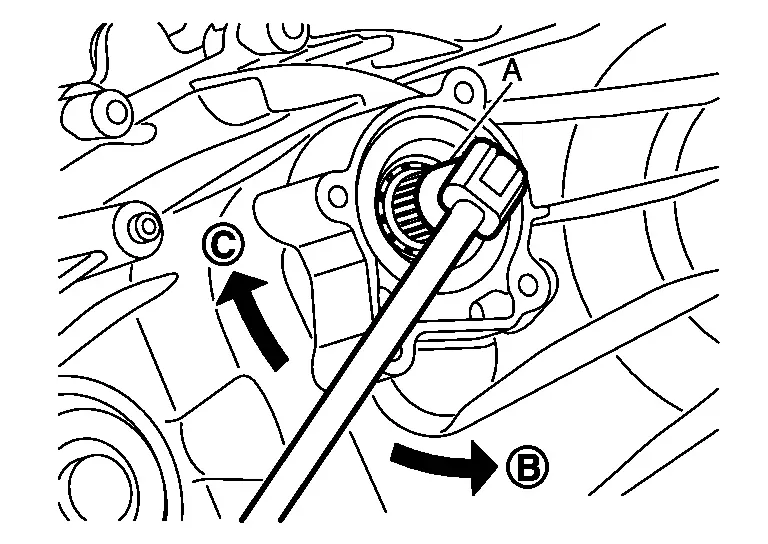
 , check returning to direction
  by spring power.
CAUTION:
The maximum turning force shall be 5 N·m (0.51 kg-m, 44 in-lb).
When turn the shaft in direction, check locking the shaft. INSPECTION AFTER INSTALLATION
After driving, check the surface fitting transfer control actuator to transfer assembly for fluid leakage.
ADJUSTMENT AFTER INSTALLATION
When replacing transfer control actuator, performe writing unit parameter. Refer to Description.
Other materials
Steering Gear and Linkage
Exploded View
REMOVAL
Member
Cotter pin
Steering gear assembly
: vehicle front
: N·m (kg-m, ft-lb)
: Always replace after every disassembly.
DISASSEMBLY
Outer socket
Outer socket lock nut
Boot clamp (small diameter)
Boot
Boot clamp (large diameter)
Inner socke ...
Diagnosis and Repair Workflow
Nissanconnect
Work Flow
OVERALL SEQUENCEDETAILED FLOWINTERVIEW FOR MALFUNCTION
It is also important to clarify the customer concerns before starting the inspection. Interview the customer about the concerns carefully and understand the symptoms fully.
NOTE:
The customers are not professionals. Neve ...
Rear Camera (driving Video Recorder)
Removal and Installation
REMOVALRemove back door lower finisher. Refer to Removal and Installation.
Disconnect rear camera (driving video recorder) harness connector .
Remove mounting bolts , and remove rear camera (driving video recorder) from vehicle.
INSTALLATIONInstall in the reverse order of ...