Removal and Installation
CAUTION:
Never damage the body panel.
REMOVAL
CAUTION:
When removing, always use a remover tool that is made of plastic to prevent damage to the parts.
Remove luggage rear plate. Refer to Removal and Installation.
Release luggage side lower finisher portion of back door weather-strip. Refer to Removal and Installation.
Set second seat to walk-in position.
Remove third seat. Refer to Removal and Installation.
Remove second seat belt anchor plate. Refer to Removal and Installation.
Remove third seat belt anchor plate. Refer to Removal and Installation.
Remove luggage hook.Slide pin part  of luggage hook
  using a remover tool (B) to release fixing pawls of luggage hook.
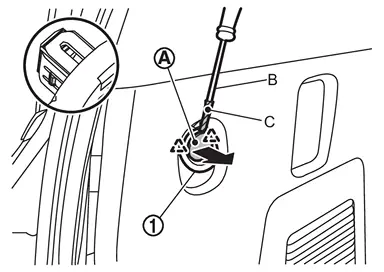
CAUTION:
Use a remover tool wrapped in protective tape (C) to prevent damage to the parts.
 |
: Pawl |
Remove rope hooks.Disengage rope hook fixing pawls using a remover tool (A), and then open rope hook cover.
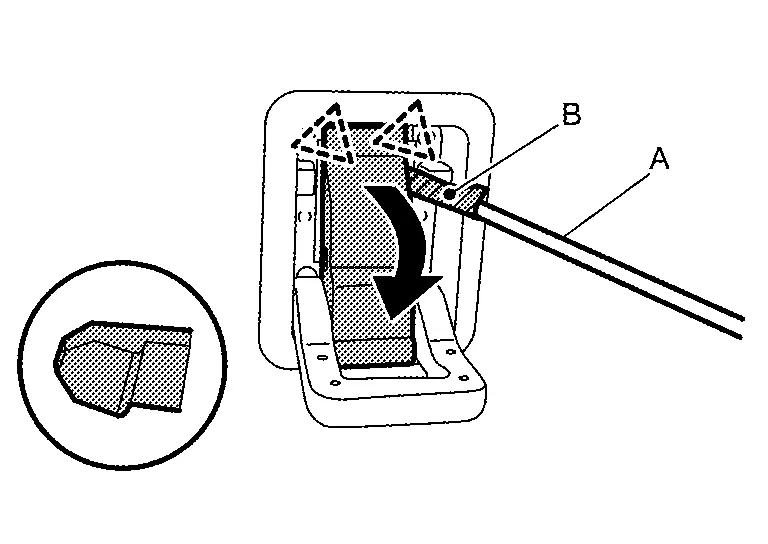
CAUTION:
Use a remover tool wrapped in protective tape (B) to prevent damage the parts.
|
: Pawl |
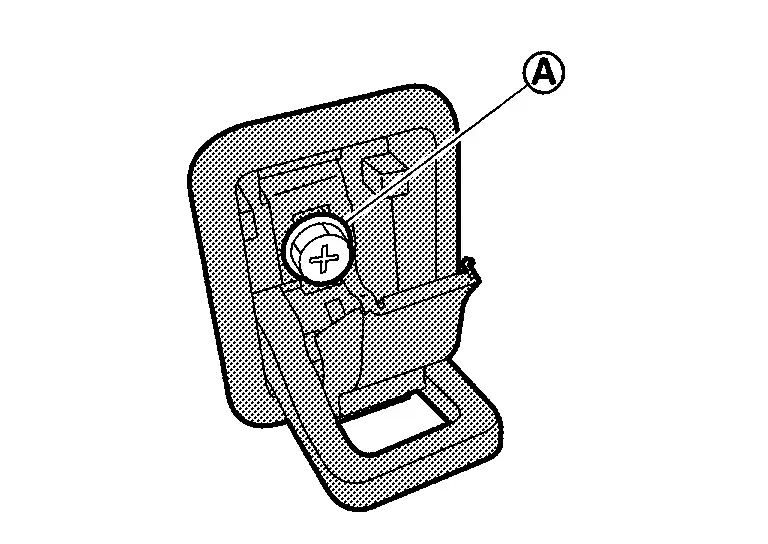
, and then remove rope hook.
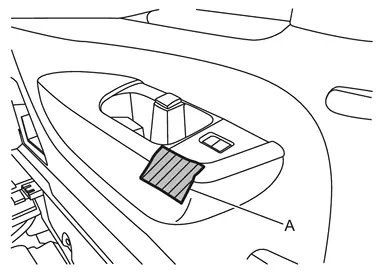
Remove seat switch escutcheon.Apply protective tape (A) on luggage side lower finisher to protect it from damage.
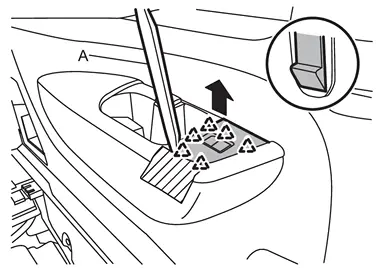
|
: Pawl |
Apply protective tapes (A) on luggage side lower finisher to protect it from damage.
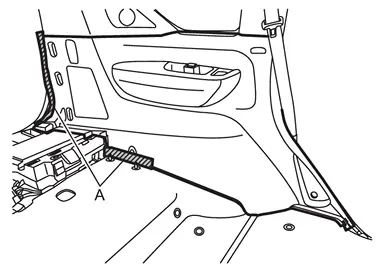
Disengage luggage side lower finisher fixing clips and pawls using a remover tool (A) according to numerical order 1→4 indicated by arrows as shown in the figure.
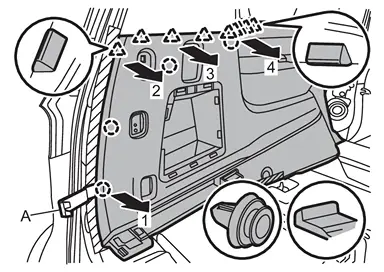
 |
: Clip |
|
: Pawl |
Disengage luggage side lower finisher fixing clips and pawls according to numerical order 1→4 indicated by arrows as shown in the figure.
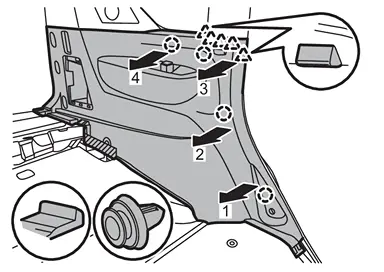
|
: Clip |
|
: Pawl |
Disengage each harness connector, and then remove luggage side lower finisher.
INSTALLATION
Note the following items, and then install in the reverse order of removal.
CAUTION:
-
Visually check clips for deformation and damage during installation. Replace with new ones if necessary.
-
Check in advance that clips and pawls are accurately aligned with the portions on body panel, and then install by pressing in.
-
After installation, check that the lip of body side welt covers. Refer to Inspection
Other materials
Bleeding Brake System
Description
CAUTION:
When the following operations are performed, always use CONSULT, for performing each air bleding of “WORK SUPPORT”. Refer to Work Procedure.
Work Procedure
CAUTION:
When performing the following operations, always use CONSULT. (It cannot be performed by any means other tha ...
Luggage Floor Board
Removal and Installation
REMOVALCAUTION:
When removing, always use a remover tool that is made of plastic to prevent damage to the parts.Luggage Floor Rear Board Remove luggage floor box. Refer to Removal and Installation.
Remove belt bracket mounting bolt of luggage floor rear board, and then remo ...
Precautions
Precaution for Supplemental Restraint System (SRS) "AIR BAG" and "SEAT BELT PRE-TENSIONER"
The Supplemental Restraint System such as “AIR BAG” and “SEAT BELT PRE-TENSIONER”, used along with a front seat belt, helps to reduce the risk or severity of injury to the driver and front passenger fo ...