Removal and Installation
CAUTION:
Never damage the body panel.
REMOVAL
CAUTION:
When removing, always use a remover tool that is made of plastic to prevent damage to the parts.
Remove luggage floor box. Refer to Removal and Installation.
Release luggage rear plate portion of back door weather-strip. Refer to Removal and Installation.
Remove luggage rear plate mask.Apply protective tape (A) on luggage rear plate to protect it from damage.
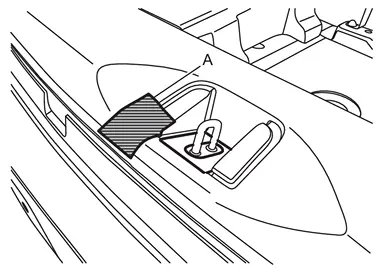
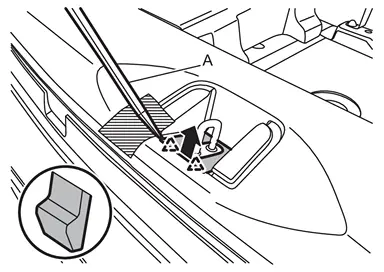
 |
: Pawl |
Apply protective tapes (A) on body panel to protect it from damage.
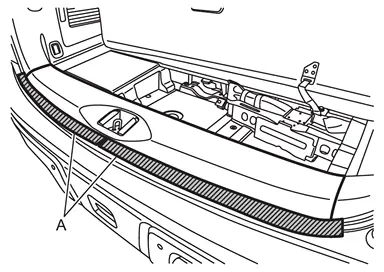
Disengage luggage rear plate fixing clips and pawls using a remover tool (A), and then remove luggage rear plate.
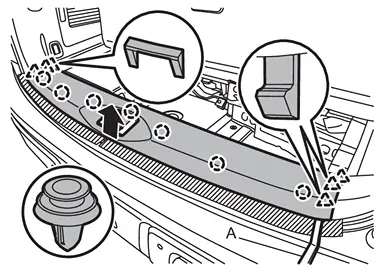
 |
: Clip |
|
: Pawl |
INSTALLATION
Note the following items, and then install in the reverse order of removal.
CAUTION:
-
Visually check clips for deformation and damage during installation. Replace with new ones if necessary.
-
Check in advance that clips and pawls are accurately aligned with the portions on body panel, and then install by pressing in.
Other materials
Low Tire Pressure Warning Lamp Blinks
Description
When the ignition switch is placed ON, the low tire pressure warning lamp blinks. And then 1 minute later, low tire pressure warning lamp turns ON.
Diagnosis Procedure
CHECK TIRE PRESSURE SENSOR INSTALLATION
Check visually that tire pressure sensors are installed to each wheels correctl ...
Rear
Exploded View
Rear ventilator duct 1
Rear ventilator duct 2 RH
Rear ventilator grille housing
Rear ventilator grille
Rear ventilator connecting duct
Rear A/C unit assembly
Rear foot duct
Rear inlet duct
Rear ventilator duct 2 LH
: Clip
: Metal clip
: vehicle fro ...
Front Door Regulator
Exploded View
Front door regulator assembly is assembled on front door module assembly. Refer to Exploded View.
Removal and Installation
Front door regulator assembly is assembled on front door module assembly. If you need replace front door regulator, refer to Removal and Installation.
Disassembly ...