Removal and Installation
WARNING:
-
Jacking up or lift up the vehicle may the vehicle height to go down which cause a personal injury and/or damage to the air suspension component parts. Refer to Precaution for when Jacking and Lifting Up the vehicle with Electronic Air Suspension System.
REMOVAL
CAUTION:
-
Oil filter is provided with relief valve. Use genuine NISSAN oil filter or equivalent.
-
Never get burned when engine and engine oil may be hot.
-
When removing, prepare a shop cloth to absorb any engine oil leakage or spillage.
-
Never allow engine oil to adhere to drive belt.
-
Completely wipe off any engine oil that adheres to engine and vehicle.
 NOTE:
NOTE:
"It is recommended to use a Genuine NISSAN oil filter or equivalent. The use of parts that do not meet or exceed NISSAN specifications may cause damage to the vehicle, and have an effect on warranty coverage. Always check with the Parts Department for the latest parts information".
Remove engine under cover using a power tool (commercial service tool). Refer to Removal and Installation.
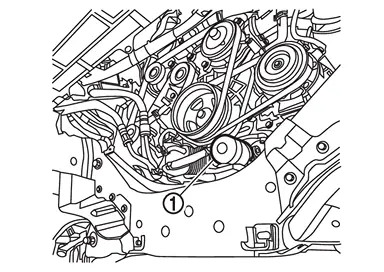
Using oil filter wrench [SST: KV10115801 (NI-38956)] , remove oil filter  .
.
INSTALLATION
Remove foreign materials adhering to oil filter installation surface.
Apply engine oil to the oil seal contact surface of new oil filter.
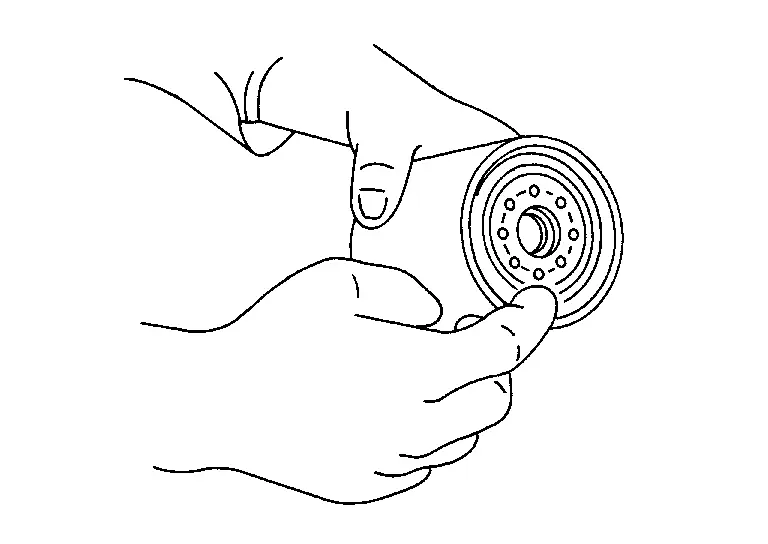
Screw oil filter manually until it touches the installation surface, then tighten it by 2/3 turn  . Or tighten to the specification.
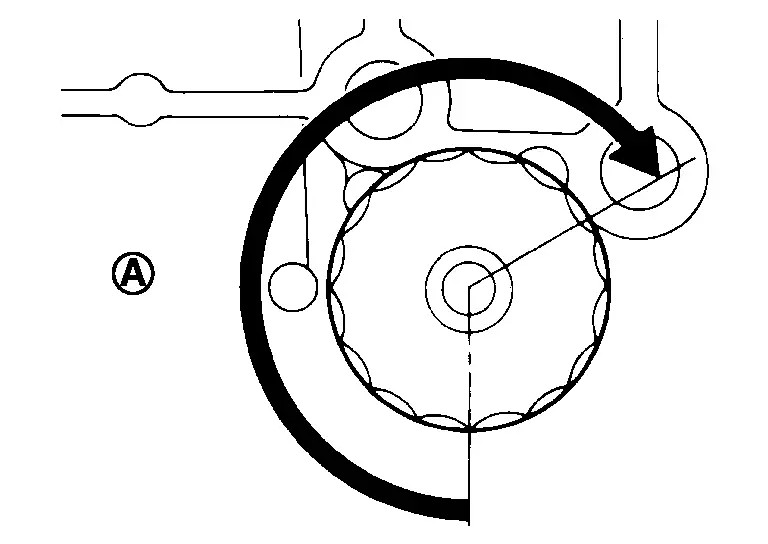
| Oil filter: | |
 : 17.7 N·m (1.8 kg-m, 13 ft-lb) : 17.7 N·m (1.8 kg-m, 13 ft-lb) |
|
Inspection
WARNING:
-
Jacking up or lift up the vehicle may the vehicle height to go down which cause a personal injury and/or damage to the air suspension component parts. Refer to Precaution for when Jacking and Lifting Up the vehicle with Electronic Air Suspension System.
INSPECTION AFTER INSTALLATION
Check the engine oil level. Refer to Inspection.
Start the engine, and check there is no leak of engine oil.
Stop the engine and wait for 10 minutes.
Check the engine oil level, and adjust the level. Refer to Inspection.
Other materials
Rear Wheel Hub and Housing
Inspection
WARNING:
Jacking up or lift up the vehicle may the vehicle height to go down which cause a personal injury and/or damage to the air suspension component parts. Refer to Precaution for when Jacking and Lifting Up the vehicle with Electronic Air Suspension System.
MOUNTING INSPECTIONC ...
Rear Air Conditioner
Description
Symptom
Insufficient cooling
No cool air comes out. (Air flow volume is normal.)
Diagnosis Procedure
NOTE:
Perform self-diagnoses with CONSULT before performing symptom diagnosis. If any DTC is detected, perform the corresponding diagnosis.CHECK REFRIGERANT CYCLE PRESSURE
Connect re ...
Sub Woofer
Removal & Installation
REMOVALRemove luggage side lower finisher LH. Refer to Removal and Installation.
Remove sub woofer mounting nuts , and then remove sub woofer .
Disconnect sub woofer harness connector.INSTALLATIONInstall in the reverse order of removal. ...