Removal and Installation
REMOVAL
CAUTION:
-
Perform lubricant return operation before each refrigeration system disassembly. However, if a large amount of refrigerant or lubricant leak is detected, never perform lubricant return operation. Refer to Perform Lubricant Return Operation.
-
When disconnect the A/C piping related parts, cap or wrap the joint of those parts with suitable material such as vinyl tape to avoid the entry of air.
Use a refrigerant collecting equipment (for HFO-1234yf) to discharge the refrigerant. Refer to Recycle Refrigerant.
Drain engine coolant from cooling system. Refer to ENGINE COOLANT : Draining.
Disconnect rear cooler pipe assembly from rear A/C unit assembly. Refer to Removal and Installation.
Remove luggage side lower finisher RH. Refer to Removal and Installation.
Remove each duct.
-
Rear inlet duct. Refer to Removal and Installation.
-
Rear ventilator connecting duct. Refer to Removal and Installation.
-
Rear foot duct. Refer to Removal and Installation.
Disconnect harness connectors  ,
,  ,
,  , and
, and  .
.
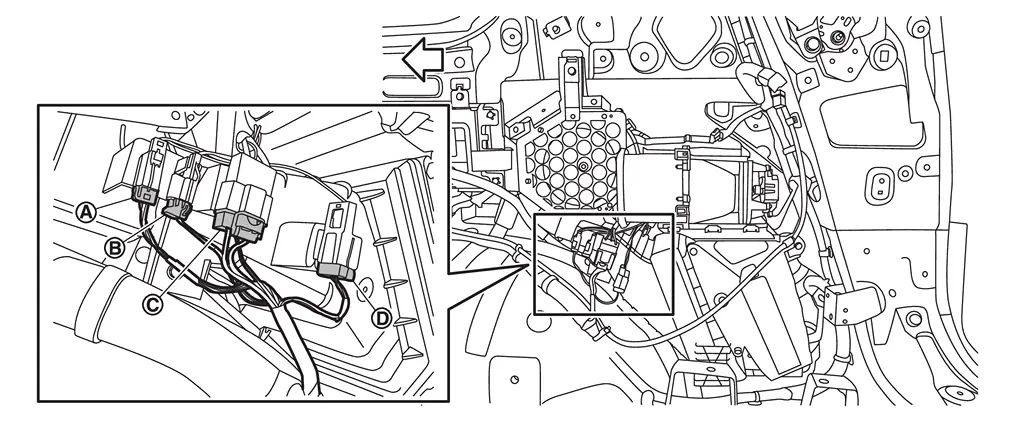
| : vehicle front |
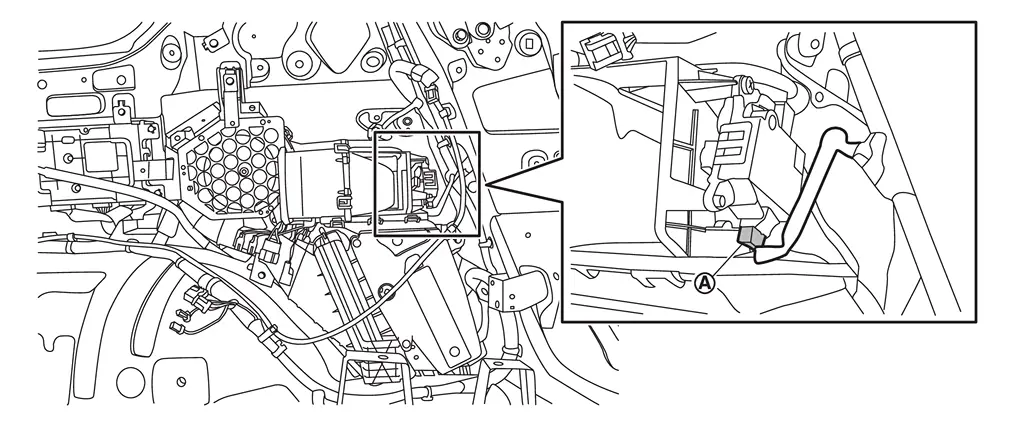
Disconnect rear mode door motor harness connector .
Disengage fixing clip, and then remove rear washer tube A from rear A/C unit assembly.
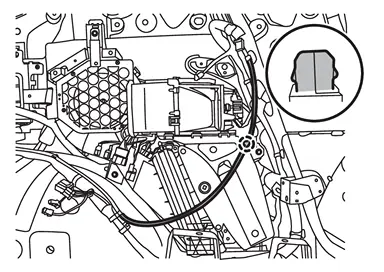
 |
: Clip |
Remove rear A/C unit assembly mounting bolts .
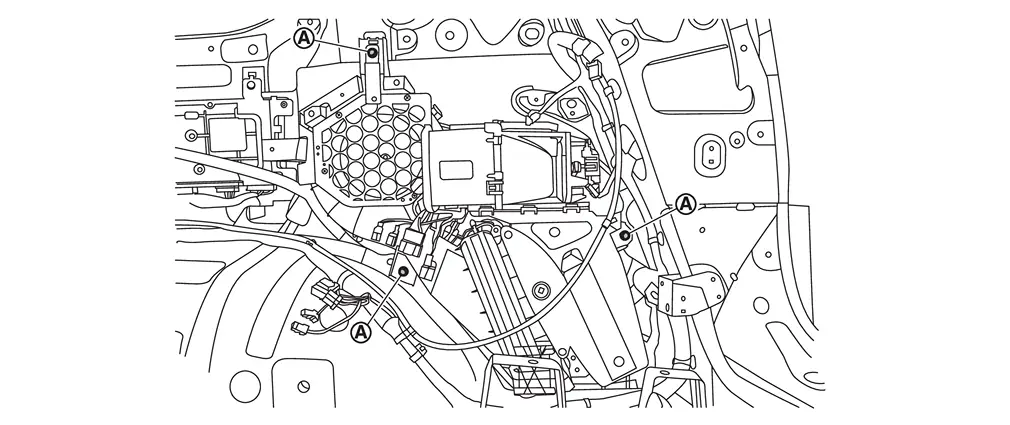
Remove rear A/C unit assembly from vehicle.
INSTALLATION
Note the following items, and then install in the reverse order of removal.
CAUTION:
-
Use a refrigerant collecting equipment (for HFO-1234yf) to charge the refrigerant. Refer to Charge Refrigerant.
-
Perform a check for refrigerant leakage when charging with refrigerant. Refer to Leak Test.
 NOTE:
NOTE:
When filling radiator with engine coolant. Refer to ENGINE COOLANT : Refilling.
Other materials
Noise, Vibration and Harshness (nvh) Troubleshooting
NVH Troubleshooting Chart
Use the chart below to find the cause of the symptom. The numbers indicate the order of the inspection. If necessary, repair or replace these parts.
SUSPECTED PARTS
(Possible cause) Symptom Reference
Transfer fluid leakage Noise
TRANSFER FLUID (Level low)
1 ...
Low-Pressure Pipe
Removal and Installation
WARNING:
Jacking up or lifting up the vehicle may the vehicle height to go down which cause a personal injury and/or damage to the air suspension component parts. Refer to Precaution for when Jacking and Lifting Up the vehicle with Electronic Air Suspension System (With ele ...
Additional Service When Replacing Driving Video Recorder Control Module
Work Procedure
DRIVING VIDEO RECORDER CONTROL MODULE REPLACEMENT
Replace driving video recorder control module. Refer to Removal and Installation.
>>
GO TO 2.
WRITING OF VIN DATA TO DRIVING VIDEO RECORDER CONTROL MODULE
With CONSULT
Ignition switch ON and wait at least 5 seconds.
Select ...