Exploded View
REMOVAL
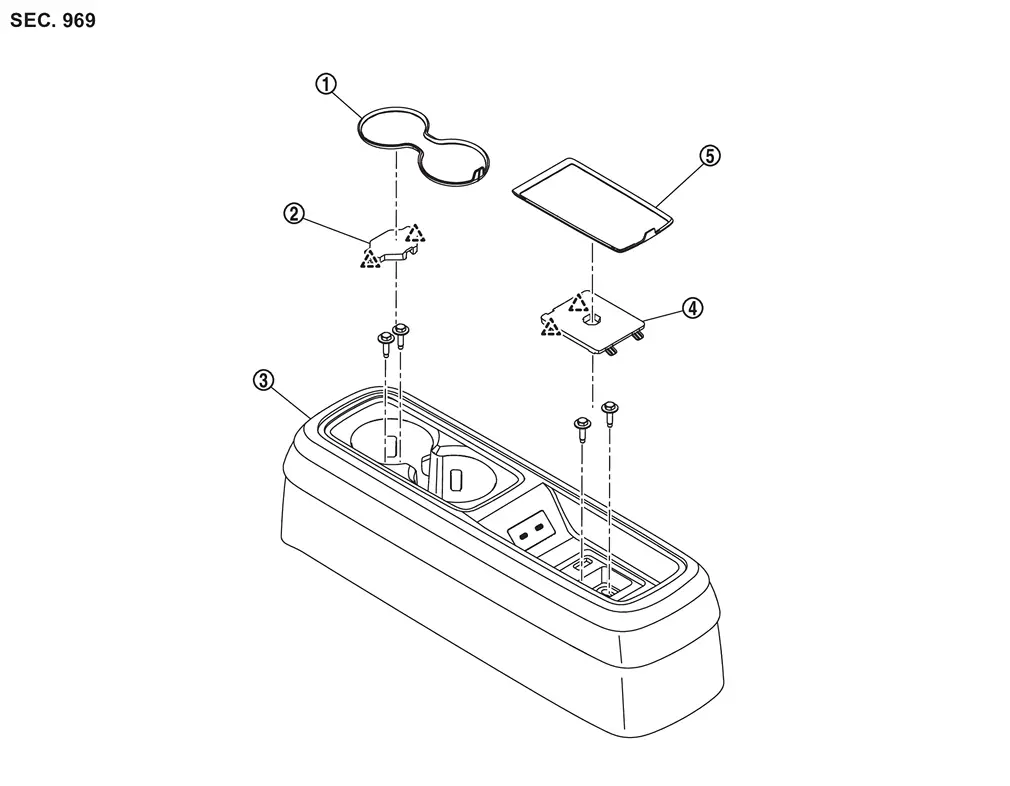
 |
Rear center tray cup holder mat |  |
Rear center tray front mask |  |
Rear center tray assembly |
 |
Rear center tray rear mask |  |
Rear center pocket mat | ||
 |
: Pawl | ||||
DISASSEMBLY
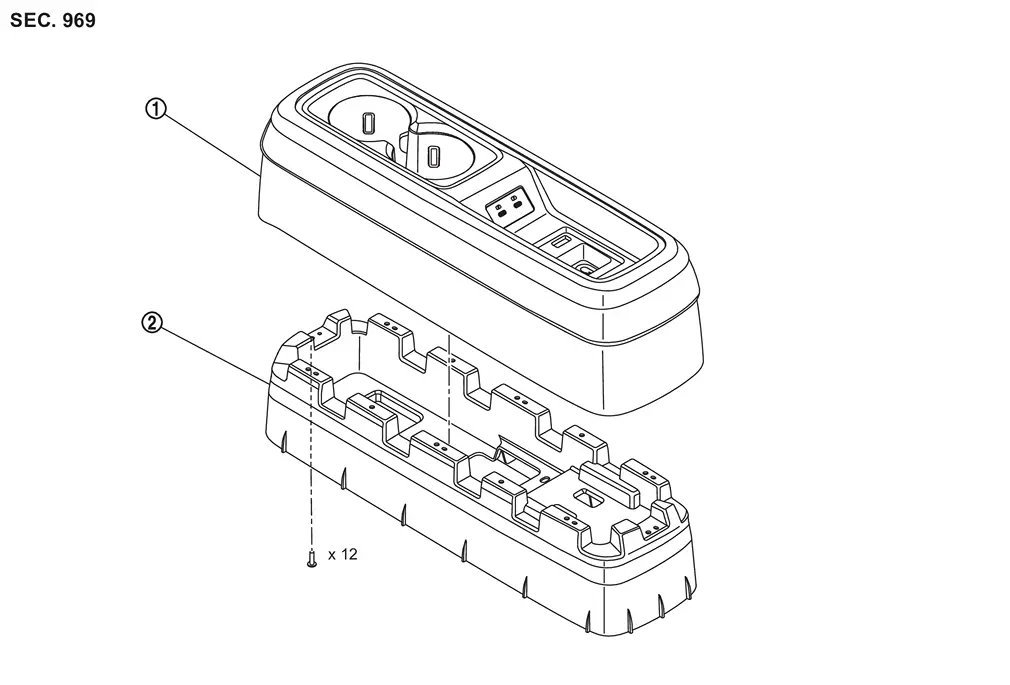
|
Rear center tray assembly | |
Rear center tray reinforcement |
Removal and Installation
REMOVAL
CAUTION:
When removing, always use a remover tool that is made of plastic.
Remove rear center tray cup holder mat and rear center pocket mat.
Remove rear center tray front mask.Apply protective tape (A) on the part to protect it from damage.
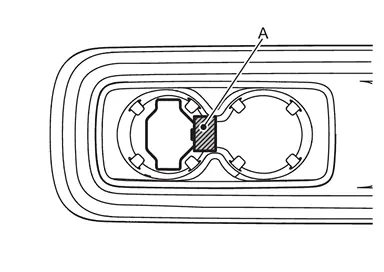
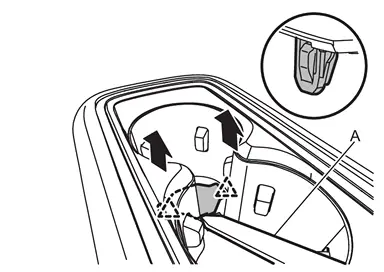
|
: Pawl |
Remove rear center tray rear mask.Apply protective tape (A) on the part to protect it from damage.
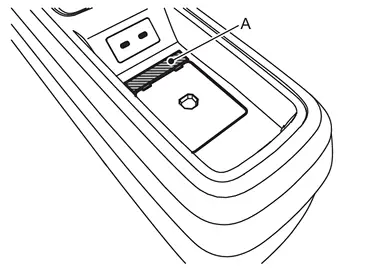
 using a remover tool (A) according to numerical order 1→2 indicated by arrows as shown in the figure, and then remove rear center tray rear mask.
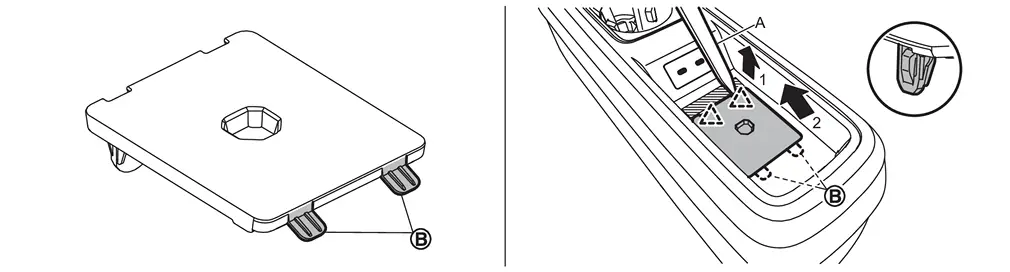
|
: Pawl |
Remove rear center tray assembly.Remove rear center tray assembly mounting bolts. Disconnect harness connector, and then remove rear center tray assembly.
INSTALLATION
Install in the reverse order of removal.
Disassembly and Assembly
DISASSEMBLY
CAUTION:
When disassemble, always use a remover tool that is made of plastic.
Disengage harness fixing clip.
Remove fixing screws, and then remove rear center tray reinforcement.
ASSEMBLY
Assemble in the reverse order of disassembly.
Other materials
Noise, Vibration and Harshness (nvh) Troubleshooting
NVH Troubleshooting Chart
Use chart below to find the cause of the symptom. If necessary, repair or replace these parts. Possible cause and SUSPECTED PARTS Symptom Reference
FRONT AXLE
Noise Shake Vibration Shimmy Judder Poor quality ride or handling
Improper installation, looseness
à ...
Back Door Window Glass
Exploded View
Back door outer panel
Back door window glass
Spacer A
Clip upper RH
Clip lower
Spacer B
Spacer C
Back door window glass molding
Dam sealant rubber
Clip upper LH
Glass primer
Adhesive
Adhesive mark
: Always replace after every disassembly.
...
Additional Service When Replacing Combination Meter
Work Procedure
DESCRIPTIONWhen replacing the Combination meter, perform the procedures before and after replacement.Before ReplacementTake note the odometer mileage of the combination meter. When replacing the combination meter, check that DTC’s are not detected at "self-diagnostic result" of ABS. ...